
A Guide to Printed Vinyl Heat Transfer
Here's a breakdown of how printed vinyl heat transfer works.
Think of it less like traditional vinyl and more like creating a high-quality, full-colour sticker that’s designed to be permanently melted into fabric. It’s the go-to method for putting complex, multi-coloured graphics onto a T-shirt or hoodie without the hassle of layering different colours of vinyl.
What Is Printed Vinyl Heat Transfer Anyway?
At its simplest, printed vinyl heat transfer closes the gap between a digital design on your screen and a wearable piece of art. Standard heat transfer vinyl (HTV) comes on a roll in a single, solid colour. This is different. Here, you print your design directly onto a special blank sheet of vinyl with a specialised printer.
Once printed, you cut out your design, weed away the extra vinyl you don't need, and apply it to the fabric using a heat press. It’s that combination of intense, even heat and heavy pressure that activates the adhesive and literally fuses the design to the garment’s fibres. This is why it’s so popular for custom clothing—it nails photorealistic images and tiny details that old-school HTV could never handle.
The Gear You'll Need
To get this right, you need three key things. No shortcuts here.
- Printable Vinyl: This isn't just any old vinyl. It’s a special material made to soak up ink and display colours vividly, all while being tough enough to survive the washing machine and a bit of stretching.
- Eco-Solvent Printer: Forget your standard desktop inkjet. This process needs a proper commercial printer that uses eco-solvent, solvent, or latex inks. These inks are built for durability and are what make the design last on clothing.
- Heat Press: A home iron just won’t cut it. For a professional finish that doesn't peel after one wash, a heat press is essential. It provides the consistent temperature and even pressure needed to make the vinyl bond permanently.
The demand for this kind of custom work is blowing up. The global heat transfer vinyl market was valued at USD 371.4 million and is on track to hit USD 551.96 million. Why? Because more and more brands are ditching traditional screen printing for digital methods that let them run smaller, more creative batches. You can dig into the numbers and see how this is shaking up the UK heat transfer industry for yourself.
The Essential Tools for Your Setup
To get your designs from a screen onto a shirt using printed vinyl, you need the right gear. Think of it like a pro kitchen – having the right tools doesn't just make the job easier; it's the difference between an amateur mess and a professional-grade final product. Pulling together a proper workstation is the first real step.
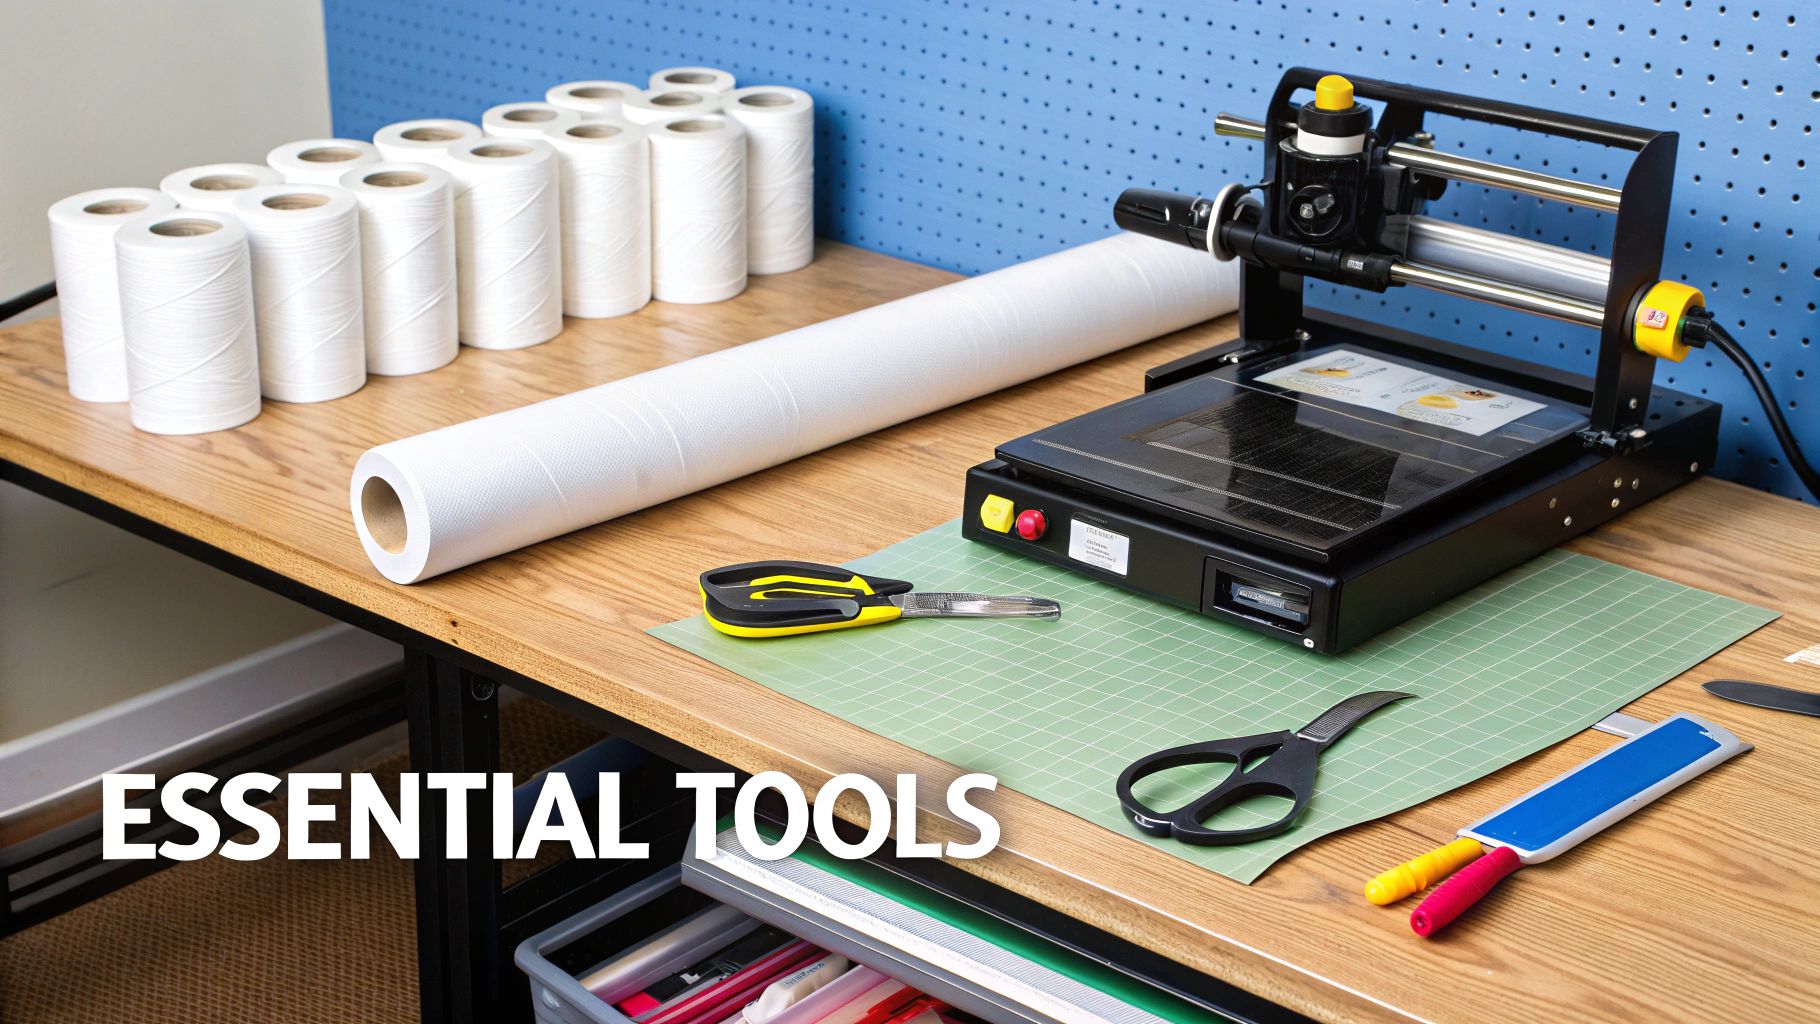
The single most important piece of equipment is your printer/cutter. And no, we're not talking about the one you use for office documents. For this game, you need a beast that runs on eco-solvent, solvent, or latex inks. These inks are the real deal, chemically designed to lock into the vinyl so they can stretch, survive the wash, and handle daily abuse without cracking or fading into oblivion.
Your Core Equipment Checklist
Once you've got the printer sorted, you'll need a few other non-negotiables. Each one has a specific job in turning that digital file into a sick piece of wearable art.
- Printable Heat Transfer Vinyl (HTV): This is your canvas. It's built to soak up those speciality inks and comes in different flavours for all kinds of fabrics – from standard tees to stretchy gym wear.
- Heat Press: This is where the magic happens. A heat press clamps down with the perfect amount of heat and pressure, forcing the vinyl to literally become one with the fabric fibres.
- Weeding Tools: These are your sharp, pointy friends. Think tiny hooks and tweezers. You'll use them to pick away all the excess vinyl around your design, leaving only the good stuff behind.
- Application Tape (Transfer Mask): This is a see-through, sticky sheet that lifts your design off its backing paper. It holds every piece of your graphic perfectly in place so you can transfer it to the garment without anything shifting.
A classic rookie mistake is grabbing a household iron instead of a heat press. Don't do it. An iron just can't deliver the consistent, high-pressure heat needed to cure the vinyl's adhesive. The result? Your design will start peeling off after a wash or two. That said, for smaller home setups, a quality tool like the Oliso Smart Iron can be a serious step up.
Why the Right Printer Matters
Honestly, your printer choice makes or breaks the whole operation. A standard inkjet or laser printer is completely useless here. The inks they use are water-based and have zero interest in bonding with fabric – they’ll wash out before you even get a chance to show off your new tee.
Investing in a proper solvent or latex printer is fundamental. It's the foundation of the entire printed vinyl process. To see what a difference pro-level gear makes, check out our guide on what to look for in custom t-shirt printers.
From Digital File to Finished Garment
Turning a design on your screen into a real, wearable piece of art is one of the most satisfying parts of the whole process. With printed vinyl heat transfer, it breaks down into five clear stages. Get these right, and you're guaranteed a pro-level finish that’s vibrant, tough, and perfectly applied.
Before you even touch the vinyl, it helps to picture the whole journey. This is where the magic starts.
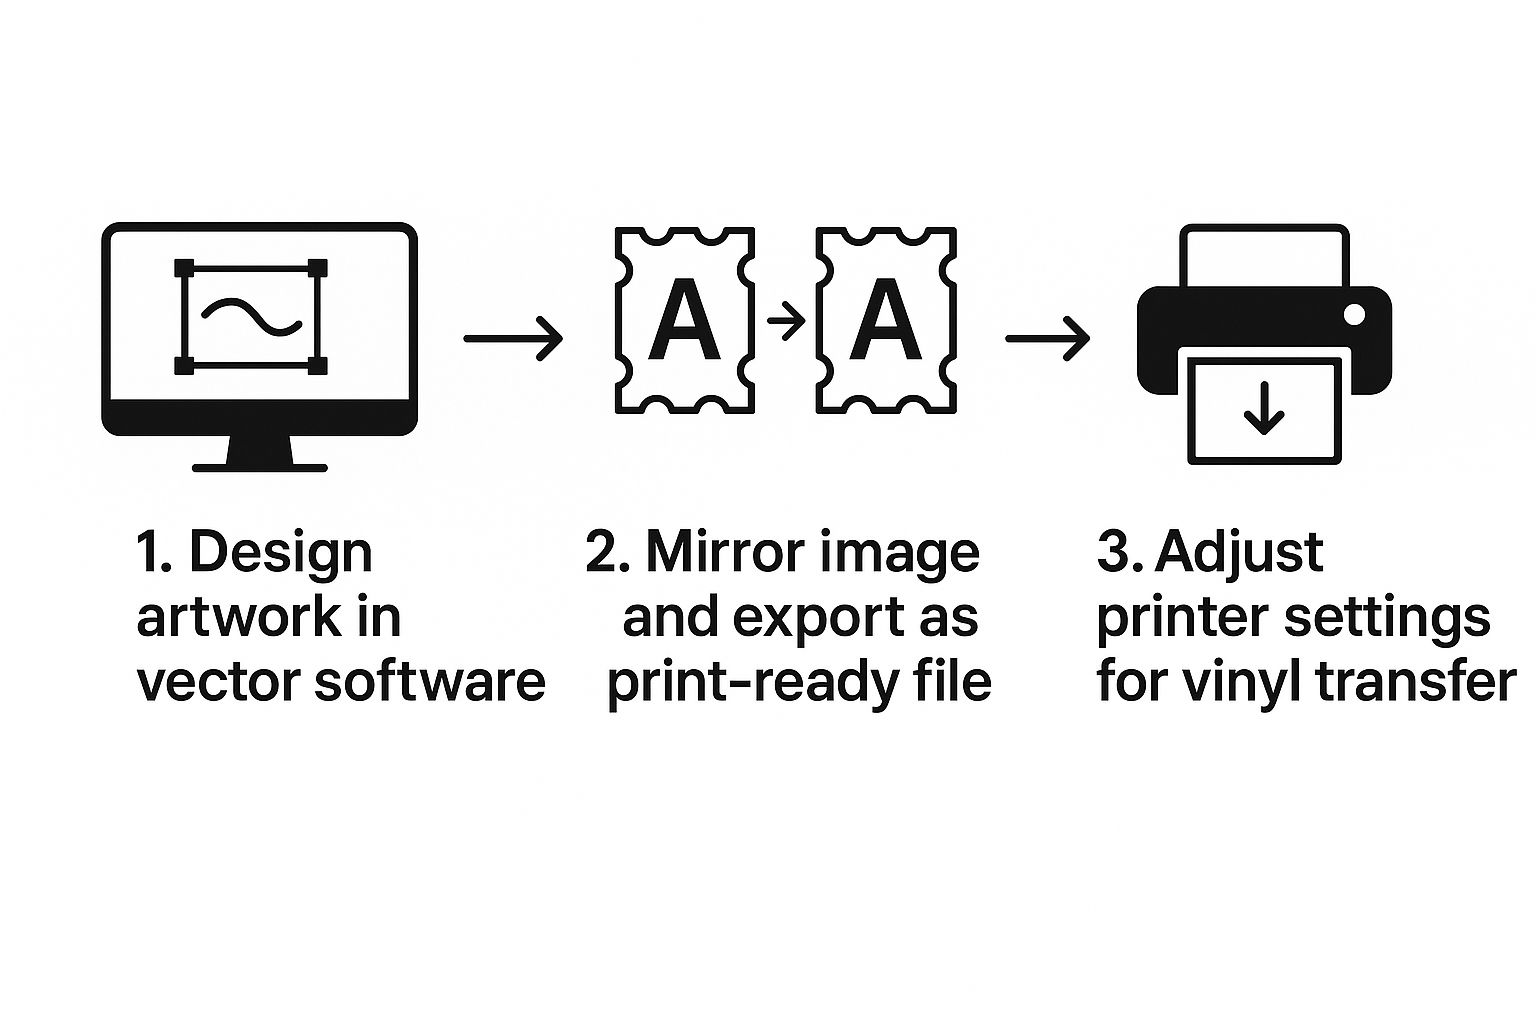
This workflow shows exactly how a vector design becomes a print-ready file, laying out the software and settings you’ll need to nail the output.
Step 1: Prepare Your Design
Every killer print starts with a solid digital file. For the absolute sharpest results, your artwork needs to be a vector file (think AI, EPS, or SVG). Unlike pixel-based images like JPEGs or PNGs, which get blurry when you scale them up, vectors stay perfectly crisp at any size.
Once your design is locked in, export it at a high resolution. 300 DPI (dots per inch) is the standard for a reason—it makes sure every line, colour, and tiny detail makes the jump from screen to vinyl without losing a thing.
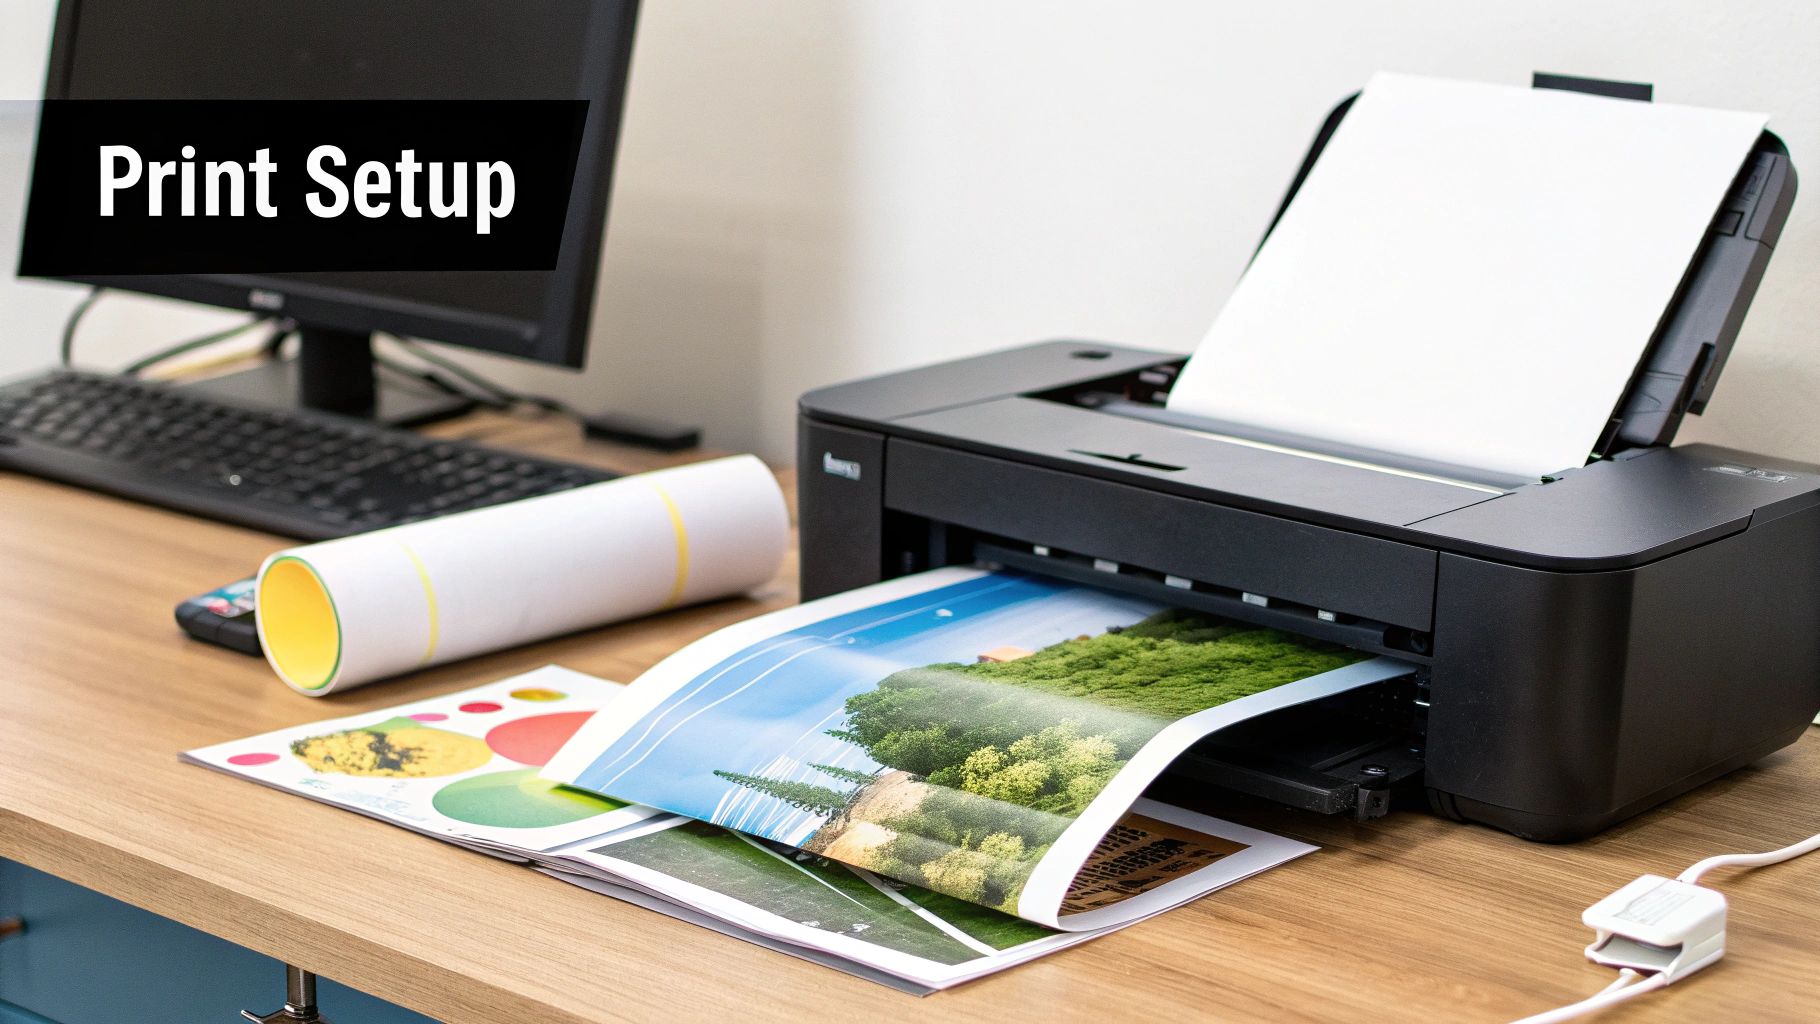
Step 2: Print and Cut the Vinyl
Next up, load your printable heat transfer vinyl into an eco-solvent printer. Pay close attention here—make sure the printable side is facing the right way. Usually, the backing paper has some branding on it, which is a good clue. Now, send your file to print.
After the ink has dried, the machine’s built-in cutter gets to work. It will trace the outline of your design with absolute precision, slicing through the vinyl layer but leaving the backing sheet completely intact. This all-in-one print-and-cut process is what lets you create those really complex shapes.
Step 3: Weed the Excess Vinyl
"Weeding" is that strangely satisfying step where you remove all the unwanted vinyl from around your design. Using a weeding tool—basically a small, sharp hook—you’ll carefully peel away all the negative space. All that should be left is your awesome graphic stuck to the backing sheet.
Take your time on this. Seriously. Especially with intricate designs or small text. If you rush it, you risk pulling up parts of your design or tearing the vinyl. Patience here is what separates an amateur job from a clean, professional transfer.
Step 4: Apply the Transfer Mask
With your design fully weeded and looking sharp, it’s time to apply a transfer mask, which you might also hear called application tape. This is just a clear, sticky sheet that lifts your entire design off its original backing in one go. It’s a lifesaver for keeping all the separate bits and pieces perfectly aligned.
Lay the mask over your design and use a squeegee to press it down firmly. You're basically forcing the vinyl to stick to the mask. Once you’re confident it’s on there, peel the mask away, and your complete design will lift off with it.
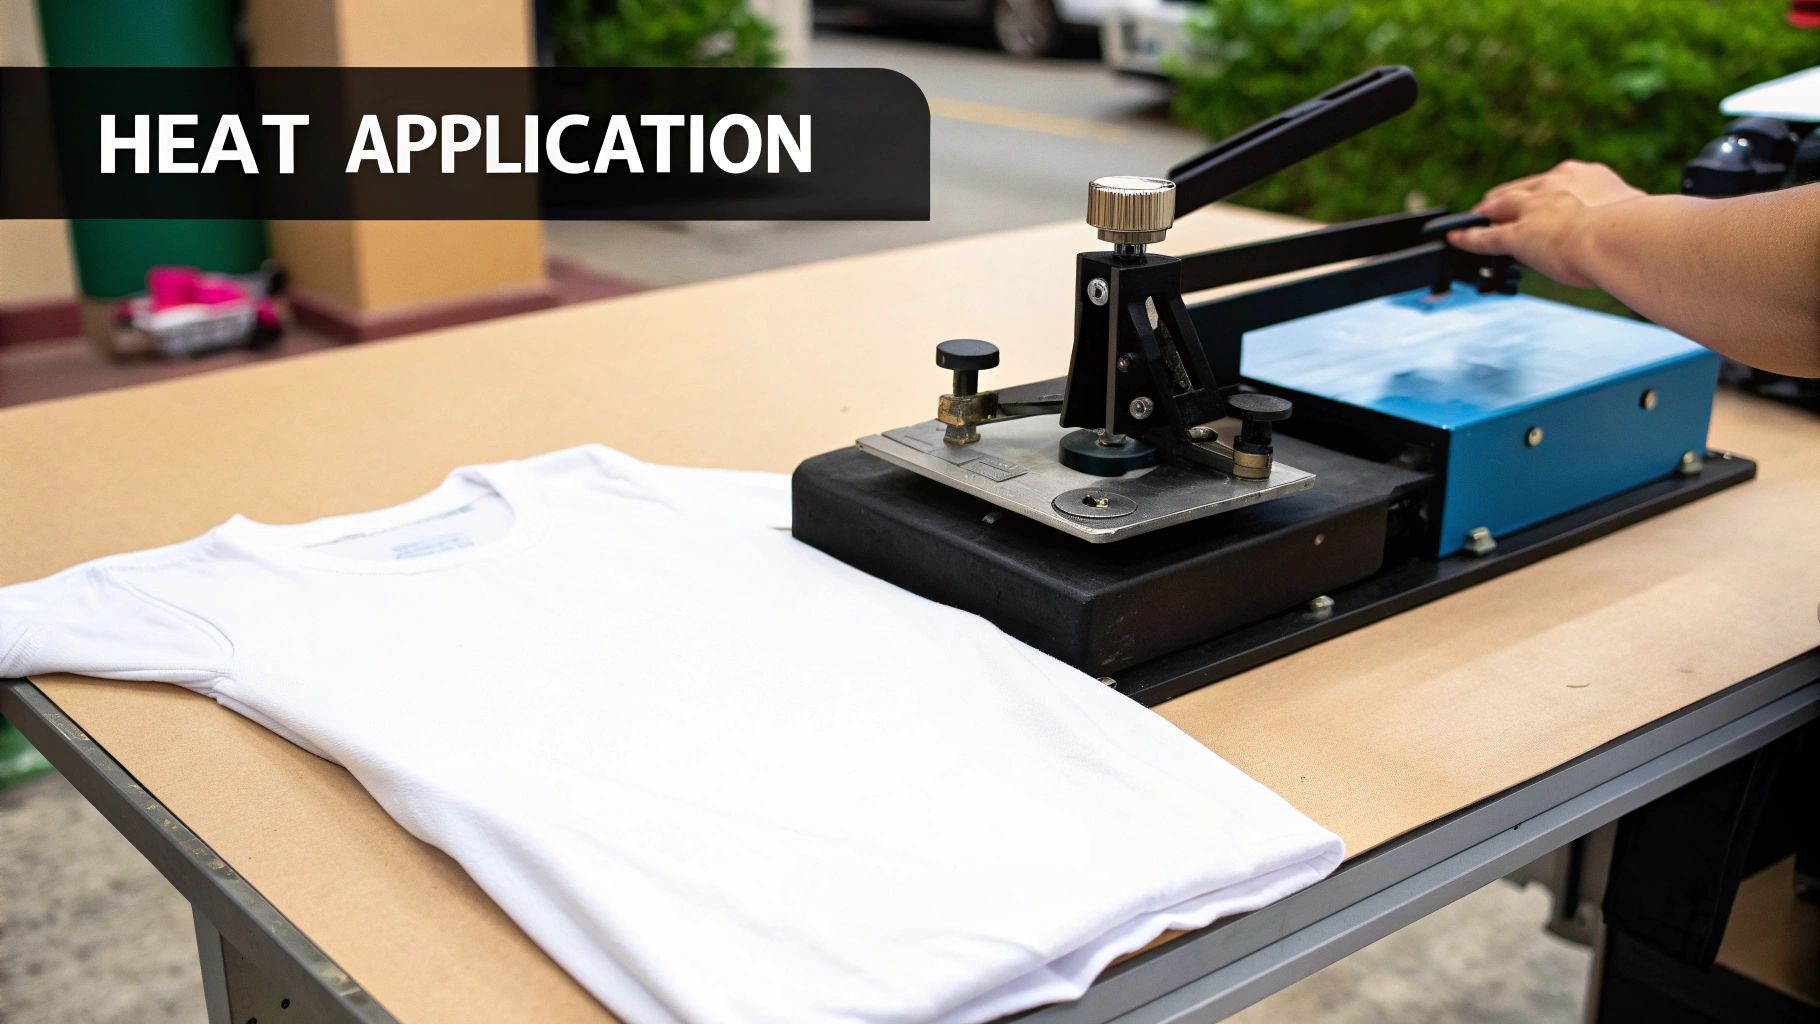
Step 5: Press Your Design
Alright, this is the main event. First, pre-press your garment for a few seconds to get rid of any moisture or wrinkles. Then, carefully position your design (which is still on its transfer mask) exactly where you want it on the fabric.
Place a protective sheet, like Teflon or parchment paper, over the top. Now, follow the manufacturer’s instructions for your specific vinyl—press it using the recommended time, temperature, and pressure. After the timer goes off, peel away the transfer mask. Some vinyls are a "hot peel," others are a "cold peel," so check the instructions.
And that's it. You're left with a finished, custom-printed garment. Mastering this final step is what makes for high-quality gear and is the backbone of any great custom t-shirt printing setup.
Printed HTV vs DTF Printing Compared
When you're getting into custom apparel, the conversation almost always lands on two big players: printed vinyl heat transfer (HTV) and Direct to Film (DTF) printing. Both use heat to stick a design onto a garment, but they produce a completely different look and feel. Getting your head around these differences is the key to picking the right tool for the job.
Printed HTV is pretty straightforward. You print your design onto a special sheet of vinyl, a machine cuts it out, and then you press it onto the fabric. The result is a bold, vibrant graphic that sits right on top of the garment. It has a distinct, slightly raised feel—think of the numbers on a classic football shirt. This texture gives it a durable, high-impact look that's perfect for logos and blocky designs.
DTF, on the other hand, is a bit different. Your design is printed onto a special film, coated with an adhesive powder, and then heat-pressed. The magic here is that the ink transfers from the film and sinks into the fabric's fibres. This creates a much softer "hand," meaning the design feels less like a separate layer and more a part of the shirt itself.
To really get to the bottom of it, let's pit these two popular methods against each other and see where they shine. Here's a quick table to break down the key differences.
Printed HTV vs DTF Printing A Quick Comparison
| Feature | Printed Vinyl Heat Transfer (HTV) | Direct to Film (DTF) |
|---|---|---|
| Feel on Fabric | Thicker, sits on top of the fabric. Bold and slightly raised feel. | Very soft and flexible. Blends into the fabric for a 'no-feel' finish. |
| Design Complexity | Best for simpler graphics, logos, and text. Weeding can be difficult. | Excellent for intricate, photorealistic images and fine, complex details. |
| Durability & Stretch | Very resilient but can crack over time if stretched excessively. | Outstanding washability and stretch. Often outlasts the garment itself. |
| Best For | Sportswear, uniforms, polyester, and nylon fabrics. Bold, high-impact logos. | Full-colour photos, complex art on cotton or blends, premium apparel. |
| Vibrancy | Brilliant, opaque colours that pop on any colour fabric. | Excellent vibrancy, especially on dark garments, without needing a base layer. |
As you can see, there's no single "best" method—it's all about what you're trying to achieve with your design and garment.
So, Which One Should You Choose?
The real decider is your project's specific needs.
Printed HTV is your go-to for sportswear, work uniforms, and designs on tricky fabrics like polyester or nylon. Its fantastic opacity and bold, clean finish make it a winner for logos that need to stand out.
DTF, however, is the undisputed champion for photorealistic prints, super-complex multi-colour artwork on cotton or blended fabrics, and any project where a soft, premium feel is non-negotiable.
Because it embeds ink into the fabric, DTF printing is often put up against traditional screen printing. Both deliver a great feel and durability, but DTF smashes it when it comes to full-colour complexity with way less setup. You can dive deeper into DTF vs screen printing for graphic tees to see exactly how these modern techniques stack up against the old guard.
Pro Tips to Make Your Prints Last
Getting a design to look bright and sharp is one thing. Making sure it doesn't crack, peel, or fade after a few washes? That's the real mark of a pro. The secret to a long-lasting printed vinyl transfer comes down to a few simple but critical steps—before, during, and after you press.
Get these right, and you'll seriously level up the quality and durability of your work.
First things first, prep your garment. Always, always pre-press your garment for about 5-10 seconds. It seems like a tiny step, but it’s a game-changer. This pushes out any hidden moisture and gets rid of wrinkles, giving the vinyl’s adhesive a perfectly flat, dry surface to grab onto. Skip this, and you're asking for peeling problems down the road.
Design Smarter, Not Harder
Believe it or not, the durability of your print starts on the screen. While printed vinyl is great for detail, super-fine lines or tiny, floating bits of text are weak points. Think about it: they have less surface area to stick to the fabric, which makes them prime candidates for peeling off when the garment is stretched or washed.
For maximum staying power, aim for designs with bolder lines and more solid shapes. You don't have to kill your creativity—just be aware of the material's physical limits. A design with a solid foundation is always going to be stronger.
The number one complaint from customers? A design that cracks or fades way too soon. The best way to stop this from happening is with proper aftercare. The instructions you give your customer are just as important as your pressing technique.
Aftercare Instructions Are Your Best Friend
You can do everything right, but if the customer throws their new shirt in a hot wash and then a tumble dryer, it's all for nothing. Educating them on how to look after their gear is vital for keeping them happy.
Here in the UK, durability is a huge deal, especially for workwear and commercial clients. In fact, research shows that around 29% of commercial laundry operators have had problems with heat transfers cracking or fading after lots of washing. You can dig deeper into the heat transfer vinyl market data to see just how big a challenge this is.
Give your customers these simple, clear instructions with every single item:
- Wait 24 Hours: Tell them to hold off on washing it for at least a day. This gives the adhesive time to fully cure and lock onto the fabric.
- Wash Inside Out: This is a non-negotiable. Turning the garment inside out stops the print from getting scraped and battered by other clothes in the machine.
- Keep it Cool: A wash at 30°C or lower is perfect. Heat is the enemy of vinyl.
- No Tumble Dryers: Air drying is the only way to go. The high, intense heat from a tumble dryer will wreck the adhesive and can make the vinyl warp or peel off.
- Don't Iron the Print: If they must iron the garment, they need to turn it inside out or put a tea towel over the design. A hot iron touching the vinyl directly will melt it in a second.
So, with all the different printing methods out there, why would you go with printed vinyl? Simple. It hits that sweet spot of vibrancy, durability, and versatility that makes it the perfect tool for certain jobs. For high-impact visuals that other techniques just can't match, this is your secret weapon.
One of its biggest wins is the incredible colour payoff. Printed vinyl delivers super vibrant, saturated colours that seriously pop off the fabric. This is a game-changer on dark-coloured garments, where its solid opacity means the design stays bright and crisp, with zero colour bleed-through from the shirt underneath.
Built to Last and Ready for Anything
Beyond the brilliant colours, printed vinyl heat transfer is famously tough. When you apply it correctly, the material creates a solid bond with the fabric. The result is a finish that stands up to fading, cracking, and peeling, even after countless washes. That's why it's such a reliable choice for stuff that's going to get a lot of wear.
But its real superpower is just how versatile it is. While some methods are picky about fabrics (looking at you, cotton-only techniques), printable HTV is happy to work with a whole range of materials.
- Polyester: Perfect for sportswear and athletic gear that needs a design that can stretch and move.
- Nylon: The go-to for jackets, bags, and other outerwear that can be a nightmare for other printing methods.
- Poly/Cotton Blends: Works like a charm on all your favourite hoodies, sweatshirts, and modern tees.
This adaptability makes printed vinyl an absolute powerhouse for customising everything from team jerseys to promotional tote bags. Its knack for sticking to synthetic fabrics where other methods fail gives it a massive edge.
You don't just have to take my word for it—the numbers back it up. In the UK, the heat transfer vinyl market was valued at around USD 55.54 million and is tipped to grow by about 5.1% every year. What’s driving this? A massive demand for personalised clothing and a bigger push for more sustainable ways of making things. You can dig deeper into the UK's custom apparel market growth here.
It just goes to show that choosing printed vinyl isn't just a creative whim—it's a smart business move.
Got Questions About Printed HTV?
When you first dive into printed vinyl, you’re bound to have a few questions. It’s totally normal. Getting these sorted from the get-go is the difference between a pro-looking print and a rookie mistake that peels off in the first wash.
So, let's cut through the noise and tackle the questions we hear all the time.
First up, the big one: "Can't I just use a regular iron?"
It's tempting, I get it. But an iron is the fastest way to a failed transfer. It just can't provide the two things that matter most: consistent temperature and even pressure.
A proper heat press is designed to clamp down with uniform force across the entire design. This ensures the adhesive melts perfectly into the fabric’s fibres, creating a bond that's built to last. An iron, on the other hand, creates random hot spots and uneven pressure points. The result? A transfer that looks okay for a day, then starts to lift and crack after one or two washes. Don't do it.
How Long Does It Last? And What Printer Do I Need?
"Okay, but how durable is it really?"
The lifespan of a printed vinyl heat transfer comes down to three things: the quality of the vinyl, getting the application process spot-on, and how you look after it. A professionally pressed design using top-notch material can easily outlast the garment it's printed on. The key is proper care: wash it inside out, stick to a cool cycle, and for the love of all that is holy, keep it out of the tumble dryer.
"What kind of printer do I need for this?" This is a deal-breaker. Your standard home inkjet printer is a complete non-starter. You need a specialised printer that runs on eco-solvent, solvent, or latex inks.
Why? Because these inks are chemically designed to fuse with the vinyl. They create a finish that’s vibrant, tough, and won’t wash out. The water-based inks in your desktop printer would just sit on the surface and slide right off. Using the wrong printer isn't just a bad idea—it simply won't work.
At the end of the day, investing in the right gear and understanding how the materials work is what separates a homemade experiment from a professional product that people will actually want to wear.
Ready to bring your own unique apparel ideas to life with professional printing? Explore the vibrant, durable custom designs at Psyque and see what's possible with expert DTF printing. Find your next favourite tee at https://psyque.co.uk.
more articles:
A Guide to Vinyl Printed Shirts
Your Guide to the Perfect Halloween Tee
Your Guide to Japanese T Shirts UK