
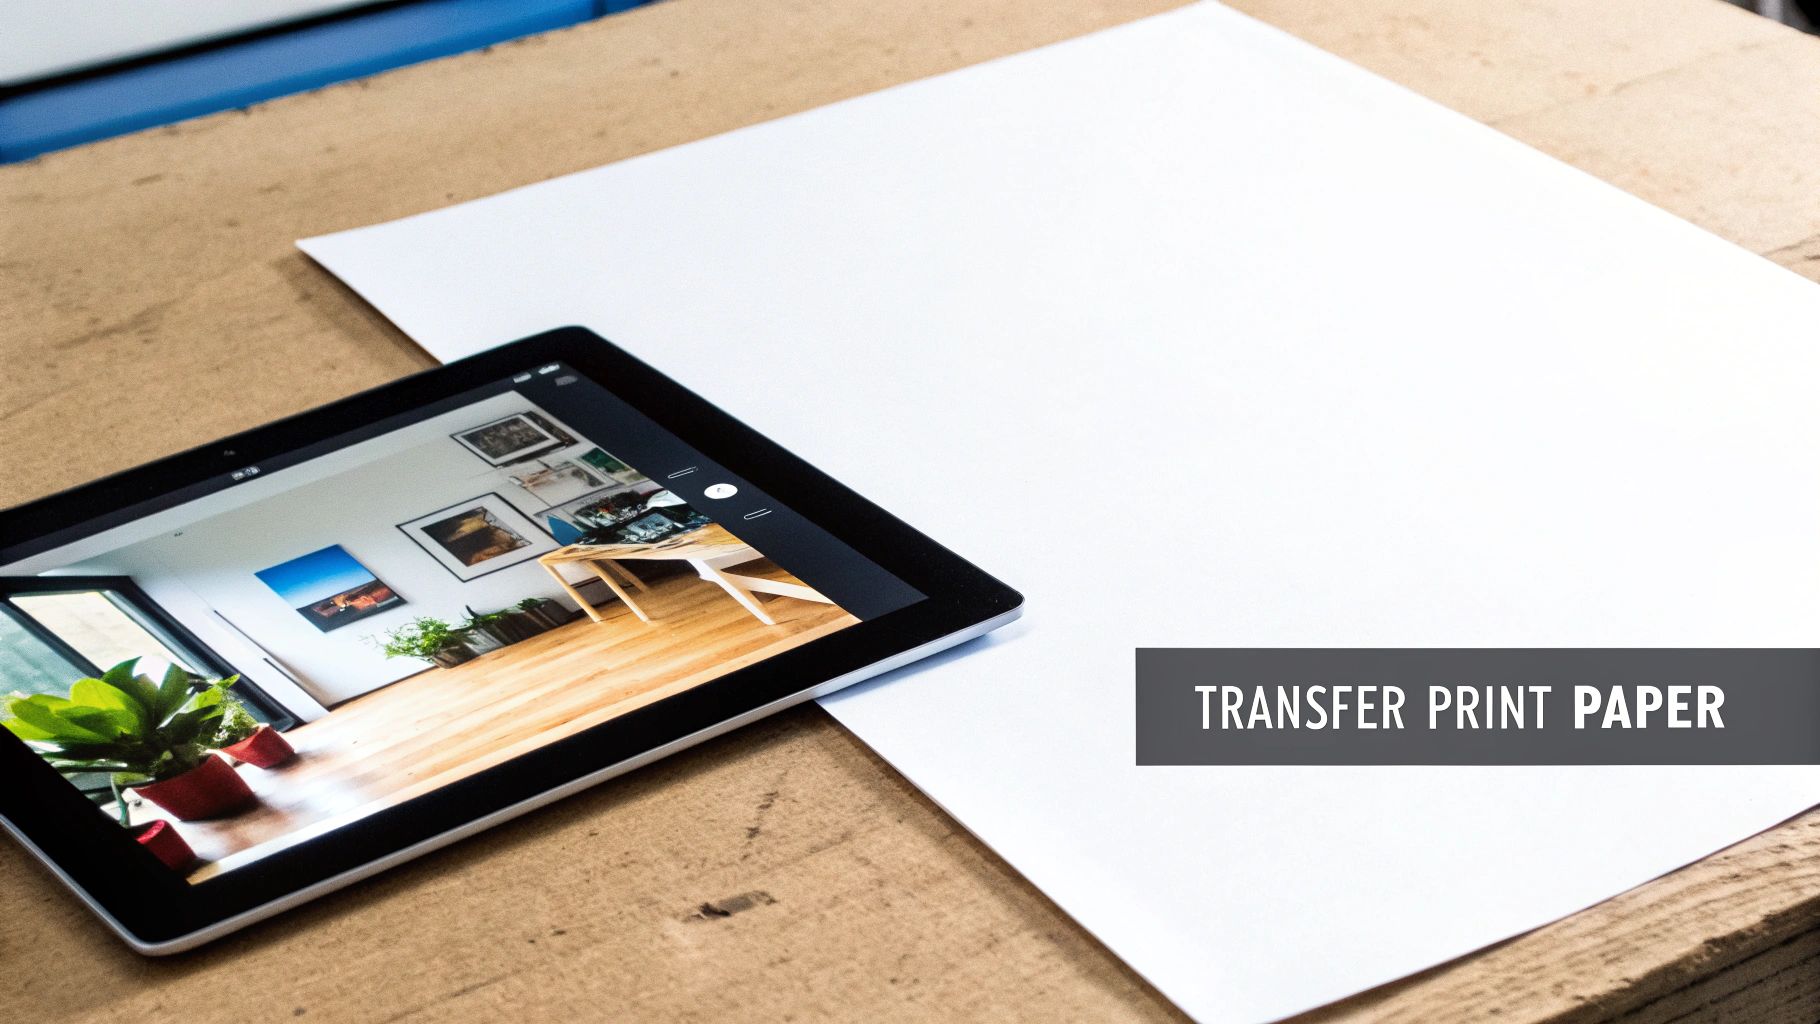
Transfer Print Paper: Master Your Prints Today
Ever wondered how custom T-shirts get their vibrant, detailed designs? Often, the secret ingredient is transfer print paper. Think of it as a temporary tattoo for your clothes, but one that results in a professional, permanent finish. This special paper is the bridge that takes a design from your computer screen straight onto a T-shirt, making custom apparel a reality for creators everywhere.
What Is Transfer Print Paper?
At its heart, transfer print paper is a sheet with a special coating, engineered to carry ink from a printer to another surface—usually fabric. The process itself is pretty straightforward: you print your design onto the paper, place it onto your garment, and apply heat and pressure with a heat press. This combination triggers the coating on the paper, causing it to release the ink and bond it permanently to the fabric.
The real magic is in that unique coating. It’s designed to hold onto the ink until it’s hit with just the right amount of heat, allowing for crisp, colourful images that you could never achieve with a standard piece of paper.
This technology has become a massive deal in the custom apparel world. In fact, the UK market for printing transfer paper is expected to grow by around 6.2% annually between 2021 and 2031, mostly thanks to the rising demand for personalised fashion and sportswear. For more on printing trends, you can explore the Branditok Blog for more insights.
A Quick Guide to Transfer Paper Types
Before you jump in, it’s worth getting to know the different kinds of transfer paper out there. Each one is designed for specific printers, fabrics, and the final look you're going for, so choosing the right T-shirt printing papers is a crucial first move.
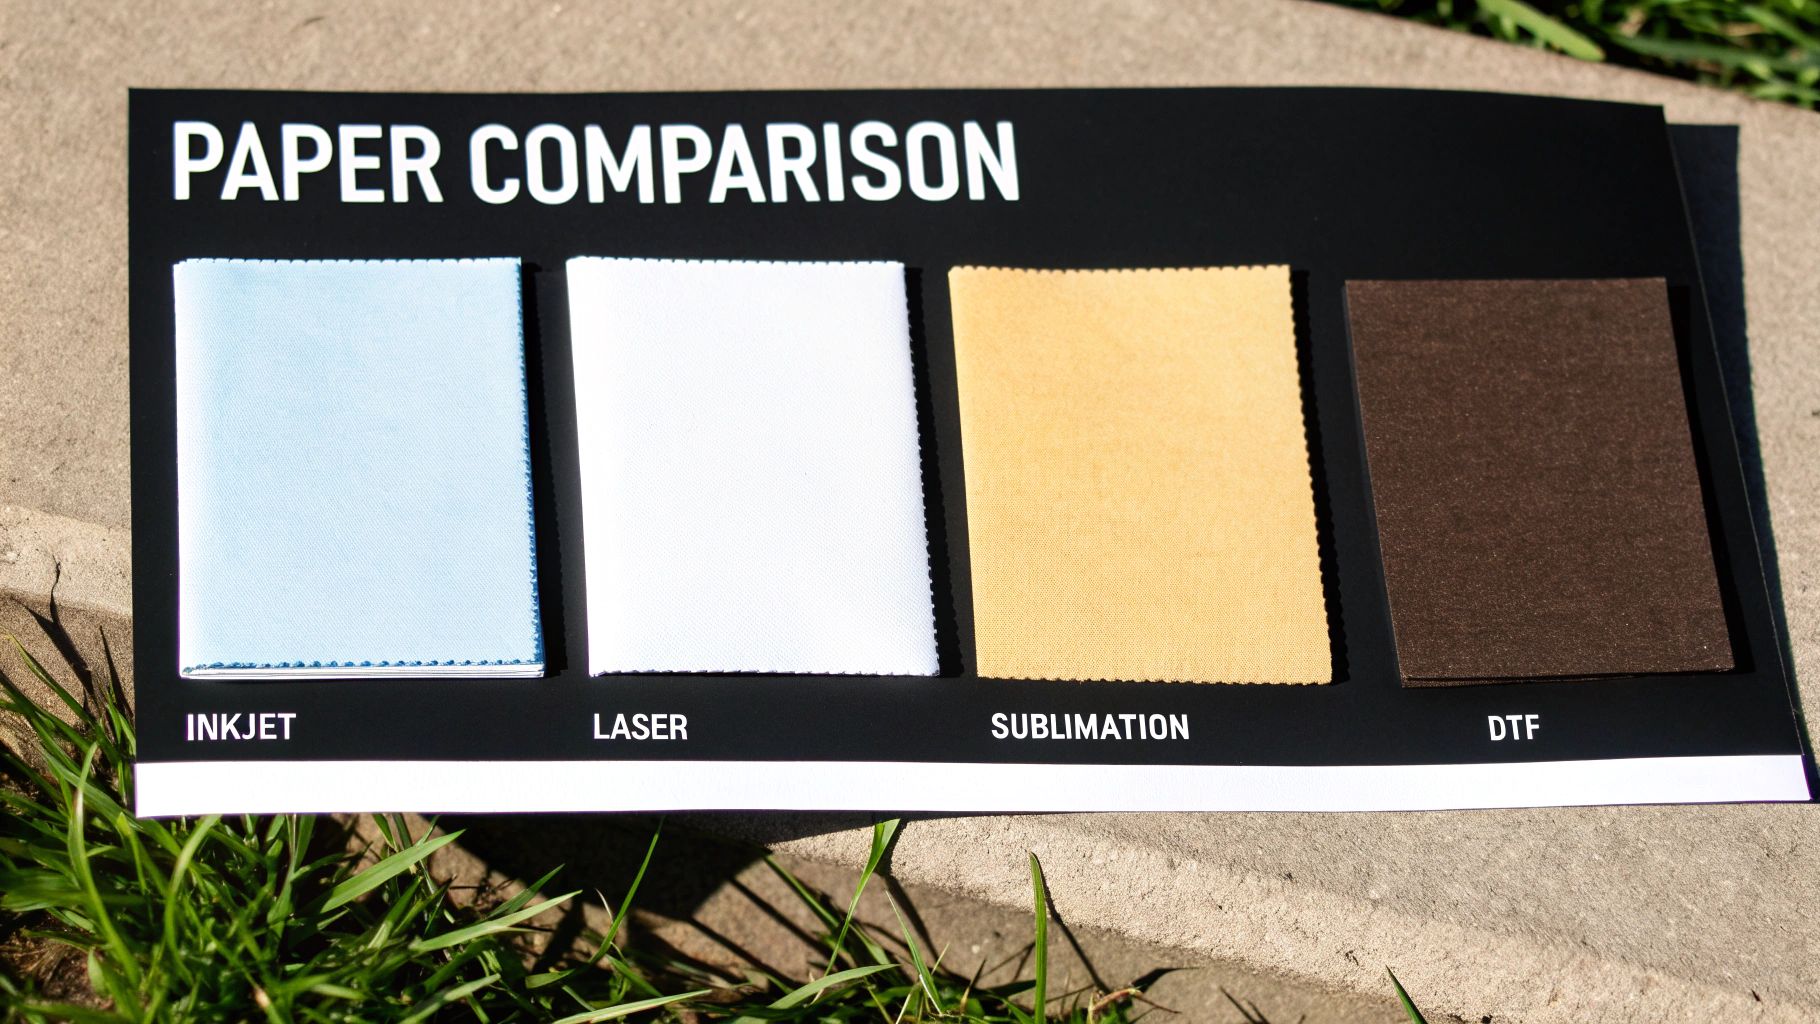
The four main technologies you’ll come across are:
- Inkjet Transfer Paper: Made for the standard inkjet printer you likely have at home or in the office. It's a fantastic starting point for beginners and hobbyists.
- Laser Transfer Paper: Formulated to handle the high heat from a laser printer. This often gives you sharper details and a more durable finish.
- Sublimation Paper: A completely different beast. Here, the ink turns into a gas under heat and permanently dyes the fibres of polyester fabrics, leaving no feel behind.
- Direct-to-Film (DTF) Film: This is a more modern approach where a design is printed onto a film, covered with an adhesive powder, then transferred. It’s incredibly versatile and works on almost any fabric.
Key Takeaway: Choosing the right transfer print paper isn't just about what printer you own. It's about matching the technology to your fabric and the quality you want your final product to have.
To help you decide, here’s a quick rundown of the main transfer paper types and what they do best.
| Paper Type | Best For | Printer Required | Key Feature |
|---|---|---|---|
| Inkjet Paper | Cotton T-shirts, hobby projects | Inkjet Printer | Accessible and easy to use for beginners |
| Laser Paper | Detailed graphics on cotton | Laser Printer | No-cut options and sharp text quality |
| Sublimation Paper | Polyester sportswear, mugs | Sublimation Printer | Ink becomes part of the fabric; no feel |
| DTF Film | All fabric types, vibrant colours | DTF Printer | Highly versatile and durable prints |
Each option opens up different creative possibilities, so understanding these basics will set you on the right path to making amazing custom gear.
Comparing Transfer Paper Technologies
Choosing the right transfer paper is a bit like a chef picking the perfect knife for a specific job. Each type has its own feel, its own strengths, and its own ideal use case. Getting to know the differences is what separates a hobbyist from a pro who turns out consistently brilliant results. Let's break down the main players on the field.
To really get to grips with the options, it helps to see them side-by-side. Each method offers something different in terms of feel, durability, and the types of fabrics it gets along with.
Comparing Transfer Paper Technologies
| Feature | Inkjet Transfer Paper | Laser Transfer Paper | Sublimation Paper | DTF Film |
|---|---|---|---|---|
| How It Works | Prints ink onto a polymer sheet, which is then heat-pressed onto the fabric. | Uses toner instead of ink, fusing it to a polymer sheet that's heat-pressed. | Special ink turns to gas under heat, permanently dyeing the fabric fibres. | Ink is printed onto a film, coated with adhesive powder, and then pressed onto fabric. |
| Fabric Compatibility | Best for cotton and poly-cotton blends. Separate papers for light and dark fabrics. | Works on cotton, blends, and some synthetics. Separate papers for light and dark. | Polyester or poly-coated materials only. Does not work on cotton. | Works on almost anything: cotton, polyester, blends, leather, nylon, and more. |
| Feel of the Print | A noticeable layer on top of the fabric. Can feel stiff, especially on darks. | Similar to inkjet but can have a slightly smoother, more plastic-like feel. | Zero feel. The design is part of the fabric itself, making it incredibly soft. | Softer and more flexible than inkjet/laser. A slight feel but very stretchable. |
| Durability | Prone to cracking and fading over time with washing. | Generally more durable than inkjet but can still crack or peel eventually. | Extremely durable. Will not crack, peel, or fade. Lasts as long as the garment. | Very durable and stretchable. Resists cracking and fading well through many washes. |
| Pros | - Low startup cost - Easy to use - Widely available |
- Faster printing - Crisper text and lines - No drying time needed |
- Unbeatable durability - Vibrant colours - Professional, soft-hand feel |
- Highly versatile - Great durability & stretch - Vibrant on all colours |
| Cons | - Less durable - Can feel heavy - Weeding can be tricky |
- Higher printer cost - Toner can be expensive - Can have a thicker feel |
- Limited to polyester fabrics - Requires a dedicated printer and special inks |
- More complex process - Higher initial investment than basic transfers |
This table gives you a bird's-eye view, but the real magic is in the details. Each of these technologies was designed to solve a different problem, so understanding how they work will help you decide which one is right for your project.
Inkjet and Laser Transfer Papers: The Go-To Starters
For most people dipping their toes into custom apparel, inkjet and laser papers are the first port of call. They work on a simple premise: a special polymer layer on the paper melts under heat, bonding to the fabric and trapping your printed design right on the surface. You can almost think of it as a high-tech sticker that becomes part of the t-shirt.
Thanks to huge leaps in digital printing, these methods have become incredibly popular in the UK for their speed and low cost. In fact, laser printing is expected to grab the biggest slice of the global market at 42.6% by 2025, which shows just how vital it's become for high-quality custom work.
The biggest thing to know here is the difference between paper for light and dark fabrics.
- Paper for Light Fabrics: This version uses a clear polymer coating. When you press it, only your ink shows up, and the rest of the transfer is transparent. This means you have to print your design as a mirror image so it reads correctly once it's on the shirt.
- Paper for Dark Fabrics: To make sure colours don't get lost on a dark background, this paper has an opaque white layer. You print normally (not mirrored), and this white base acts like a primer on a dark wall, making your colours pop just as you intended.
Sublimation Paper: The "No-Feel" Finish
Sublimation is a different beast entirely. It creates prints that are so soft you literally cannot feel them. Instead of sitting on top of the fabric, the design becomes a part of the fabric itself. This process requires special sublimation inks and paper.
Here's the science bit: under serious heat and pressure, the solid ink on the paper bypasses the liquid stage and turns straight into a gas. This gas sinks into the polyester fibres of your garment. As it cools, it turns back into a solid, permanently dyeing the material from the inside out.
Key Takeaway: The magic of sublimation is that the ink fuses directly with the fabric. This means the print will never, ever crack, peel, or fade. It offers durability and vibrancy that other methods just can't match.
But there's a catch, and it's a big one. Sublimation only works its magic on polyester or materials with a special polyester coating. It simply won't bond with natural fibres like cotton. This makes it the undisputed champion for sportswear, activewear, and other synthetic gear where performance and longevity are everything.
Direct-to-Film (DTF): The Modern All-Rounder
Direct-to-Film, or DTF, is the new kid on the block, and it’s a game-changer. It cleverly blends the versatility of traditional transfers with the professional durability of more complex methods. It's no wonder that small businesses and indie brands have adopted it so quickly—it just works on almost everything.
The process looks like this:
- Your design is printed onto a special PET film with water-based inks.
- While the ink is still wet, a fine hot-melt adhesive powder is sprinkled over it.
- The film is then cured with heat, melting the powder into a smooth, solid backing.
- This finished transfer is then simply heat-pressed onto your garment.
What you get is a print that’s tough, super stretchy, and feels much softer than old-school inkjet or laser transfers. DTF shines where other methods struggle, working beautifully on cotton, polyester, blends, and even tricky customers like leather. When you're making graphic tees, it's worth taking a look at how DTF vs. screen printing stack up, as each has unique benefits for different production runs.
With its incredible adaptability and pro-level finish, DTF really stands out as the superior choice for anyone wanting to create top-quality custom gear across a huge range of products.
Essential Tools for Transfer Printing
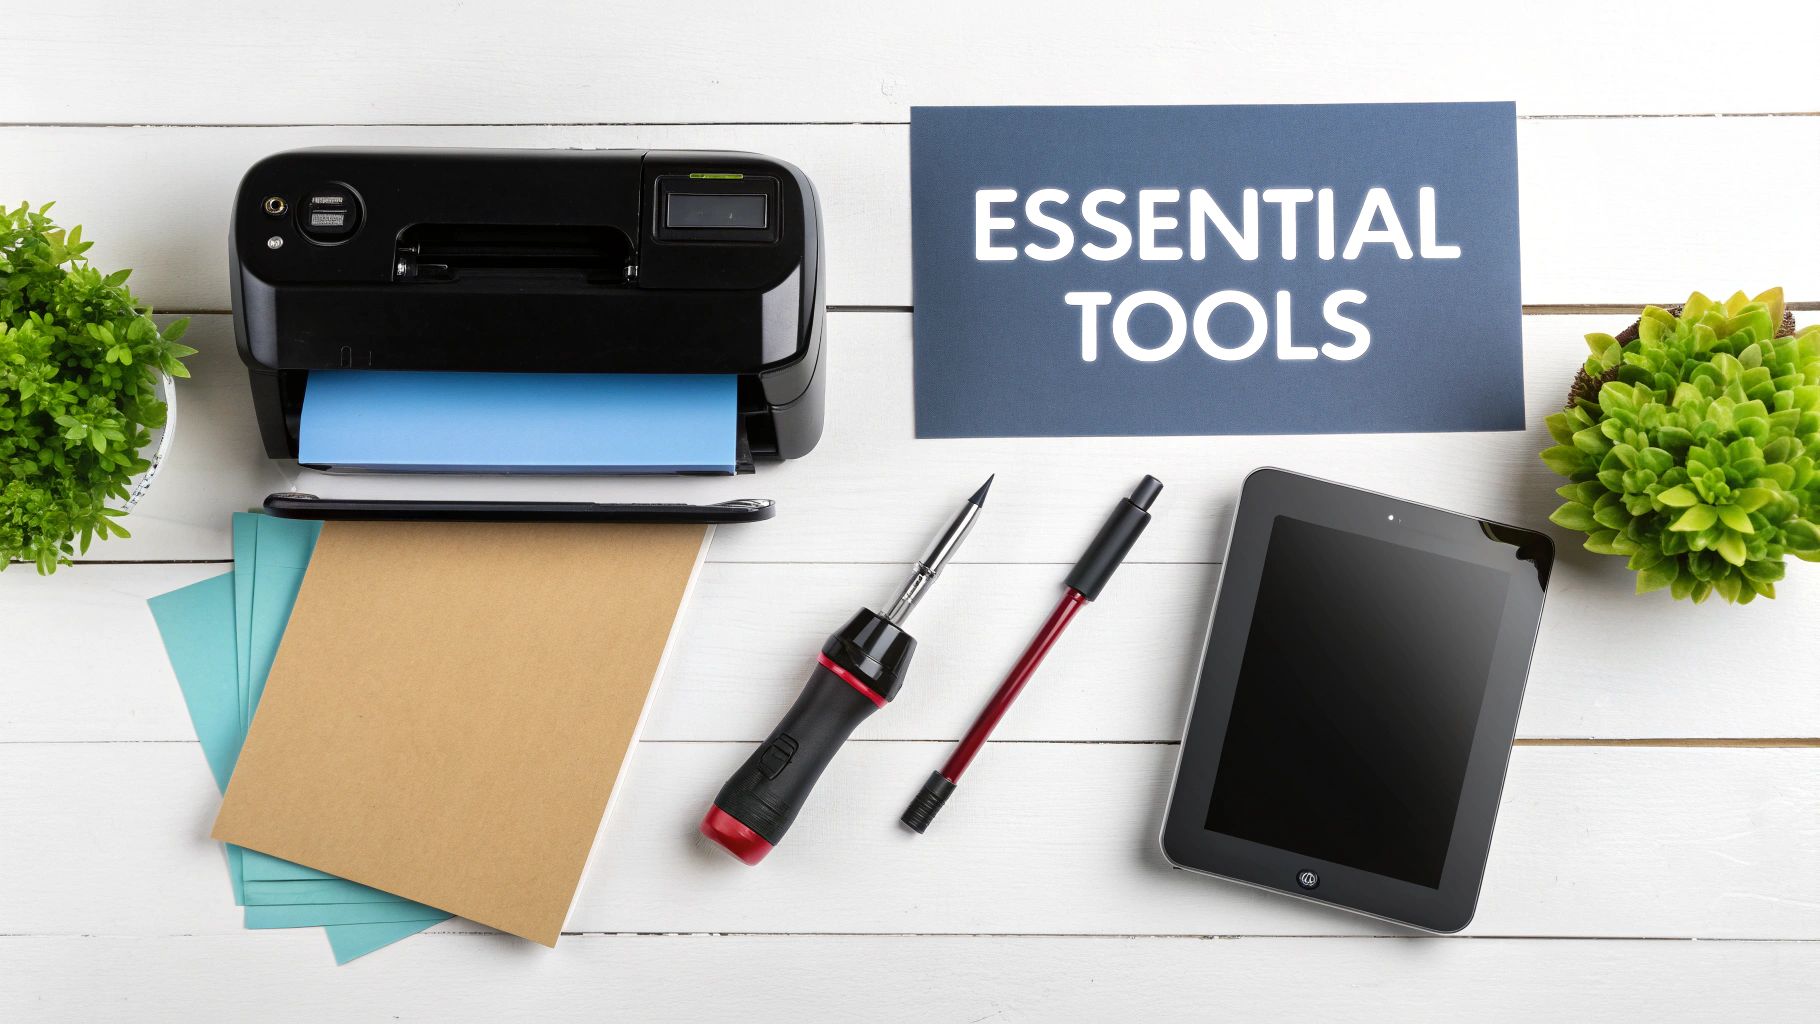
Before you can start turning those digital designs into wearable art, you'll need to gather the right kit. Having the correct tools doesn't just make the process smoother; it's the secret sauce that separates amateur results from professional, durable prints. Think of it like cooking a gourmet meal—you can't expect a perfect result without the right oven and utensils.
Your setup doesn't need to be overwhelmingly complex, but every piece has a crucial job. From the printer that lays down the ink to the heat press that makes it permanent, getting to know your equipment is the first real step towards nailing that perfect press, every single time.
Choosing Your Printer
The printer is the very heart of your operation. The model you choose will dictate which kind of transfer print paper you can work with, so it's a big decision. For most home or small business setups, you’re looking at two main contenders: inkjet and laser.
- Inkjet Printers: These are what most of us have at home, and they're incredibly versatile. For transfer printing, you’ll get the best results with pigment-based inks rather than standard dye-based ones. Pigment inks are far more water-resistant and hold their colour against fading, which means your designs will actually survive the wash.
- Laser Printers: Known for their speed and sharp precision, laser printers use toner (a fine powder) instead of liquid ink. This often gives you incredibly crisp lines and text, making them a brilliant choice for more intricate designs. The finished transfers also tend to be a bit more durable straight off the press.
While your standard office printer might get you started, a model designed for graphics and photos will always deliver better, more accurate colours.
The Heat Press: The Star Player
If the printer is the heart, the heat press is the muscle. It might be tempting to start out with a household iron, but if you're serious about quality, a dedicated heat press is non-negotiable. An iron just can't provide the consistent, even pressure and stable temperature needed to create a permanent, professional-looking bond.
A quality heat press gives you total control over the three golden rules of transfer printing:
- Temperature: Different papers need specific heat, usually somewhere between 150°C to 210°C. A heat press locks in that temperature precisely across the entire plate.
- Pressure: Getting the force right is critical. Too little, and the transfer won’t stick properly. Too much, and you risk squashing the ink or even damaging the fabric.
- Time: Every transfer needs a specific amount of time under the heat, generally between 10 to 60 seconds. The built-in timer on a press takes all the guesswork out of it.
Investing in a reliable machine is one of the smartest moves you can make. It's the difference between a print that peels after one wash and one that looks fantastic for years. To get into the nitty-gritty, check out our complete guide to choosing a UK heat press machine.
Must-Have Accessories for Flawless Transfers
Beyond the big machines, a few simple accessories will streamline your workflow and save you from common headaches. These small bits of kit can make a massive difference to the final quality of your work.
Make sure you have these on hand before you press your first project:
- Teflon Sheet: This is a reusable, non-stick sheet that goes between the hot plate of your press and your transfer paper. It stops any stray ink from sticking to your press and protects your garment from scorch marks. An absolute must-have.
- Weeding Tools: If you’re working with heat transfer vinyl (HTV) or certain laser papers, these are essential. They look like dental tools and have sharp points that let you pick away all the unwanted material around your design, leaving just the good stuff behind.
- Heat-Resistant Tape: This clever tape can handle the high temperatures of your press without melting or leaving any sticky gunk behind. Use it to tack your transfer paper down onto the garment so it doesn't shift an inch when you close the press.
With these essential tools in your arsenal, you're all set to move from screen to fabric with confidence.
Step-by-Step Guide to Transfer Printing
Alright, you’ve got your gear sorted. Now for the fun bit – actually bringing your design to life. Getting a flawless, professional-looking print comes down to following a solid process. This guide breaks it all down into simple, clear steps to take the guesswork out of it and get you the results you want.
Think of it like baking a cake. Every single step, from mixing the batter to getting the oven temperature right, matters. If you rush it or skip a stage, the final result just won't be what you hoped for.
Step 1: Design and Print Preparation
Before you even think about hitting 'print', your design file needs to be spot on. This prep work is absolutely crucial if you want your image to transfer cleanly and look sharp on the final garment.
First, get your artwork finalised in your design software. To avoid a blurry, pixelated mess, make sure your image has a high resolution. The gold standard here is 300 DPI (dots per inch).
Now for the part that trips up almost every beginner: mirroring your image.
- For light fabrics: You MUST mirror (or flip horizontally) your design before printing. The paper goes face-down on the shirt, so if you don't flip it, your design will be backwards.
- For dark fabrics: Do NOT mirror your design. This type of paper is applied face-up, so what you print is exactly what you'll see.
Once you’re ready, head into your printer settings. Make sure you select the right paper type – something like "T-shirt transfer" or "photo quality glossy" usually works best. Crank the print quality up to the highest setting. This forces the printer to use plenty of ink, giving you a vibrant, saturated design that will really pop.
Step 2: Garment and Heat Press Preparation
With your design printed and looking good, it's time to get your garment and heat press ready. Setting this up properly is the key to making sure your transfer sticks evenly and permanently. It’s what prevents annoying issues like peeling edges or patchy prints later on.
Start by pre-heating your heat press to whatever temperature the paper manufacturer recommends. This can be anywhere from 150°C to 210°C, so always double-check the instructions. Hitting the right temperature is what activates the adhesive and makes the magic happen.
Next, lay your garment out flat on the heat press platen. Take a moment to smooth out any wrinkles or creases with your hands.
Pro Tip: Give the garment a quick "pre-press" for about 3-5 seconds. This simple step gets rid of any hidden moisture and flattens the fabric, creating the perfect dry, smooth canvas for your transfer. A good bond depends on it.
After the pre-press, carefully position your printed transfer paper on the garment. I highly recommend using a bit of heat-resistant tape on the corners to hold it steady. This stops it from shifting when you close the press, which is vital for a crisp, perfectly aligned print.
Step 3: Pressing and Peeling
This is it—the moment of truth. The right combination of heat, pressure, and time is about to permanently fuse your artwork into the fabric's fibres.
Close the heat press, making sure you've got the pressure set correctly (usually medium to firm, but check your paper's guide). Start the timer for the recommended duration, which is typically between 10 to 30 seconds. Once the timer goes off, open the press.
The very last step is peeling the backing paper away, and how you do this really matters. There are two ways to go about it: hot peel or cold peel.
- Hot Peel: This means you rip the backing paper off immediately while the transfer is still piping hot. It often gives the print a softer, more matte finish because the ink stretches a tiny bit with the fabric.
- Cold Peel: With this method, you have to let the transfer cool down completely before you even think about touching the paper. This usually results in a glossier, more vibrant look, as the ink has had time to fully set.
Always, always follow the instructions for your specific paper. Using the wrong peeling method can completely ruin your hard work. Once peeled, your custom garment is done! Just be sure to wait at least 24 hours before its first wash to let the ink fully cure.
If you want to get even more granular on the process, our guide on how to print heat transfers has some extra tips and tricks.
Solving Common Transfer Printing Issues
Even with the best gear and a killer design, things can sometimes go sideways. That T-shirt that looked absolutely perfect on the press might come out of the first wash looking faded, cracked, or like it's aged ten years. Don't panic—these problems are incredibly common, and pretty much every printer has been there. The real skill is knowing how to spot the cause and fix it.
Most transfer printing headaches boil down to three things: time, temperature, and pressure. Nailing the balance between this trio is the secret sauce for creating prints that look amazing and last. This section is your first-aid kit for heat press creations, walking you through the usual suspects and giving you clear, simple steps to get things back on track.
Why Your Print Is Fading or Cracking
This one is a real heartbreaker. You've made a beautiful garment, it goes through one wash cycle, and the design comes out looking battered and old. The good news? This kind of premature ageing is almost always preventable and usually points back to a hiccup during the initial press.
Here are the most common culprits:
- Not Enough Heat or Pressure: The adhesive layer on your transfer print paper needs a certain amount of heat and some good, firm pressure to properly bond with the fabric's fibres. If you're too low on either, the ink just sits on the surface instead of curing into the material, making it easy prey for a washing machine.
- Cutting the Time Short: Every transfer paper has its own ideal press time. Shaving off even a few seconds can mean the difference between a permanent bond and a weak one that just won't hold up.
- Washing It Too Soon: A freshly pressed transfer needs a moment to fully set. We always recommend waiting at least 24 hours before its first wash. This gives the polymers in the ink and adhesive time to completely harden and lock into the fabric for good.
The fix? Go back to basics. Find the manufacturer's instructions for your specific transfer paper and make sure your heat press is dialled in to their exact recommendations for temperature, pressure, and time.
Tackling Dull or Uneven Colours
You printed a design bursting with vibrant colour, but after pressing, it looks muted, patchy, or just plain lifeless. This problem can really suck the energy out of your artwork, but the solution is often found in your printer settings or the press itself.
First up, check your print quality. Before you even think about printing onto your transfer paper, dive into your printer settings and select the highest quality option available—often called "photo" or "best." This tells the printer to lay down more ink, giving you a much richer, more saturated image that's ready for transfer. A standard or "draft" setting just won't cut it.
Another major cause is uneven pressure from your heat press. If your press isn't applying force equally across the whole design, some spots will get less love. This leads to a weaker transfer in those areas and a patchy, inconsistent finish.
Key Takeaway: Consistent, even pressure is completely non-negotiable for professional-looking results. If you think your press might be uneven, try the carbon paper test: place a sheet of paper and carbon paper on the bottom platen, then clamp it down. The mark it leaves should be solid and uniform.
How to Fix Poor Adhesion and Peeling Edges
There's nothing more frustrating than seeing the edges of your design start to lift right after you've pressed it. This is a classic sign that the bond between the transfer and the garment is weak, especially around the outside of your design.
Here’s what you should look out for:
- Obstacles on the Garment: Things like zips, thick seams, buttons, or even chunky collars can stop the heat press from closing properly. This creates a gap where pressure can't reach, leaving the edges of your transfer vulnerable. Make sure your printing surface is always perfectly flat.
- The Wrong Peeling Technique: Transfer papers are picky. Some are "hot peel" (you peel the backing off immediately), while others are "cold peel" (you have to wait for it to cool down). Peeling at the wrong temperature can wreck the bond before it's had a chance to set, causing those edges to lift right up.
- Moisture Hiding in the Fabric: Any dampness trapped in the garment will turn into steam under the heat of the press, and that steam gets in the way of a clean transfer. A quick 3-5 second pre-press is a simple but vital step. It gets rid of that hidden moisture and gives you the perfect dry canvas to work on.
By keeping an eye on these common issues, you'll be able to troubleshoot like a pro and seriously boost the quality and durability of your prints.
Selecting Transfer Print Paper for Business Applications
Moving from a creative hobby to a full-blown business changes the game entirely. Suddenly, choosing the right transfer print paper isn't just about getting a decent print; it’s about balancing quality, cost, and efficiency to keep your business profitable and your customers coming back for more. Every little decision, from the materials you choose to your production method, has a direct impact on your bottom line.
This is where you need to start thinking strategically. You have to weigh the upfront cost of an in-house setup against the long-term benefits of outsourcing. For example, running your own printing operation gives you total control but comes with hefty equipment costs and a bit of a learning curve. On the flip side, partnering with a specialist for pre-made transfers can seriously streamline your workflow, especially as those orders start piling up.
In-House Production vs Outsourcing
Deciding whether to print everything yourself or outsource it is one of the first major hurdles for any growing apparel business. Your choice will really boil down to your order volume, how complex your designs are, and the cash you have on hand.
- In-house Production: This route means buying your own printer, heat press, and all the raw materials. It offers the most flexibility for one-off orders and last-minute changes, but it demands a significant initial investment and ongoing maintenance.
- Outsourcing with DTF Transfers: For businesses looking to scale up, ordering pre-made Direct-to-Film transfers from a supplier like Psyque is often the smarter, more efficient move. This model completely removes equipment costs and the technical headaches of printing, letting you focus purely on pressing your designs. You can find out more about the benefits in our guide on DTF transfer sheets.
Outsourcing your printing turns a large capital expenditure into a predictable operational cost. This lets you scale production up or down with demand, without being tied to expensive machinery that might just sit there.
This infographic is a great tool for visualising some of the common issues you might run into, and it points you towards a solution.
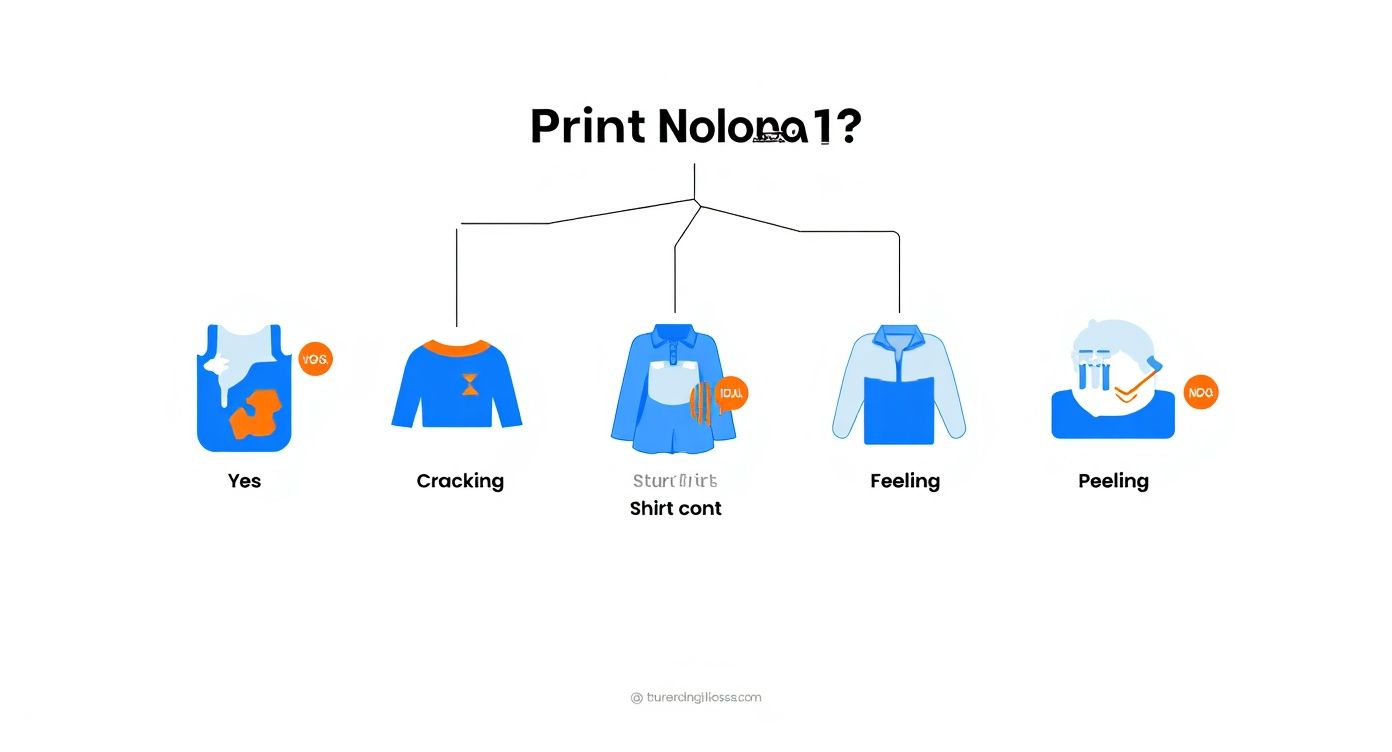
As you can see, most print failures come down to just a few core problems, which really highlights the need for consistent, reliable processes.
Choosing the Right Paper Specifications
Once you’ve settled on a production method, it’s time to get into the nitty-gritty of materials. The weight and thickness of your transfer paper are critical factors that affect both the final print quality and how easy it is to handle during production.
Paper weight is measured in Grams per Square Metre (GSM). From an industry perspective, the 60-90 GSM thickness range is the sweet spot for textile transfer paper here in the UK and across Europe. This weight strikes the perfect balance, offering enough durability to stop it from tearing while staying flexible enough for easy handling during the heat press process. Anything below 60 GSM is often too fragile for commercial use and is quickly falling out of favour.
At the end of the day, making data-driven decisions based on your specific business needs—from order volume to the durability you're after—is the key to success. By carefully picking your materials and production strategy, you can build a sustainable business that delivers top-quality products time and time again.
Frequently Asked Questions About Transfer Print Paper
Key Insight: Heat, Pressure and Time form the pillars of a durable transfer.
Can I Use a Regular Iron Instead of a Heat Press
In a pinch, a household iron can press simple inkjet designs—but the uneven heat and pressure often lead to peeling or colour fade after just a few washes. By contrast, a heat press holds temperature, time and pressure rock-steady, delivering professional-quality prints that last.
Why Did My Design Crack After One Wash
Cracking usually tells you the polymer layer hasn’t fully bonded. Always let your garment rest for 24 hours before its first wash. If you still spot cracks, revisit your heat-press settings—tweaking the temperature, pressure or dwell time often cures the problem.
Iron Versus Heat Press
An iron works for very simple transfers, but it’s hard to maintain consistent heat and pressure across every inch of fabric. A heat press, on the other hand, is purpose-built for even coverage—no hot spots, no guesswork, and much more reliable adhesion.
What Is the Difference Between Paper for Light and Dark Fabrics
Transfer paper for light fabrics sports a clear polymer coating. You must mirror your design so it appears the right way around once pressed. Dark-fabric paper includes an opaque white background, so you print normally (no mirroring required) and your colours stay bold.
How Do I Care for Transfer-Printed Garments
A few simple habits will help your prints stay vibrant:
- Turn garments inside out and wash on a cold, gentle cycle.
- Skip bleach and fabric softeners—they can weaken the transfer bond.
- Hang to dry or tumble on low heat to preserve adhesion.
For your transfer sheets, stash them flat in a cool, dry spot away from direct sunlight. And remember: patience pays off—hold off on washing for at least 24 hours to ensure a full cure.
Order vibrant, durable DTF transfers today from Psyque - DTF Print & Press with secure payment at Psyque - DTF Print & Press