
Custom DTF Transfers Ready to Press A Practical Guide
If you’ve ever looked into custom apparel, you’ve probably heard about custom DTF transfers ready to press. So, what are they? Essentially, they're pre-printed designs on a special film that you can apply to almost any garment with a simple heat press. It's a method that delivers vibrant, full-colour, and durable prints without the messy, complicated setup of traditional screen printing.
Why DTF Transfers Are a Game Changer for Custom Apparel
Welcome to the world of professional-quality custom apparel, made ridiculously simple. We're going to dive into what makes custom DTF transfers ready to press such a big deal and why they're completely changing the game for creators and small businesses. If you've ever been put off by complex screen printing or the limitations of vinyl, this technology is for you. It puts durable, multi-colour prints within easy reach for anyone with a heat press.
Think of this guide as your practical roadmap. We'll cover everything from finding a great UK supplier to nailing the pressing process itself, setting you up to confidently bring your digital designs to life on fabric.
Unlocking Creative and Business Potential
The real beauty of DTF lies in just how accessible and high-quality it is. It breaks down the old barriers, opening up huge opportunities for all sorts of people.
- For Small Businesses: It’s perfect for small-batch production. You can test new designs or run off a few staff uniforms without committing to huge, costly orders.
- For Clothing Brands: It delivers a retail-quality finish that feels soft to the touch and holds up through countless washes—an absolute must for building a brand people trust.
- For DIY Creators: It gives hobbyists the power to make professional-grade items right from home, turning a creative spark into a real, tangible product.
The numbers don't lie. The UK's direct-to-film printing market was valued at USD 192.2 million in 2025 and is expected to climb to USD 249.0 million by 2030. This isn't just a fleeting trend; it shows a real, growing demand for personalised apparel, pushed forward by creative industries and small businesses alike.
The best part about DTF technology is that it lets you say "yes" to more projects. It handles those tricky, intricate details and unlimited colours with ease, and it works on fabrics that other methods just can't handle, like polyester and blends.
For anyone thinking about turning this into a proper venture, getting solid advice on starting an online business is a great first step. Taking the time to understand the different types of DTF prints available can also give you a serious edge. This method isn’t just about slapping a picture on a shirt; it’s about creating a durable, professional product that can be the foundation of a successful apparel business.
Choosing Your Supplier and Preparing Perfect Artwork

The final quality of your printed garments really comes down to two things: a solid supplier and flawless artwork. Before you even think about firing up the heat press, you need to nail these two elements. Getting this stage right from the start will save you a world of frustration, not to mention time and money.
Finding the right UK-based supplier is your first big task. Let's be honest, not all printers are the same, so a little bit of homework now pays off later. You've got to look past the headline price and dig into what really counts for producing professional-quality custom DTF transfers ready to press.
Vetting Your UK DTF Supplier
Here’s a quick rundown of what I look for when choosing a partner I can rely on:
- Reviews and Samples Are a Must: Hunt for genuine customer feedback, especially photos of finished products on their website or socials. If you can, grab a small sample pack. There’s no substitute for seeing and feeling the print quality for yourself before you commit to a big order.
- Easy Gang Sheet Options: Does the supplier have a user-friendly gang sheet builder? This is a game-changer for keeping costs down, as it lets you cram multiple designs onto one sheet, squeezing every bit of value out of it.
- Crystal-Clear Artwork Guidelines: A professional outfit will have specific, easy-to-find instructions on file formats, resolution, and colour profiles. If their guidelines are vague or hard to find, that’s a potential red flag.
- Responsive Customer Support: How easy is it to get in touch with a real person if you hit a snag? Good communication is non-negotiable, especially when you’re starting out or dealing with a tricky custom order.
Prepping Your Artwork for a Perfect Press
Once you've locked in a great supplier, all eyes are on your design file. Submitting print-ready artwork isn't just a suggestion; it's essential. Even the world's best printer can't salvage a low-resolution, pixelated design.
The gold standard for DTF printing is a 300 DPI PNG file with a transparent background. This precise format is what gives you that crisp, sharp finish without any dreaded white boxes ghosting your design. Getting this right is a huge part of choosing the right file format for your designs.
To make it even easier, here’s a checklist I run through before sending any file to print. It’s saved me from countless headaches over the years!
Artwork File Checklist for Perfect DTF Transfers
| Requirement | Specification | Why It Matters |
|---|---|---|
| File Format | PNG | Ensures a transparent background, so only your design gets printed. |
| Resolution | 300 DPI (Dots Per Inch) | Guarantees a sharp, high-quality print without any blurriness or pixelation. |
| Background | Transparent | Prevents an unwanted white or coloured box from being printed around your graphic. |
| Colour Mode | RGB | Most DTF printers are calibrated for RGB files, ensuring colour accuracy. |
| Sizing | Sized to the final print dimensions | Prevents the printer from having to scale your art, which can distort it. |
| Clean Edges | No stray pixels or soft edges | Avoids a faint, hazy outline around your design after pressing. |
Sticking to this checklist ensures your vision translates perfectly from the screen to the fabric every single time.
Pro Tip: Always, always double-check your design for "stray pixels" or semi-transparent edges. These sneaky little artefacts can get picked up by the printer's software and leave a faint, unwanted haze around your design. Zoom right in and clean up any messy edges before you export.
Think about it this way: you’re prepping a multi-colour logo for a client’s hoodie order. If you send it over as a 72 DPI JPEG, you're setting yourself up for a blurry, unprofessional disaster.
Instead, you’d open the original vector file, set your canvas to the exact print dimensions, and export it as a 300 DPI PNG, making sure that "transparent background" box is ticked. This is the difference between an amateur result and a professional one. If you're looking to buy DTF transfers, getting your artwork spot-on is the single most important step you can take.
Getting Your Heat Press and Workspace Dialed In
A flawless print starts long before the transfer ever touches the fabric. It begins with a well-prepped space. Let's move past the theory and get into the practical side of setting up your workspace for pressing custom DTF transfers ready to press. A tidy, organised environment doesn't just make the process smoother; it dramatically boosts the quality and consistency of your finished garments.
Before you even think about switching on the press, get your essential tools together. Having everything you need within arm's reach is a game-changer and stops any last-minute panic.
- Lint Roller: This is non-negotiable. Seriously. Even tiny fibres you can't see will get trapped under the transfer and show up as annoying little bumps in the final print. A quick once-over with a lint roller makes all the difference.
- Teflon Sheet: You'll also see this called a protective guard sheet. It's a non-stick sheet that goes over your transfer during pressing. It's your best friend for protecting the garment from direct heat, stopping any ink from sticking to the top platen, and ensuring the heat is spread evenly.
- Heat Resistant Tape: Absolutely invaluable for keeping your transfers exactly where you want them. It's a lifesaver for smaller items or tricky placements like sleeves, ensuring your design doesn't slide about when you clamp the press down.
Nailing Your Heat Press Settings
Your heat press is the heart of the whole operation, and getting its settings just right is everything. Think of it like a recipe with three core ingredients: temperature, time, and pressure. If any one of these is off, the whole thing can be a disaster. If you're just starting out, taking the time to learn how to choose the right UK heat press machine is your first massive step toward getting professional results.
These three pillars work together to melt the transfer's adhesive and fuse the ink right into the fabric's fibres. Your transfer supplier will give you their recommended settings, but here are the starting points I always rely on for common fabrics.
Go-To Settings for Common Fabrics
| Fabric Type | Temperature Range (°C) | Time (Seconds) | Pressure Level |
|---|---|---|---|
| 100% Cotton | 150-160°C | 12-15s | Medium-Firm |
| 100% Polyester | 135-145°C | 10-12s | Medium |
| Poly-Cotton Blends | 145-155°C | 10-15s | Medium-Firm |
So, what does 'medium-firm' pressure actually feel like? It’s a question I hear all the time. A good rule of thumb is that it should take a solid bit of effort to lock the handle down, but you shouldn't be straining your entire body to do it.
Here's a little trick I use to check my pressure – the "paper test." Stick a piece of regular paper in each of the four corners of your press and clamp it shut. Now, try to pull the papers out. You should feel a consistent, firm resistance on all four. If one slides out easily, your pressure is uneven and needs adjusting.
The One Habit You Can't Skip: The Pre-Press
Finally, let's talk about the single most important habit for a perfect application: the pre-press. This is just a quick, 3-5 second press of the blank garment before you even think about placing your transfer.
This simple step does two critical things. First, it zaps any lingering moisture hiding in the fabric – moisture is the enemy of a good transfer adhesive. Second, it smooths out every last wrinkle, giving you a perfectly flat canvas for your design. Skipping the pre-press is one of the biggest and most common mistakes I see beginners make. Do yourself a favour and make it a non-negotiable part of your routine.
The Art of a Flawless DTF Application
This is the moment of truth. All your careful prep work comes down to this: the press. Getting the application just right is part science, part feel, but if you stick to a solid workflow, you'll nail it every time with your custom dtf transfers ready to press. From prepping the garment to that final, satisfying peel, every little detail matters.
Alright, after your pre-press, lay the garment out flat and give it one last look over. Now, it's time to position your transfer. A classic trick for a big chest print on a t-shirt is to fold the shirt in half vertically to create a subtle centre crease. Then, just line up the middle of your transfer with that crease. Simple. For smaller logos on a sleeve or pocket, a ruler is going to be your best mate. Don't rush this part; a few extra seconds here makes all the difference.
This infographic really gets to the heart of what you're juggling on your heat press to get that perfect finish.
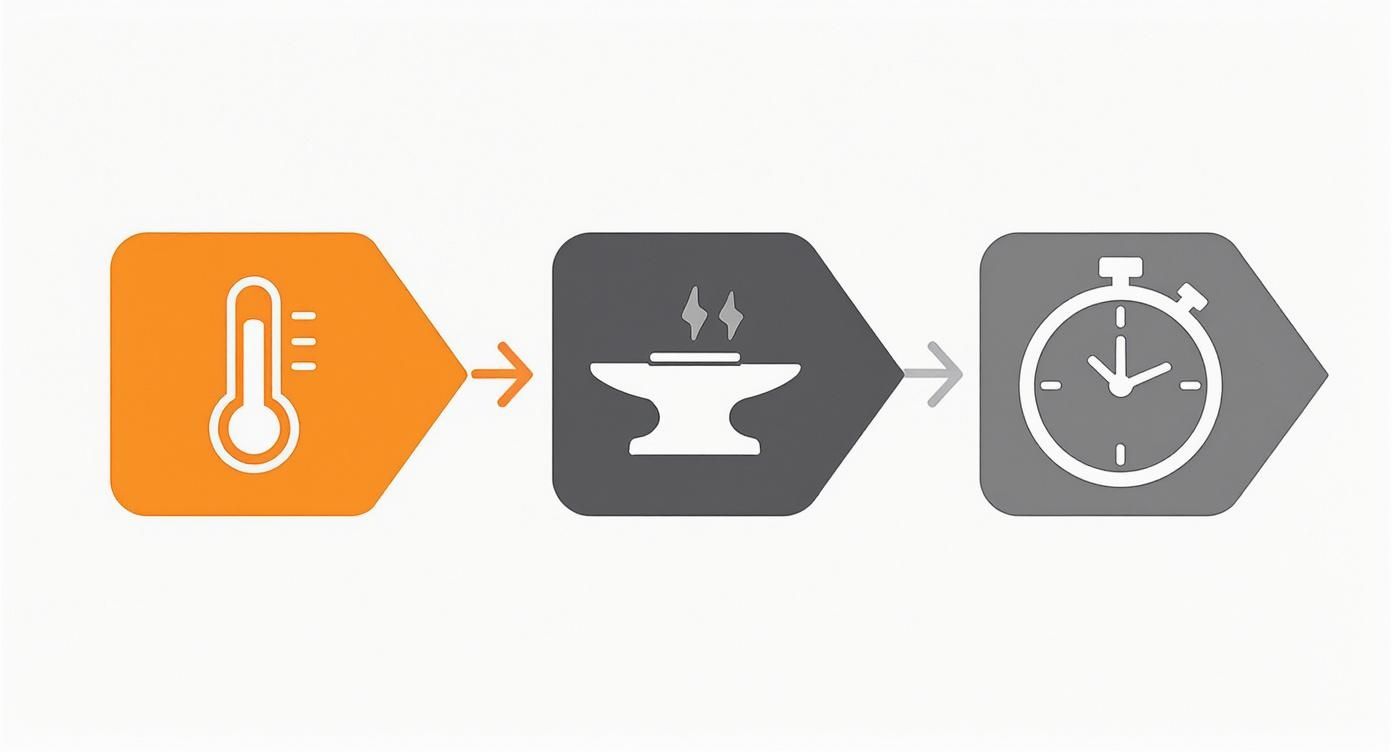
As you can see, it's all about the interplay between temperature, pressure, and time. Get that trio working in harmony, and you’re golden.
The Main Press and The Big Peel
Once your transfer is sitting perfectly, cover it with a Teflon sheet. This is a must-do to protect both the transfer and the hot plate of your press. Clamp it down firmly and hit that timer. This is the main event, where the adhesive melts and weaves itself into the fabric fibres. When the timer pings, lift the handle smoothly.
Now for the hardest part of the entire DTF process: waiting. The vast majority of DTF transfers are "cold peel," meaning you absolutely have to let the film and the garment cool down completely before you even think about peeling. Trying to peel it while it's still warm is asking for trouble—you'll end up with a lifted, stretched, or patchy design. Just be patient.
When the garment is properly cool to the touch, find a corner and start peeling the film back. Keep the angle low and your speed slow and steady. This is where you finally see your crisp, vibrant design come to life. If you want to get into the nitty-gritty, our guide on DTF transfer sheets has even more detailed tips.
The Finishing Press: A Non-Negotiable Step
You might feel like you're done after the peel, but hold on. There's one last, quick step that separates the good prints from the genuinely professional ones. This finishing press isn't optional; it's essential for getting maximum durability and a top-tier look and feel.
The second press does more than just lock in the design; it pushes the ink further into the fabric's weave. This not only improves washability but also transforms the feel of the print, removing any plastic-like shine and leaving a soft, desirable matte finish.
It's easy. Just place your Teflon sheet directly over the freshly revealed design and press it again for just 5-7 seconds at the same temperature and pressure. It’s a tiny step that makes a massive difference.
This kind of quality is why the technology has become such a big deal for UK businesses. In fact, the t-shirts segment alone accounts for 41% of the global DTF printing market’s revenue, a figure that reflects the UK's booming custom apparel scene. The ability to create durable, high-detail prints on cotton and blends is exactly why so many streetwear and casualwear brands have jumped on board. You can read more about these trends and their impact on the direct-to-film printing market.
Dealing with Tricky Garments
So, what happens when you’re faced with zips, buttons, or thick seams? These things mess with the pressure, creating uneven spots where the transfer won’t stick properly. This is where a pressing pillow is an absolute lifesaver. You just slide one of these heat-resistant foam pads inside the garment. It raises the printing area so the press gets full, even contact, while the awkward seams and zips just sink into the pillow. Problem solved.
Aftercare and Troubleshooting: Keeping Your Prints Perfect
The job isn’t over when the heat press pops open. The real mark of quality is a print that still looks fantastic months and years down the line. Nailing the aftercare is just as important as the application itself, and knowing how to fix the odd hiccup will save you a world of frustration.
First things first, let's talk washing. Giving your customers (or yourself!) clear instructions is the single best way to protect your work. A few simple rules can dramatically extend the life of a print, stopping the fading, cracking, and peeling that a harsh wash routine can cause.
The Golden Rules of Washing and Care
The main goal here is to be gentle. Modern DTF transfers are incredibly tough, but even the best print will suffer from an aggressive wash cycle.
- Turn It Inside Out: This is non-negotiable. Washing the garment inside out is the easiest way to protect the print from rubbing against other clothes and the washing machine drum.
- Keep It Cool: Stick to a cool wash cycle, ideally around 30°C. High heat can slowly weaken the transfer's adhesive over time.
- Go Easy on the Chemicals: Forget the bleach and harsh detergents. A mild, standard detergent is all you need to get things clean.
- Avoid the Tumble Dryer: This one’s a biggie. The intense, prolonged heat from a tumble dryer is the quickest way to ruin a print. Always let your garments air-dry, either on a line or laid flat.
Following these steps will keep the colours looking sharp and the transfer perfectly intact for dozens of washes—often outlasting the garment itself.
By passing these simple care instructions on to your customers, you’re not just ensuring they stay happy with their purchase; you’re reinforcing the quality and durability of your work. It's a small touch that builds a huge amount of trust and keeps people coming back.
Solving Common Pressing Problems
Even when you do everything right, things can occasionally go sideways during pressing. Don't panic. Most DTF issues come down to a handful of common causes, and they're almost always fixable with a small tweak to your process.
If you find your transfer isn't sticking properly in some spots, the culprit is nearly always uneven pressure or the wrong temperature. Double-check that your heat press is calibrated correctly and that no bulky seams, zips, or collars are getting in the way. A pressing pillow can be an absolute lifesaver for this.
What if the print feels a bit stiff or has a plasticky shine? This is a classic sign that it needs that all-important finishing press. The second press is essential for getting that professional, soft-hand feel. A quick 5-7 second press with a Teflon sheet or parchment paper directly on the design melts the ink right into the fabric fibres. This gets rid of that shiny texture and leaves you with a beautiful matte finish.
To make things even easier, here’s a quick guide to diagnosing and fixing the most frequent frustrations.
Common DTF Pressing Problems and Solutions
Sometimes, you just need a quick cheat sheet to figure out what's gone wrong. This table breaks down the most common issues you're likely to face and tells you exactly how to sort them out.
| Problem | Likely Cause | How to Fix It |
|---|---|---|
| Transfer Not Sticking | Not enough pressure, temperature is too low, or peeling while it's still warm. | Increase the pressure on your press, double-check your temperature settings, and make sure the transfer is completely cool to the touch before peeling. |
| Print Cracking/Peeling After Washing | The garment wasn't pre-pressed, or the vital second press was skipped. | Always pre-press your garments to get rid of moisture. Crucially, always perform a final 5-7 second press to fully cure the ink into the fabric. |
| Colours Look Faded or Burnt | The temperature is too high, causing the ink to "burn," especially on synthetics. | Drop your heat press temperature by 5-10 degrees and run another test. This is a very common issue with polyester fabrics. |
| Uneven or Patchy Print | Uneven pressure caused by seams, collars, zips, or an uncalibrated press. | Use a pressing pillow to raise the print area so the platen makes consistent, firm contact across the entire design. |
Once you get the hang of these simple aftercare and troubleshooting steps, you'll be set to produce flawless results every single time with your custom dtf transfers ready to press.
Your Questions About Custom DTF Transfers Answered
Once you start working with custom DTF transfers ready to press, you're bound to have a few questions. It’s completely normal. Getting clear answers is the best way to build your confidence and really nail the process. So, let’s run through some of the most common queries we hear.
Getting the basics down, like what DTF actually means, gives you a solid foundation for everything else. If you fancy a bit more detail on the jargon, our guide explaining what DTF stands for is a great place to start.
What Types of Fabric Can I Press DTF Transfers Onto?
One of the best things about DTF is just how versatile it is. These transfers work brilliantly on all the usual suspects like 100% cotton, polyester, and poly-cotton blends. That covers the vast majority of standard garments—think t-shirts, hoodies, and sweatshirts.
But the good news doesn't stop there. DTF is also tough enough for more difficult materials like nylon, denim, and even some leathers. The key is to tweak your heat press settings—your temperature and time—to suit the specific fabric. This stops you from scorching the material while making sure you get a rock-solid application.
How Long Do DTF Transfers Last After Being Pressed?
When they’re put on properly, high-quality DTF transfers are incredibly long-lasting. You can realistically expect them to hold up for 50-100 washes, which often means the print will outlast the garment itself.
The lifespan of the print really comes down to three things: the quality of the transfer you bought, how well you pressed it (don't forget that second press!), and how the garment is looked after. Simple care instructions, like washing on a cool cycle and keeping it out of the tumble dryer, go a long way in making the print last.
A well-applied DTF transfer literally fuses with the fabric's fibres. This creates a bond that stands up to cracking, peeling, and fading, which is exactly why so many professional brands now use this method for retail-quality finishes.
Do I Need a Special Type of Heat Press?
Nope, you don't need to go out and buy a special 'DTF' heat press. Any standard, decent-quality clam-shell or swing-away press will do the job perfectly.
What really matters is that your press can hold a steady temperature and apply consistent, even pressure across the entire platen (the heated plate). A home iron just won't cut it because it can't provide the right pressure or stable heat. But any professional or even a good prosumer-level heat press is more than capable of applying your transfers beautifully.
At Psyque, we're all about providing top-tier custom DTF transfers ready to press for businesses, creators, and hobbyists across the UK. Have a look at our collections and see how we can bring your designs to life. Visit us at https://psyque.co.uk to get started.