
Your Ultimate Guide to DTF Transfer Printing
So, what exactly is Direct-to-Film, or DTF transfer printing? In simple terms, it's a clever way to print a design onto a special film, coat it with an adhesive powder, and then press it onto a piece of clothing using heat.
Think of it like creating a high-end, super-flexible, and colourful fabric sticker that permanently becomes one with almost any material you can think of.
Understanding the World of DTF Transfers
At its heart, DTF transfer printing is the bridge between a digital design on your screen and a real, wearable piece of art. The process itself is surprisingly straightforward but incredibly effective. It all starts with printing your design onto a clear PET (polyethylene terephthalate) film. This film acts as a temporary carrier for the ink, unlike other methods that print straight onto the fabric.
After the colour layers go down, a vital layer of white ink is printed on top. This white base is the secret sauce behind DTF’s amazing vibrancy. It guarantees that your colours will pop on any garment, whether it's a bright white cotton tee or a dark black polyester hoodie. This single step is what makes the whole process so versatile and dependable.
The Magic of Adhesive Powder
Once printed, the still-wet ink on the film gets a dusting of a fine, hot-melt adhesive powder. This stuff is smart – it only sticks to the ink, creating a perfect adhesive layer that precisely matches your design. The film is then heated, or "cured," melting the powder into a smooth sheet of glue, ready for action.
This brilliant use of film and powder is exactly why DTF transfer printing shines where other methods fall short. You don't need to pre-treat the fabric like you do with Direct-to-Garment (DTG) printing, and you can forget the complicated screen setups of traditional screen printing.
The core idea is simple but powerful: instead of preparing the garment, you prepare the transfer. This simple switch unlocks compatibility with a huge range of materials that used to be a nightmare to customise.
From Film to Fabric
The final step is where the magic really happens. The prepared film, now holding your design and its adhesive layer, is placed onto the garment. A heat press applies pressure and heat, which reactivates the adhesive and bonds the ink permanently into the fabric's fibres.
After a moment to cool, the film peels away, leaving behind a design that feels incredibly soft, stretchy, and tough. It's no wonder this method has become a favourite for so many.
- Unmatched Versatility: It works a treat on cotton, polyester, leather, nylon, and all sorts of blends.
- Exceptional Detail: It can handle everything from photorealistic images and fine lines to complex colour gradients without breaking a sweat.
- Incredible Feel: The final print is thin and flexible, so it moves with the fabric instead of feeling like a stiff plastic patch.
For small businesses and big production houses alike, DTF transfer printing offers a reliable way to create beautiful, high-quality custom apparel with fewer headaches and consistently brilliant results.
The Complete DTF Printing Process Step-by-Step
Seeing a digital idea become a vibrant, wearable piece of clothing is a fascinating journey. The beauty of dtf transfer printing is its logical, step-by-step workflow. Each stage builds on the last to create a final product that’s both stunning and durable. Let's walk through exactly how it works, from the first click to the final press.
This infographic gives you a bird's-eye view of the core stages, starting with the digital file and ending with the heat press.
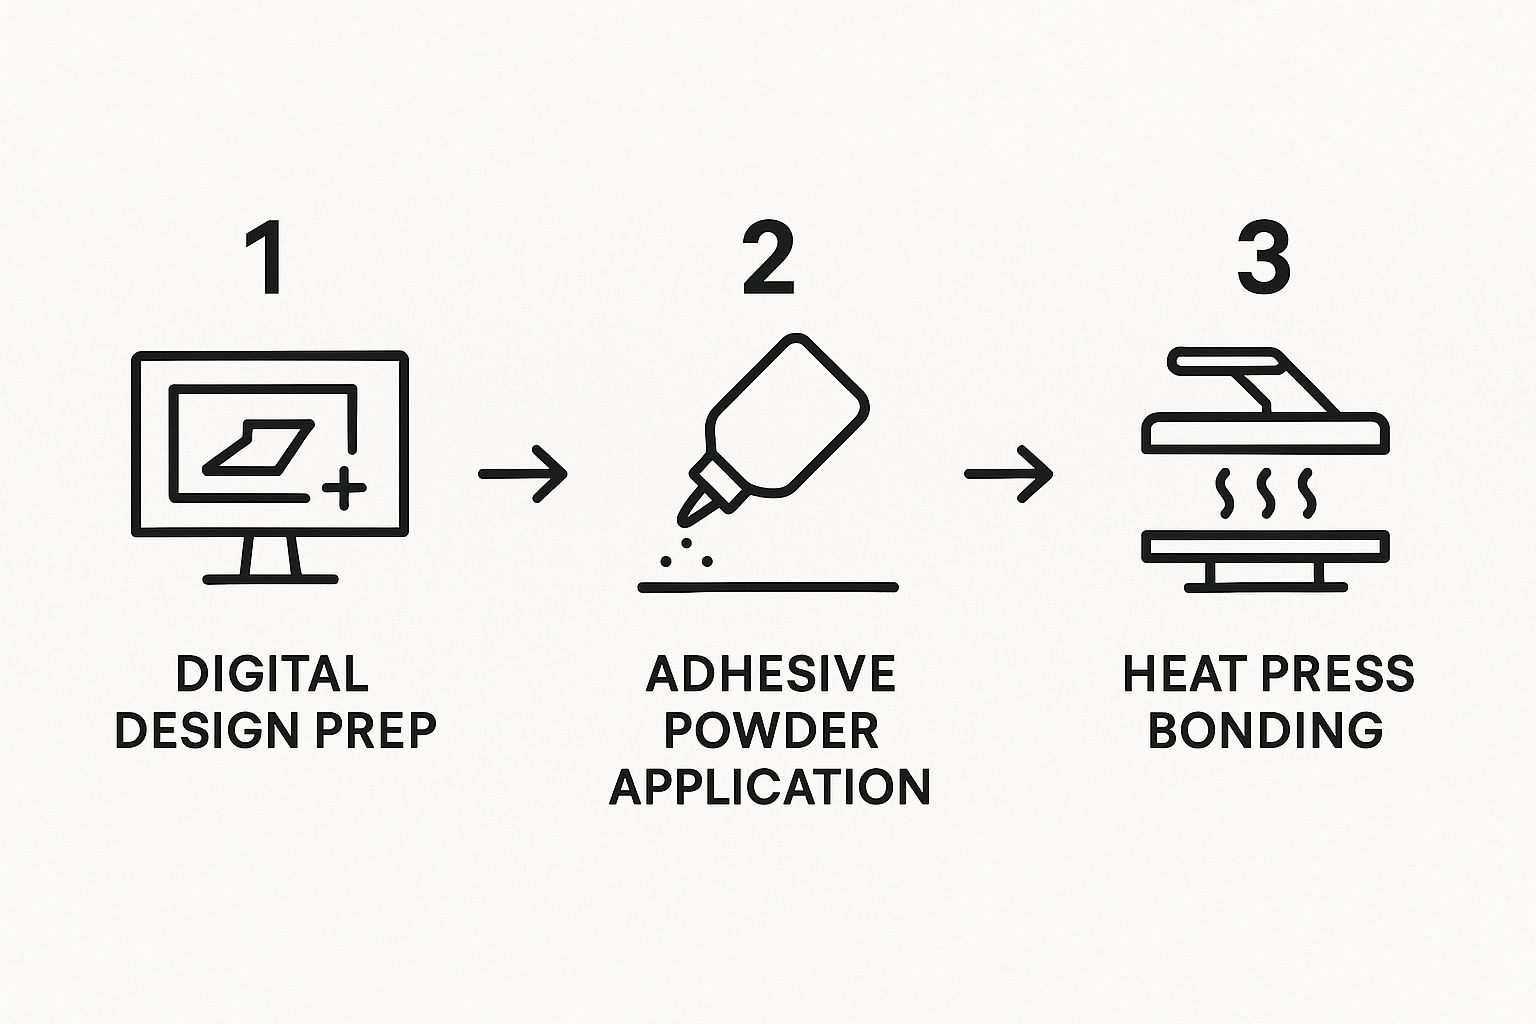
As you can see, the process flows from an intangible design to a physical transfer. That adhesive powder? It’s the critical bridge connecting the ink to the final garment.
Step 1: Preparing Your Digital Design
Everything starts with your artwork. Before a single drop of ink hits the film, your design needs to be properly prepped to guarantee a top-quality result. This isn't just about creating a cool-looking image; it's about getting it technically spot-on for the DTF process.
The single most important factor is resolution. Your design file must be at least 300 DPI (dots per inch) at the size you want it printed. If the resolution is too low, you’ll end up with a blurry or pixelated print, no matter how good the printer is.
File format is another key detail. For the best results, always use a file with a transparent background, like a PNG, PSD, or AI file. This transparency is crucial because the printer only puts ink where your design actually is, leaving the rest of the film completely clear.
Step 2: Printing Onto the PET Film
With your design finalised and ready to go, the next stage is printing it onto a special PET (polyethylene terephthalate) film. This isn’t your average plastic sheet; it's chemically coated to perfectly accept and hold the DTF inks, ensuring the transfer is sharp and vibrant.
The DTF printer first lays down the coloured inks (Cyan, Magenta, Yellow, and Black) to recreate your design. Then, in a clever second pass, it prints a layer of white ink directly over the top. This white underbase is the secret ingredient behind DTF's success. It acts as an opaque foundation that makes your colours truly pop on any garment, especially dark or coloured fabrics. Without it, the colours would just look dull and washed out.
If you're curious about the hardware that makes this happen, knowing the components can be a huge help. To dive deeper into the machinery that powers this stage, feel free to explore our detailed guide on choosing a DTF printing machine.
Step 3: Applying the Adhesive Powder
This is where the real magic happens. While the ink on the PET film is still wet, it gets coated with a fine, sugary-looking thermoplastic polyurethane (TPU) powder. You can think of this powder as the glue that will eventually fuse your design to the fabric.
The powder needs to be applied evenly, covering every last bit of the wet ink. The clever part is that the powder only sticks to the printed areas, so there's no need to worry about rogue adhesive messing up your design. Once it’s coated, any loose powder is shaken off, leaving a perfect adhesive layer that precisely mirrors your artwork.
Key Takeaway: The adhesive powder is the essential link between the printed ink and the fabric. An uneven application can lead to parts of the transfer not sticking properly, compromising the print's durability.
Step 4: Curing the Transfer
Now it’s time to cure the transfer. The film, now layered with ink and powder, is passed through a heat source—either a curing oven or a heat press hovering just above the surface. The goal here isn't to dry the ink but to melt the adhesive powder.
The heat transforms that grainy powder into a smooth, rubbery sheet of adhesive. This usually takes a couple of minutes at a temperature of around 120°C to 160°C. Getting the curing just right is vital; under-curing leads to a weak bond, while over-curing can damage the film or the ink. What comes out the other side is a ready-to-press transfer sheet, all set for the final step.
Step 5: Heat Pressing Onto the Garment
Finally, we apply the cured transfer to your chosen garment. Before you place the transfer, it's always a good idea to pre-press the fabric for about five seconds. This quick step removes any hidden moisture and smooths out wrinkles, creating a perfectly flat surface for the transfer.
The DTF transfer is then positioned carefully on the garment, and the heat press is brought down with firm pressure. The heat reactivates the melted adhesive, forcing it to bond deep into the fabric's fibres. After pressing for around 10-15 seconds, the garment is set aside to cool. Once cooled, the PET film is peeled away, leaving behind a flawless, vibrant, and permanent design.
DTF Printing vs Other Customisation Methods
Choosing the right way to customise a garment can feel like navigating a maze of acronyms. DTF, DTG, HTV, Screen Printing… where do you even start? When you're deciding how to bring your designs to life, understanding the real-world pros and cons of each method is crucial.
DTF is the new kid on the block that’s been making some serious waves, but how does it actually compare to the tried-and-true titans of the industry? Let’s break it down. It’s not about finding the one "best" method, but about picking the smartest tool for the job you have in front of you.
DTF vs Screen Printing
Screen printing has long been the heavyweight champion of bulk apparel. If you need a thousand t-shirts with a simple, two-colour logo, it’s almost impossible to beat on price per piece. The whole process revolves around creating stencils (screens) for each colour and pushing ink through them onto the fabric.
But that setup is also its Achilles' heel for smaller projects. Making those screens is a time-consuming and costly affair, making it completely impractical for one-off prints or small batches. Got a design with six colours? You'll need six different screens, and that initial cost adds up fast.
This is exactly where DTF transfer printing shines, especially for small businesses, start-ups, and anyone needing custom gear without massive order quantities.
- No Colour Limits: DTF can print photorealistic images with millions of colours without a single extra setup fee. A simple logo costs the exact same to produce as a full-colour photograph.
- Small Runs Welcome: Since there are no screens to burn, DTF is ridiculously cost-effective for small to medium-sized orders. You can print one t-shirt just as easily as you can print fifty.
- Pin-Sharp Detail: DTF is a master of fine lines and tiny, intricate details that can easily get lost or clog up a screen printing mesh.
Think of it this way: Screen printing is like an industrial press, perfect for churning out thousands of identical newspapers. DTF is like a professional photo printer, giving you stunning, full-colour prints on demand, one at a time if you need.
For a deeper look at how these two stack up for graphic tees, check out our guide on DTF vs screen printing.
DTF vs Direct-to-Garment (DTG)
On the surface, DTF and DTG look like twins. Both are digital methods that can produce gorgeous, full-colour designs. DTG is essentially a big inkjet printer that applies ink directly onto the garment's fibres.
The key differences pop up when you talk about fabrics and preparation. DTG is at its best on 100% cotton and needs a chemical pre-treatment spray to make the ink stick, especially on dark colours. This extra step can sometimes leave a faint box around the design and adds time to the workflow.
DTF sidesteps these issues entirely. Because the design is printed onto a transfer film first, it doesn't care what the final garment is made of. This gives it a massive advantage in flexibility.
- Go-Anywhere Versatility: DTF works brilliantly on cotton, polyester, nylon, leather, and blends—materials where DTG either struggles or just won't work at all.
- Punchy Colours on Dark Synthetics: That white ink base layer in a DTF transfer ensures colours pop on dark polyester, a notorious challenge for DTG printers.
- A Softer Touch: While both feel great, many find that a quality DTF transfer has a slightly smoother, more flexible feel than a heavily pre-treated DTG print.
DTF vs Heat Transfer Vinyl (HTV)
Heat Transfer Vinyl, or HTV, is the go-to for many hobbyists and for simple, bold graphics. The process is straightforward: cut your design from a sheet of coloured vinyl, then use a heat press to apply it to the shirt.
It's fantastic for names, numbers on jerseys, and single-colour logos. But its limitations become obvious with more complex art. If you want to layer multiple colours of vinyl, you're in for a tedious process that can result in a thick, stiff, and heavy design that feels like a plastic shield. It’s also completely out of the question for photos or gradients.
DTF provides a much more elegant solution for any design with more than one colour. You get a single, thin, and pliable transfer that feels more like it's part of the fabric instead of a thick layer sitting on top of it.
A Quick Comparison
To make things even clearer, let's put these methods head-to-head on the features that matter most.
| Feature | DTF Transfer Printing | DTG Printing | Screen Printing | Heat Transfer Vinyl |
|---|---|---|---|---|
| Best For | Small-to-medium runs, full-colour designs, various fabrics | Small runs, full-colour on 100% cotton garments | Large bulk orders (100+) with limited colours | Simple text, numbers, and single-colour logos |
| Colour Capability | Unlimited, photorealistic | Unlimited, photorealistic | Limited; each colour adds cost and complexity | Limited to available vinyl colours; layering is difficult |
| Fabric Compatibility | Excellent (Cotton, poly, blends, leather, nylon) | Best on 100% cotton; struggles with synthetics | Very good (Most fabrics with the right ink) | Good (Cotton, poly, blends) |
| Feel on Garment | Soft, smooth, and flexible | Very soft, as ink soaks into fibres | Can be heavy, depending on ink layers | Often thick and stiff, especially with layers |
| Durability | Excellent; very resistant to cracking and peeling | Good, but can fade with repeated washing | Excellent; very durable for workwear and sportswear | Good, but can peel or crack over time |
| Setup Cost | Very low; no per-design setup | Low; requires pre-treatment but no screens | High; requires a separate screen for each colour | Low; requires a vinyl cutter |
Each method has its place, but as you can see, DTF fills a crucial gap, offering the versatility and colour freedom of digital printing without the fabric limitations.
Your Essential DTF Printing Toolkit
Getting started with DTF transfer printing takes more than just a great design. You need the right gear. Think of it like setting up a professional kitchen—every tool and ingredient has a crucial part to play in getting that perfect final result. From the printer that lays down your artwork to the heat press that makes it a permanent part of the fabric, knowing your tools is the first step to a smooth workflow.
Whether you're a hobbyist firing up a printer in your spare room or a growing business looking to scale, the core toolkit is pretty much the same. The real trick is picking equipment that fits your budget, production goals, and overall ambition. Let's break down the essential hardware and supplies you’ll need to build a solid DTF operation.
The Core Hardware
This is the heart of your setup. The machinery does all the heavy lifting, turning your digital files into vibrant transfers ready for pressing. A smart investment here will pay off big time in quality and consistency down the line.
-
The DTF Printer: Don't mistake this for your average office printer. A dedicated DTF printer is built to handle specialised pigment inks and print directly onto PET film. The most critical feature is its ability to print a layer of white ink. This creates an opaque base that makes your colours pop on any garment, light or dark. Entry-level models are often modified inkjet printers, while industrial machines are built for speed and high-volume production.
-
Curing Equipment: Once you've applied the adhesive powder, the transfer needs to be cured. A dedicated curing oven is the pro's choice, tumbling the transfers through a heated chamber for perfectly even results. If you're on a tighter budget, you can also use a heat press with a "hover" function, which lets you melt the powder without making direct contact.
-
The Heat Press: This is where the magic happens. A good heat press is non-negotiable, delivering the exact temperature and even pressure needed to permanently bond the transfer to the fabric. Look for a press with a sturdy frame and reliable digital controls—it's the only way to guarantee every single print comes out looking flawless.
Essential Consumables and Supplies
Alongside your machinery, you'll need a constant stock of consumables. The quality of these materials has a direct impact on the look, feel, and durability of your final prints, so don't cut corners here.
Specialised DTF Inks
DTF printing relies on a unique set of water-based pigment inks. You'll need the standard CMYK (Cyan, Magenta, Yellow, Black) for the colour layer, but the real star of the show is the crucial white ink. This ink is much denser than the others and is used to create the underbase, which is the foundation of the entire process.
The demand for these inks is skyrocketing, reflecting just how quickly the DTF method is being adopted across the UK and Europe. The global DTF ink market is expected to reach an estimated USD 4.56 billion in 2024 and is growing at a massive 9.6% annually. This isn't just about T-shirts; it's being driven by all sorts of promotional industries. You can find more data on the DTF ink market on Metastat Insight.
PET Transfer Film
This is the carrier sheet that holds your design until it's ready to be pressed. These PET (polyethylene terephthalate) films have a special coating that accepts the ink without letting it bleed, which is how you get those razor-sharp lines and crisp details. They're available in both rolls and pre-cut sheets.
Hot Peel vs. Cold Peel Film: The big difference here is when you peel the film away. With hot peel, you remove the film immediately after pressing, while the garment is still hot. This usually leaves a softer, more matte finish. Cold peel films, on the other hand, need to cool down completely before being removed, which typically gives you a glossier, smoother result.
We've gone into much more detail on what makes a quality transfer in our guide to DTF transfer sheets, so be sure to check that out.
TPU Adhesive Powder
This fine, white powder is the secret sauce that holds everything together. After printing, you sprinkle it over the wet ink, where it sticks only to your design. When you heat it, this Thermoplastic Polyurethane (TPU) powder melts and forms a smooth, even adhesive layer. This is what bonds to the fabric fibres during the final press. Without it, your design would literally wash right off.
Mastering Fabric and Material Compatibility
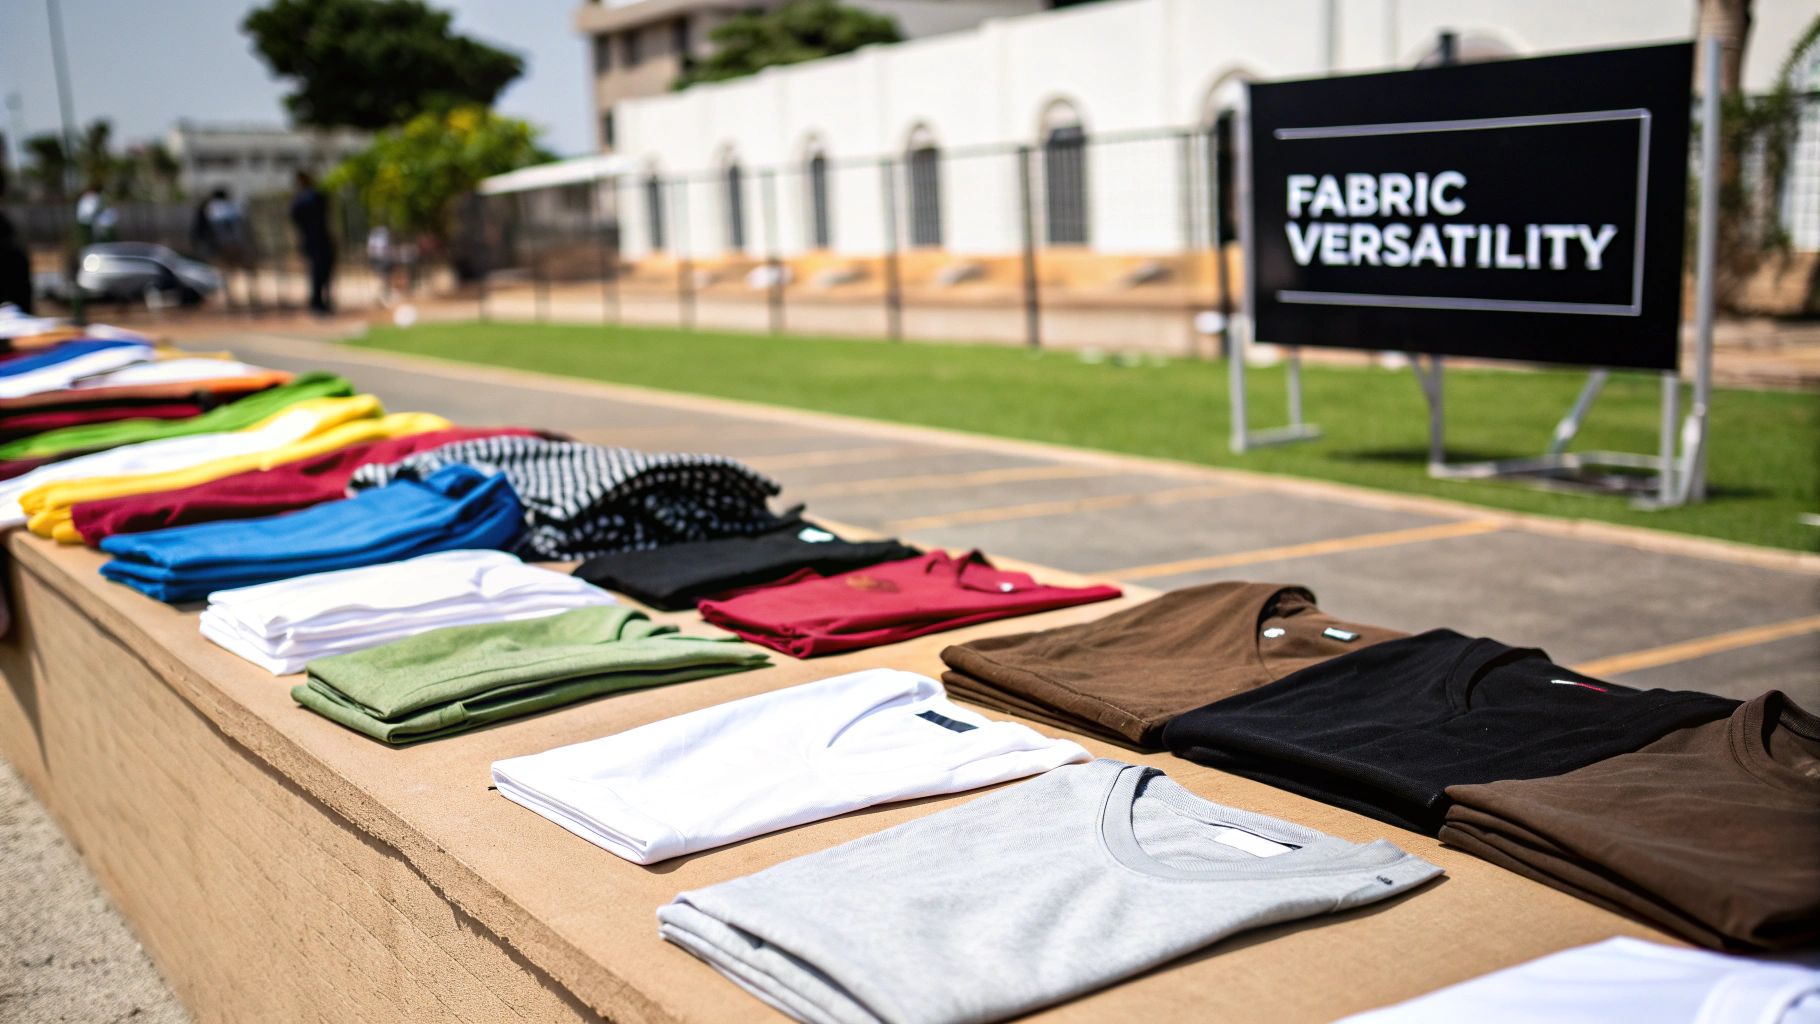
If there's one area where DTF transfer printing truly runs rings around the competition, it's the incredible range of materials it works with. While other methods can be notoriously picky about fabrics, DTF is the easy-going friend in the customisation world, happy to bond with almost anything you can think of.
This flexibility is a genuine game-changer. You're no longer stuck printing on just 100% cotton t-shirts. DTF printing opens up a whole universe of creative possibilities, letting you build a diverse and exciting product line that simply isn't possible with techniques like DTG.
Beyond the Basic Cotton Tee
Of course, DTF works beautifully on cotton, giving you vibrant, tough prints every time. But its real magic becomes clear when you start working with more challenging materials. Because the design is printed onto a film first and then applied with an adhesive layer, the whole process is far less bothered by what the fabric is actually made of.
This unique approach means it performs brilliantly on a huge range of textiles that often cause headaches for other printing methods.
- Polyester and Performance Wear: DTF is the absolute go-to for sportswear. It sticks perfectly to synthetic polyester fibres without needing special inks, creating prints that are just as stretchy and breathable as the garment itself.
- Tricky Fabric Blends: Tri-blends and 50/50 cotton-poly mixes can be a nightmare for DTG printing. DTF handles them without breaking a sweat, ensuring consistent colour and a solid, lasting bond.
- Nylon and Ripstop: Think custom rain jackets, branded windbreakers, or durable gym bags. DTF’s powerful adhesive creates a reliable bond on these slick, often-treated surfaces that would cause other prints to fail.
The key takeaway is simple: with DTF, the print sits securely on top of the fabric, bonded by the adhesive. This means you can customise based on what looks best, not just what your printer will allow.
Expanding into New Product Categories
This material compatibility isn’t just a nice technical feature; it's a massive business opportunity. It lets you offer products that your competitors simply can't produce, helping you tap into new markets and meet fresh customer demands.
A major reason DTF transfer printing has taken off in the UK is the huge appetite for personalised clothing. While t-shirts are a cornerstone, making up around 41% of the global DTF market in 2024, it's the ability to print on other items that sets innovative brands apart. This is especially true here in the UK, where people value unique fashion that goes beyond a standard tee. You can find more data on this growing market at kbvresearch.com.
Just think about the possibilities this unlocks:
- Branded Sportswear: Create vibrant logos for local sports teams on moisture-wicking polyester jerseys.
- Custom Accessories: Design intricate, full-colour graphics for rugged canvas tote bags or stylish backpacks.
- Unique Headwear: Apply detailed custom patches to leather hats or nylon caps, creating premium-feel products.
- Workwear and Uniforms: Print durable, wash-resistant logos onto tough poly-cotton work jackets and high-visibility vests.
This power to print on almost anything truly establishes DTF as the ultimate solution for anyone looking to offer a properly diverse and creative range of customised goods.
Pro Tips for Flawless DTF Printing Results
Getting those professional, long-lasting results with DTF transfer printing really comes down to nailing the small details. The difference between a good print and a truly great one is all about paying close attention at every stage, from the digital file right through to the final press. Let’s walk through the expert tips that will help you sidestep common mistakes and produce flawless custom gear every single time.
It all starts with your artwork. A brilliant design can easily be let down by poor file prep. You absolutely must create your design at a minimum of 300 DPI (dots per inch) at the final size you intend to print it. This high resolution is the secret to getting sharp, crisp lines and avoiding that dreaded pixelated look on the finished garment.
You also need to be careful with very fine lines and tiny bits of text. Anything thinner than 0.02 inches is asking for trouble—it might not print clearly or transfer properly because there just isn't enough surface area for the adhesive powder to grab onto. If you simplify any overly fiddly elements, you're guaranteed a much cleaner and more durable print in the end.
Perfecting Powder Application and Curing
Once your design is printed onto the PET film, the next make-or-break step is applying the adhesive powder. The aim here is a perfectly even, consistent coating that covers every last drop of wet ink. Uneven powder application is one of the biggest reasons prints fail, leading to peeling or cracking after just one wash.
After you've shaken off the excess, take a second to hold the transfer up to a light source. Check for any gaps or clumps in the powder. A smooth, uniform layer is what creates a strong, reliable bond between the ink and the fabric. This quick check can save you a world of disappointment later on.
Crucial Insight: Curing isn't really about drying the ink. It's about melting the adhesive powder perfectly into a single, smooth sheet. If you under-cure it, you'll get a weak bond. Over-cure it, and you risk scorching the film or the ink, which makes the transfer brittle and discoloured.
Mastering Your Heat Press Settings
The final stage, the heat press, is where all your careful prep work pays off. The three pillars of a perfect press are temperature, pressure, and time. These settings aren't a one-size-fits-all deal; you have to tweak them based on the specific fabric you're working with. For example, delicate synthetics need much lower temperatures than heavy cottons do.
For a complete breakdown of the best settings for different materials, our in-depth heat press temperature guide gives you the specific details you need to get it right every time. Using the right combination ensures the adhesive fully bonds with the fabric fibres without burning or damaging the garment.
Proper aftercare is just as important as the application itself. To make sure your DTF prints last as long as possible and stay looking vibrant, give your customers these simple instructions:
- Wait 24 Hours Before Washing: Always let the print fully set for at least a day before its first wash.
- Wash Inside Out: Turning the garment inside out protects the print from rubbing against other clothes and the washing machine drum.
- Use a Cool Wash: Wash at 30°C max on a gentle cycle. This helps preserve the ink’s colour and the adhesive's strength.
- Avoid Tumble Drying: The high heat from a tumble dryer can ruin the print. For best long-term results, always air dry your DTF garments.
By mastering these best practices—from getting your artwork spot-on to providing clear care instructions—you can elevate the quality of your DTF transfer printing and create products that not only look professional but are built to last.
Your DTF Printing Questions, Answered
Even when you've got a good grip on the DTF process, a few practical questions always pop up. It's only natural. Here are some quick, straight-to-the-point answers to the queries we hear most often, helping you clear up any confusion and get started with confidence.
How Durable Are DTF Prints?
This is usually the first thing people ask, and for good reason—nobody wants a design that flakes off after a couple of washes. The good news is that DTF prints are incredibly durable, often lasting 50-100 washes without cracking or fading, provided they're applied and cared for properly.
Their staying power is right up there with traditional screen printing. The magic is in the thermoplastic adhesive, which creates a super-strong bond that actually fuses the ink into the fabric’s fibres. The result is a flexible finish that can easily handle the rigours of daily wear and tear.
Can I Use a Regular Inkjet Printer for DTF?
In a word, no. You can't just load up your home or office inkjet printer and expect it to work for DTF. The process demands a specialised printer that's been built to handle a few key jobs:
- Handling DTF Pigment Inks: These inks are formulated differently from standard document inks, especially the white ink, which is much thicker and would clog a regular printer in no time.
- Printing on PET Film: A DTF printer's rollers and feed system are designed specifically for the unique texture and thickness of DTF film.
- Specialised RIP Software: This is the brains of the operation. The software is crucial for managing the ink layers, particularly for printing that all-important white underbase perfectly on top of the colour layer.
What Is the Difference Between Hot Peel and Cold Peel Film?
The main difference is exactly what it sounds like: it’s all about when you peel the film away after heat pressing. Each type gives your final print a slightly different look and feel.
Hot peel film is designed to be removed immediately after pressing, while the garment is still piping hot. This is generally a faster process and leaves behind a softer, more matte finish that almost melts into the fabric’s texture.
On the other hand, cold peel film needs to cool down completely before you peel it. This method often gives you a slightly glossier, smoother finish and is sometimes the better choice for designs with very fine lines or tiny details. If you're looking to source materials, you can learn more about finding DTF printing near me, although ordering online often gives you more choice and better quality control.
Do Garments Need Pre-Treatment for DTF?
This is one of the biggest perks of DTF printing. Unlike its cousin, DTG, no liquid chemical pre-treatment is required. The adhesive powder does all the heavy lifting, creating the bond between the ink and the fabric.
That said, there is one step you should never skip: pre-pressing the garment for about 3-5 seconds. It might seem small, but this quick press removes any hidden moisture and smooths out wrinkles, giving you a perfectly flat canvas for a flawless transfer.
Ready to bring your designs to life with professional quality? Psyque offers premium, ready-to-press DTF transfers that make custom apparel simple. Explore our collections and start creating today at https://psyque.co.uk.