
Your Essential Heat Press Temperature Guide
Getting a perfect heat press finish comes down to three things: temperature, time, and pressure. This guide is your cheat sheet for nailing the ideal settings for all sorts of materials, making sure your designs look sharp, last forever, and feel like they came straight from a pro print shop.
Your Quick Reference Heat Press Settings
Mastering your heat press isn't some dark art—it’s just about knowing what your materials need to play nice. The right mix of heat, time, and pressure is the secret sauce for a transfer that actually sticks around. Get any of them wrong, and you’re looking at vinyl peeling off after the first wash, scorched fabrics, or designs that look faded before they’ve even been worn. This guide is here to kill the guesswork.
Think of it like cooking a steak. Too hot, it burns. Not long enough, it’s raw in the middle. The adhesive on your HTV or DTF transfer works the same way. It needs a specific temperature to wake up and properly fuse with the fabric fibres. The time on the press lets that bond cure, and the right amount of pressure makes sure every last bit of the design makes full contact with the garment.
The Three Pillars of Heat Pressing
To get that same professional-quality result every single time, you need to balance these three variables for every project you tackle:
-
Temperature: This is the big one. Different fabrics handle heat in completely different ways. Cotton, for instance, can take a serious blast of heat, usually around 160-180°C. But try that on delicate polyester, and you’ll melt or discolour it; it needs a much gentler touch, somewhere in the 140-150°C range.
-
Time: Also known as ‘dwell time,’ this is simply how long the heat is applied. A standard 10-15 second press is perfect for most cotton tees. But if you’re working with a thick hoodie, you might need a little longer, while heat-sensitive fabrics need shorter times to avoid any damage.
-
Pressure: This is the force your press applies to squish the transfer adhesive deep into the fabric. We usually talk about it as light, medium, or firm. A t-shirt typically needs medium pressure, but a chunky hoodie will demand firm pressure to get a solid, lasting bond.
Before we get into the nitty-gritty for specific fabrics, here’s a quick-glance table for the most common materials you’ll be working with.
Heat Press Settings for Common Materials
This table gives you a solid starting point for the most popular fabrics and transfer types. Always remember to do a test press on a scrap piece if you're unsure – it can save you a world of hurt.
| Material Type | Temperature Range (°C) | Time (Seconds) | Pressure Level |
|---|---|---|---|
| 100% Cotton | 160°C - 180°C | 10 - 15 | Medium to Firm |
| Polyester | 140°C - 150°C | 8 - 12 | Medium |
| Poly/Cotton Blends | 150°C - 165°C | 10 - 15 | Medium |
| Tri-Blends | 140°C - 155°C | 8 - 12 | Light to Medium |
| Nylon (Treated) | 140°C - 150°C | 5 - 10 (2 presses) | Light |
| Fleece/Hoodies | 155°C - 170°C | 12 - 18 | Firm |
These settings are a great foundation, but keep in mind that every heat press, transfer, and garment can be slightly different. Consider these your go-to numbers, but don't be afraid to tweak them a little to find what works perfectly for your specific setup.
The Science Behind a Perfect Heat Transfer
Getting professional, consistent results with your heat press is about more than just following a chart. Anyone can do that. The real expertise comes from understanding the why behind the numbers—the interplay between temperature, time, and pressure. Nail this, and you can troubleshoot any problem and adapt to any material thrown your way.
At its core, a heat transfer is a straightforward chemical reaction. The heat from your press activates a special adhesive on your DTF print or vinyl. It's a precise trigger point; too little heat and the glue won't bond properly, meaning your design will be peeling off after the first wash. Too much, and you've got a scorched mess.
How Temperature Creates the Bond
Temperature is the spark that kicks off the whole process. When the hot platen hits the transfer, it turns the solid adhesive into a molten state, allowing it to sink into the tiny gaps between the fabric's fibres. The perfect temperature gets this done efficiently without damaging the garment itself.
Think of it like this:
- Too cool: The adhesive gets soft but never truly melts. It just sits on top of the fabric instead of becoming one with it.
- Too hot: You can liquefy the adhesive too much, causing it to spread thin. Worse, you’ll burn or melt delicate fabrics like polyester.
Getting the temperature right is absolutely fundamental for durability and is a key part of quality custom t-shirt printing.
The Role of Time and Pressure
Once the adhesive is hot and ready, time and pressure step in to finish the job. The dwell time is the curing phase. This is the window where the melted glue seeps deep into the fabric's fibres before it cools and hardens again. Cut this short, and you’re left with a weak, incomplete bond.
Pressure is what guarantees every square millimetre of your design makes solid contact with the garment. It's the force that physically pushes the molten adhesive into the fabric's weave, creating a tough mechanical lock that will survive stretching, washing, and general chaos.
An ideal press is a perfect balance. Temperature activates the adhesive, pressure forces it into the fabric, and time lets it cure into a permanent bond. Mastering this trio is everything.
Heat Press Settings for Natural Fabrics
Natural fibres like cotton and canvas are the bread and butter of the custom apparel world. Everyone loves them because they’re comfortable and take a print like a dream. But that organic composition has a dark side—get your settings wrong, and you'll scorch or yellow the fabric in a heartbeat. Nailing a vibrant, durable transfer on these materials is all about precision.
Unlike synthetics that just melt into a mess, cotton is more likely to burn, especially lighter colours. This is why getting the temperature and time right isn't just a suggestion; it's a non-negotiable rule for anyone serious about quality. One pro move is the pre-press: hit the garment for 3-5 seconds before you even think about the transfer. This zaps any hidden moisture and smooths out wrinkles, giving you a perfect canvas to work with.
Settings for Standard and Ringspun Cotton
For your everyday 100% cotton t-shirts, there’s a solid, reliable starting point. This fabric is pretty resilient and can handle higher temperatures, which is great for getting the DTF adhesive to really sink into the fibres for a transfer that lasts.
- Temperature: Your sweet spot is between 160°C and 180°C (320°F - 350°F). This range is hot enough to properly cure the adhesive without risking a burn.
- Time: A press time of 10 to 15 seconds is usually all you need.
- Pressure: Go for medium to firm pressure. This ensures the design sticks evenly across the whole surface, with no lifting edges.
Ringspun cotton, that softer, more premium-feeling stuff, has a much tighter weave. The settings are similar, but you’ll often find you get brilliant results at the lower end of the temperature and time ranges. This helps preserve that lush texture you're paying for. Mastering these numbers is the key to creating top-tier personalised t-shirt printing that stands out.
Adjusting for Heavy Canvas
When you’re working with heavyweight materials like canvas tote bags or thick workwear, you need to change your game plan. The fabric is so thick that it acts as an insulator, meaning the heat needs more time and a bigger push to get through to the adhesive on the other side.
For these tougher fabrics, tweak your settings like this:
- Temperature: Stay on the higher end of the scale, around 170°C to 180°C (340°F - 350°F).
- Time: Crank up the dwell time to 15 - 20 seconds.
- Pressure: Always use firm pressure. You need to physically drive that adhesive deep into the coarse weave of the canvas.
Pro Tip: If your design on canvas feels a bit raised or stiff after the first press, don't panic. Just cover it with a Teflon sheet and give it another quick press for 5-7 seconds. This helps to fully embed the transfer, giving it a much softer feel and making it last longer.
Getting these settings right is crucial, especially in the UK's custom apparel scene. Cotton makes up nearly 60% of all clothing here, and the industry standard is to press at around 150°C for 10-15 seconds with medium pressure. Sticking to these guidelines doesn’t just guarantee a quality product; it also aligns with the sustainable practices UK customers are increasingly looking for. You can dig deeper into industry standards over at Galaxy-Press.com.
Mastering Synthetics and Blended Fabrics
Synthetic and blended fabrics like polyester, nylon, and cotton/poly mixes are everywhere in the UK, from high-performance sportswear to your favourite hoodie. But their heat-sensitive nature makes them a real challenge on the press. Unlike forgiving cotton, these materials can easily melt, scorch, or suffer from dye migration—that frustrating moment when the fabric’s dye bleeds into your transfer, turning your crisp white design a murky colour.
Nailing a pro-level finish on synthetics is all about precision and control. The golden rule? Use lower temperatures and shorter press times than you would for natural fibres. A protective Teflon sheet or parchment paper isn't optional here; it’s a must-have. It acts as a vital barrier, spreading heat evenly and shielding the delicate fabric from the raw heat of the platen.
Preventing Dye Migration and Fabric Damage
Dye migration is the arch-nemesis of anyone pressing onto coloured polyester. When the heat from the press gets too high, it can reactivate the dyes in the fabric, turning them into a gas that stains your transfer material. This is exactly why white vinyl often ends up with a faint pink tinge on a red polyester shirt.
To stop this from happening, you’ve got to work below the fabric's dye sublimation temperature.
- Keep Temperatures Low: For 100% polyester, don’t push it past 140°C - 150°C.
- Use Sub-Block Vinyl: If you're working with HTV, make sure you get vinyl with a "sub-block" or "dye-block" layer. It’s a special barrier designed specifically to shut down dye migration.
- Shorter Press Time: Stick to just 8-12 seconds. Pressing for too long is a classic mistake that causes both melting and dye bleed.
This guide gives you a solid idea of the pressure settings you'll need for different fabrics, showing how blends often need a bit more muscle.
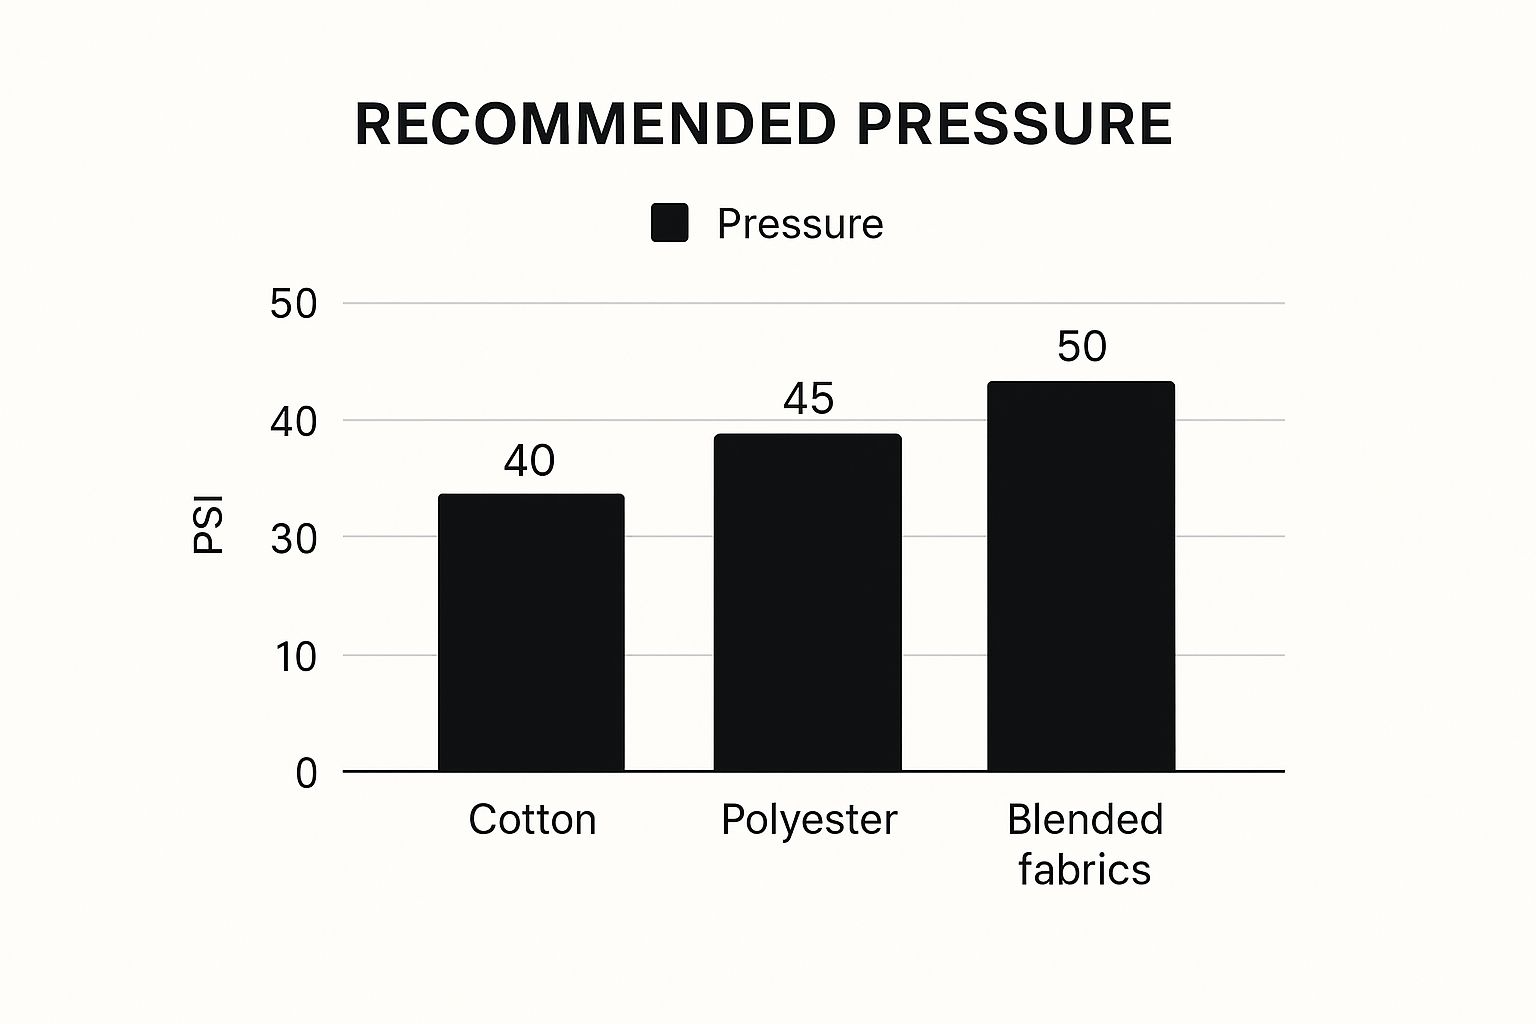
As you can see, blended fabrics often require a bump in pressure. This helps the transfer adhesive properly fuse with all the different fibre types in the material.
Heat Press Settings for Synthetic Fabrics and Blends
Here’s a quick-reference table to take the guesswork out of pressing on synthetics. These are battle-tested starting points, but always remember to do a test press if you’re working with a new garment or transfer type.
| Fabric Type | Temperature Range (°C) | Time (Seconds) | Pressure Level | Peel Type (Hot/Cold) | Key Considerations |
|---|---|---|---|---|---|
| 100% Polyester | 140°C - 150°C | 8 - 12 | Medium | Cold | Extremely sensitive to heat; prone to scorching and dye migration. Use sub-block materials. |
| Nylon | 140°C - 155°C | 10 - 15 | Medium | Cold | Melts easily. Use a protective sheet and test on a hidden area first. |
| 50/50 Cotton/Poly Blend | 150°C - 165°C | 10 - 15 | Medium | Hot or Cold | Balances cotton's durability with polyester's heat sensitivity. Start at the lower end of the temp range. |
| Tri-Blends | 145°C - 160°C | 10 - 15 | Light-Medium | Varies | Very delicate. Use lower pressure to avoid press marks on the fabric. |
| Spandex/Lycra | 135°C - 150°C | 8 - 12 | Light | Cold | Pre-stretch the garment slightly before pressing to prevent the design from cracking. |
Getting these settings right is the difference between a shirt that looks pro and one that ends up in the bin. Pay close attention to the fabric composition and always check your transfer manufacturer's guidelines.
Settings for Blends and Performance Wear
Cotton/polyester blends are a true workhorse, giving you the best of both worlds in comfort and strength. But they still carry that polyester heat sensitivity. For a 50/50 blend, your settings should reflect this compromise, usually landing around 150°C - 165°C for 10-15 seconds with medium pressure. Always start low and test if you can.
Direct to Film (DTF) transfers are an absolute game-changer for synthetics, and getting the settings just right is crucial. It's a key reason why the DTF vs. screen printing on graphic tees debate often leans towards DTF when polyester is in the mix.
Key Insight: With DTF on polyester or blends, a two-press method is your best friend. The first press at 145°C for 10-12 seconds lays down the design. After a cold peel, a second press for 5-7 seconds with a protective sheet locks it in, improving both the feel and its long-term durability.
Understanding Hot Peel vs Cold Peel
That final step—peeling off the carrier sheet—can make or break the whole job. Your transfer material will dictate whether you need a hot peel or a cold peel.
- Hot Peel: This means you rip that carrier sheet off the second the press opens. It's common for standard HTV on blends and often gives you a softer finish because the vinyl stretches a little with the hot fabric.
- Cold Peel: You have to wait. Let the garment and transfer cool down completely before you even think about touching the carrier sheet. DTF transfers are almost always a cold peel. If you peel too early, you’ll just pull the entire design straight off the garment.
Always, always check the manufacturer’s instructions for your specific transfer material. This final step is just as important as the temperature and time. Get it right, and your design will look sharp, vibrant, and ready for anything.
Settings for Specialty Heat Transfer Vinyl
Standard HTV is great, but let's be honest—specialty vinyl is where the real creative magic happens. When you get into materials like glitter, flock, metallic, and 3D puff, you're adding texture and attitude that standard prints can't touch. But each of these materials is a different beast and needs its own unique settings to nail the look.
Forget the one-size-fits-all approach. Specialty vinyls have different thicknesses and chemical makeups that react uniquely to heat. Glitter vinyl, for example, is thicker and needs a higher temperature to get its adhesive to bite properly. On the other hand, 3D puff needs a very specific heat window to expand without collapsing on itself. This section is your cheat sheet for getting these special finishes right every single time.
Glitter and Metallic Vinyl Settings
Glitter and metallic foils are your go-to for adding a premium, eye-catching finish to any garment. They can also be a nightmare if you get the settings wrong. The key here is firm, even pressure. This ensures the adhesive bonds completely around every single sparkly or reflective flake, so you don't get any peeling or dull spots.
- Glitter HTV: This stuff is thick and needs a bit more muscle. Set your press to 160°C - 170°C and press for 15-20 seconds with firm pressure. Don't be shy with the force; that coarse texture needs it to properly embed into the fabric's fibres.
- Metallic/Foil HTV: These are way more delicate. Too much heat will scorch the shine right off. Dial it back to around 140°C - 150°C for 10-15 seconds with medium pressure. And always, always use a protective sheet to keep that finish looking pristine.
It's no surprise that these materials are blowing up in the UK market. We've seen a huge spike in demand for heat presses with precise digital controls, with data showing 68% of UK buyers now choosing them. That's because when you're working with temperamental materials like glitter and foils, accuracy is everything.
Flock and 3D Puff Vinyl Settings
Flock and puff are all about one thing: texture. Flock vinyl brings a soft, velvety feel to the party, while 3D puff creates a properly raised, three-dimensional effect that you can feel. Their unique properties mean their settings are completely different from anything else.
Flock HTV Flock has that classic fuzzy, suede-like texture that needs to be pressed firmly into the fabric so it feels like part of the garment, not just stuck on top.
- Temperature: Aim for 155°C - 165°C.
- Time: Give it 15-20 seconds.
- Pressure: Use firm pressure to make sure those fibres get a solid grip.
3D Puff HTV Puff vinyl is the drama queen of the HTV world. You're trying to heat it just enough to expand, but a second too long or a degree too hot and it will flatten out and die.
- Temperature: The sweet spot is a narrow range of 140°C - 150°C. Don't stray.
- Time: A quick press of 8-12 seconds is all it needs.
- Pressure: Go with light to medium pressure. Too much force will literally crush its dreams of rising.
Key Takeaway: With puff vinyl, let the heat do the work. The expansion happens when the material is activated by the temperature. Smashing it with heavy pressure physically stops it from rising, giving you a flat, disappointing mess.
Knowing how to handle these different materials is what separates the amateurs from the pros. For a deeper dive into how different vinyl types actually perform on finished garments, check out our guide on printed vinyl heat transfers. And don't forget to cross-reference these settings with the fabric you're pressing onto—if it’s a heat-sensitive synthetic, you'll need to adjust your temperature down.
Troubleshooting Common Heat Press Issues
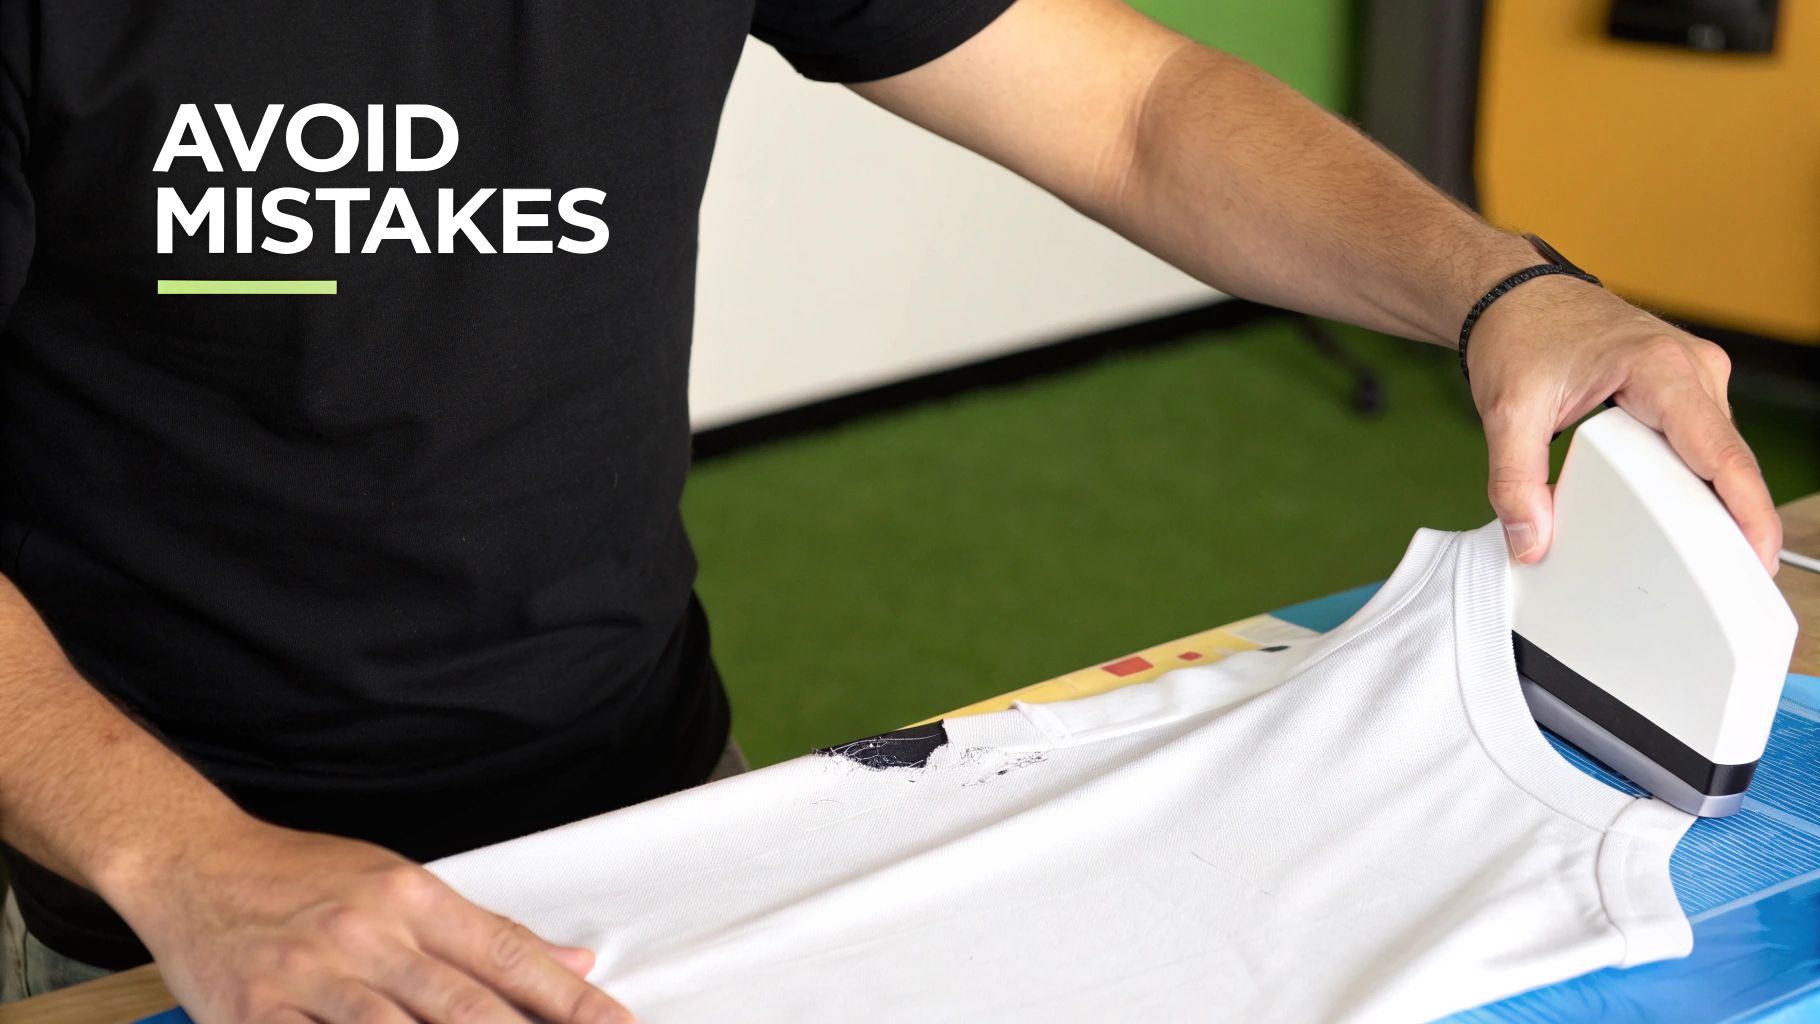
Even when you follow a guide to the letter, things go wrong. It happens. When a transfer fails, it's almost always down to one of the big three: temperature, time, or pressure. This is your battle plan for fixing the most common heat press fails and turning a frustrating mistake into a lesson learned.
Don't panic when a print doesn't stick or the fabric looks weird. Most of these problems are simple fixes once you know what you’re looking for. From peeling vinyl to scorched shirts, a small tweak to your settings is usually all it takes to get things right.
Vinyl Peeling After Washing
This is probably the most soul-crushing issue. You pull off a brilliant design, press it perfectly, and it looks mint—until it hits the wash. When your vinyl starts peeling or cracking, it’s a dead giveaway that the adhesive bond was too weak from the start.
The culprit is almost always not enough heat or pressure. The adhesive simply didn’t get hot enough, or it wasn't pushed deep enough into the fabric’s fibres to lock in permanently. It’s sitting on top, not fused into the material.
- The Cause: Your temperature was too low, the press time was too short, or your pressure setting was weak.
- The Fix: Bump up your press temperature by 5-10°C and add another 3-5 seconds to your press time. Double-check you’re using firm pressure, especially for thicker garments like hoodies. A quick post-press for a few seconds after peeling the carrier sheet can also work wonders for durability.
Scorch Marks or Discoloured Fabric
You peel back the sheet and see a faint yellow or brown box outlining your design. That’s scorching. It’s what happens when the heat is way too intense for the fabric you’re using, especially on light-coloured cotton or sensitive materials like polyester. You’ve basically cooked it.
To avoid this, a protective sheet is non-negotiable. Always use a Teflon sheet or a clean piece of parchment paper between the heat platen and your garment. It acts as a buffer, spreading the heat more gently and protecting the delicate fibres underneath.
The solution is to dial everything back. Lower the temperature by at least 10°C and shorten the press time. If it keeps happening on polyester, you might be dealing with dye migration, where the fabric's dye bleeds into your vinyl. You’ll need a specific sub-block vinyl to stop that. For a deeper dive into making prints that last, check out our complete guide to custom T-shirt printing.
Uneven Transfers and Cold Spots
Ever had a transfer where one part is stuck down perfectly but another corner is lifting? You’re likely fighting uneven pressure or cold spots on your heat platen. Cheaper presses are notorious for this—the centre gets screaming hot while the edges stay lukewarm.
You can test for cold spots with an infrared temperature gun. Just point it at different areas of the heated platen to see if the temperature is consistent. Uneven pressure is a different beast, often caused by trying to press over seams, collars, zips, or buttons.
- How to Fix It: This is what heat press pillows were made for. Slide a pillow or a folded Teflon sheet inside the shirt to raise the printing area. This clever trick allows the seams and collar to drop down around the pillow, creating a flat, elevated surface for the platen to make perfect, even contact. No more gaps, just solid, consistent pressure across your entire design.
Heat Press Temperature FAQs
Even with a perfect cheat sheet, you’re bound to run into some weird issues. That’s just part of the game. So, here are straight answers to the questions we see pop up all the time. Think of this as your troubleshooting guide for when things go wrong.
We’ll cover everything from dodgy equipment readings to why your vinyl decided to bail after one wash. Getting these details right is what separates an amateur print from a pro-level one.
How Do I Know If My Heat Press Temperature Is Accurate?
Short answer: you don't. Never, ever trust the digital display out of the box, especially on more affordable presses. It's common for the number on the screen to be wildly different from the actual heat on the platen. A bad temperature reading is probably the number one reason transfers fail.
The only way to know for sure is to get an infrared (IR) temperature gun. They’re cheap and an absolute lifesaver. Just get your press up to temperature, let it stabilise for a few minutes, then point and shoot. Check the centre, corners, and edges. This will instantly show you if you've got massive temperature drops or "cold spots" that are sabotaging your adhesion.
What Is the Best Way to Prevent Scorch Marks?
Ah, the dreaded yellow scorch mark. It’s the ghost of too much heat, and it loves to haunt light-coloured fabrics. Beating it requires a bit of finesse, not just brute force.
Here’s the plan of attack:
- Drop the Temperature: This is the most obvious fix. Knock your temperature down by 5-10°C. Every fabric has a tipping point, and your goal is to find the lowest possible heat that still gets the job done.
- Use a Protective Sheet: Always. A Teflon sheet or even a simple piece of parchment paper acts as a buffer. It diffuses the intense, direct heat and helps spread it out more evenly.
- Cut the Dwell Time: Sometimes it’s not how hot, but how long. Shave a few seconds off your press time. Often, that’s all it takes to avoid a burn.
Can I Use the Same Temperature for Different Brands of HTV?
Definitely not. This is a rookie mistake that will cost you time and a lot of wasted vinyl. While different types of vinyl (like glitter or flock) have general temperature ranges, every single manufacturer has its own secret sauce for the adhesive. These formulas are all unique and have their own perfect activation temperature and specific peel instructions (hot or cold peel).
Crucial Advice: Always, always check the manufacturer’s instructions for the exact vinyl you are using. Their recommended settings are your Bible. Ignoring them is just gambling.
Why Is My Vinyl Peeling Off After Washing?
This is easily the most frustrating problem in the game. The design looked flawless right off the press, but after one trip through the washing machine, it's cracking or peeling away. This almost always means the adhesive never properly bonded with the fabric in the first place.
It usually boils down to one of these three culprits:
- Not Enough Heat or Time: The adhesive just didn't get hot enough, or didn't stay hot long enough, to fully melt and cure into the fibres.
- Weak Pressure: You need firm pressure to literally push the melted adhesive into the weave of the garment. If it's too light, the vinyl is just sitting on top.
- Fabric Coatings: Brand new garments sometimes have a chemical finish on them to keep them looking fresh. This coating can act as a barrier to the adhesive. A quick pre-press for a few seconds usually burns this off.
To fix it, try bumping up your temperature a little, add a couple of seconds to your time, and make sure your pressure is genuinely firm.
At Psyque, we obsess over these details. We live and breathe DTF printing, dialling in our settings to create designs that aren't just bold, but built to last. Check out our collections of apparel inspired by Japanese culture to see what a perfect press looks like. Find your next favourite tee at https://psyque.co.uk.