
Your Complete Heat Press Machine Guide
At its heart, a heat press machine is a piece of kit designed to permanently apply a design onto a surface, most commonly a t-shirt or other garment. You can think of it as a professional-grade, super-powered iron, but engineered with a level of precision that your home iron could only dream of. That precision is what makes all the difference in creating custom apparel with a clean, durable finish that lasts.
How a Heat Press Machine Actually Works
The core principle behind a heat press is beautifully simple. It works by sandwiching your transfer material—like a DTF film or a sheet of vinyl—between the garment and a heated metal plate. But that simple action relies on a perfect trio of elements working in harmony: heat, pressure, and time.
When you get this combination just right, these three forces trigger a chemical reaction. The adhesive on your design melts and bonds permanently with the fibres of the fabric. It’s a far more scientific process than just ironing on a patch, ensuring every square centimetre of the design gets the exact same temperature and pressure for a flawless application.
The Key Components and What They Do
Getting your head around the basic parts of a heat press makes it much clearer how they achieve such consistent results. While there are plenty of different models out there, they all share the same fundamental components that work together to get your graphics onto the garment.
- The Upper Platen: This is the hot part. It’s a heavy metal plate, usually coated with non-stick Teflon, that contains the heating elements. Its job is to distribute heat perfectly evenly across its entire surface.
- The Lower Platen: This is the base where you lay out your t-shirt. It’s typically a flat, heat-resistant silicone pad that gives you a firm but forgiving surface to press onto.
- The Control Panel: This is the brains of the operation. It’s where you’ll dial in the precise temperature and time needed for different fabrics and transfers. On any modern press, these controls will be digital.
The Science Behind the Transfer
The real magic happens the moment that upper platen clamps down. The intense heat instantly activates the specialised adhesive on the back of your transfer film. At the same time, the machine applies firm, even pressure, pushing that now-softened adhesive deep into the weave of the fabric.
Once the timer beeps and you lift the platen, the adhesive cools and solidifies almost instantly. This creates a permanent bond that essentially fuses the design with the garment. If you're keen to dive deeper into the nuts and bolts, we've covered it all in our guide to heat transfer printing.
A household iron might get hot, but it can never deliver the consistent, even pressure of a proper heat press. That lack of uniform pressure is exactly why old-school iron-on transfers so often peel, crack, or fade after just a few washes. A heat press solves that problem, guaranteeing a professional-grade bond every single time.
Choosing the Right Type of Heat Press
Picking the right heat press machine is one of those big decisions that will shape your workflow, what you can make, and even how you lay out your workspace. While they all do the same basic job—applying heat and pressure—their designs are worlds apart, and each one is built for a different kind of user. Getting your head around these differences is the first step to making a smart investment.
The three main players you'll come across are the Clamshell, the Swing-Away, and the Draw press. Each has its own personality, with clear pros and cons depending on what you're trying to achieve. Let's break them down to figure out which one belongs in your setup.
The Space-Saving Clamshell Press
Picture a clamshell heat press like the bonnet of a car—it opens and closes on a hinge at the back. It’s a simple, up-and-down motion. This design makes it incredibly quick to operate, which is why it's a firm favourite for anyone churning out high volumes of T-shirts.
Its biggest selling point? Its tiny footprint. Because the heated top platen just lifts straight up, a clamshell machine takes up way less room than its counterparts. This makes it the perfect choice for a small workshop, a home studio, or even a retail spot where every square inch is precious. If your main game is printing standard garments like T-shirts and sweatshirts fast, a clamshell is an absolute workhorse.
The Versatile Swing-Away Press
A swing-away press works completely differently. The top platen lifts up a little, then swings right out to the side, leaving the bottom platen totally clear and accessible. This design gives you two massive advantages: safety and visibility.
With the scorching hot platen moved completely out of the way, you get a much safer, clearer space to arrange your garment and DTF transfer. There’s virtually no risk of accidentally brushing against the heat. This unobstructed view is a lifesaver when you're working with thicker or awkwardly shaped items like hoodies, jackets, or even ceramic tiles. The straight, even pressure it applies is also far better for these bulkier items, avoiding the pinching that can sometimes happen at the back of a clamshell.
The Hybrid Draw Press
The draw heat press is a clever compromise, sitting somewhere between the clamshell and swing-away models. In this design, the top platen is fixed in place, but the bottom platen slides out towards you like a drawer.
This clever mechanism gives you the easy, safe access of a swing-away but within a much more compact frame. You can lay out your garments and transfers safely away from the heat, then just slide the drawer back in to press. It's a fantastic solution if you need the versatility for different items but just don't have the side-to-side space for a full swing-away machine.
Choosing a press isn't just about the machine; it's about your workflow. A high-volume t-shirt business will value the speed of a clamshell, while a creator making diverse products like hoodies and plaques will benefit from the precision and safety of a swing-away.
The infographic below offers a simple decision tree to help you visualise whether a professional heat press or a home iron is the right tool for your project.
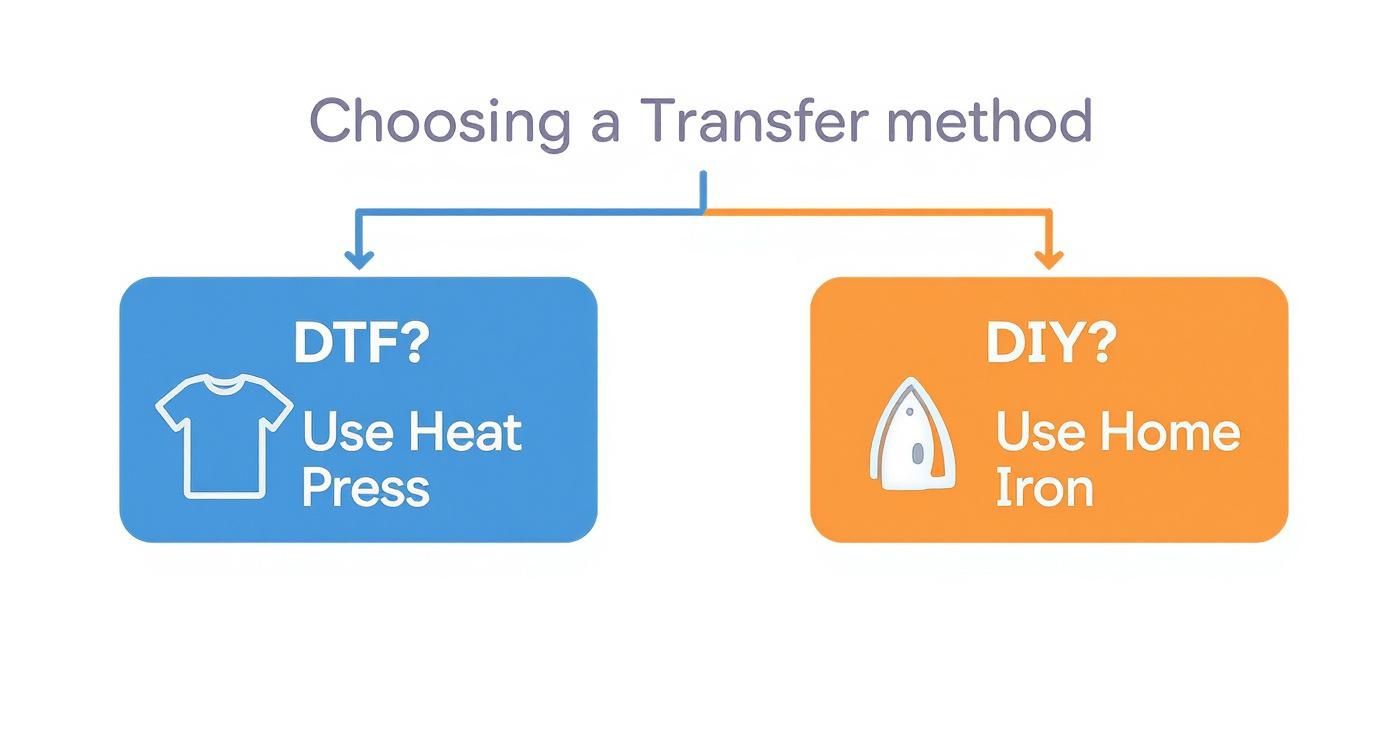
As this visual guide makes clear, if you're aiming for professional, long-lasting results with methods like DTF, a proper heat press is non-negotiable. To dig deeper into which model is best for clothing, you might want to check out our detailed guide on choosing a heat press machine for T-shirts.
Of course, it's worth mentioning that you can also get speciality presses built for one job and one job only—think mugs, caps, and plates. While the three main types offer the most flexibility for a growing business, these dedicated machines are shaped to perfectly fit curved or unique surfaces, guaranteeing a flawless transfer every time.
Understanding Key Features and Specifications
Looking at a product page for a heat press machine can feel a bit like trying to read a foreign language. All those numbers and technical terms? It’s enough to make your head spin. But buried in that jargon is everything you need to know about how a machine will actually perform day-to-day.
Think of these specs as the DNA of your heat press. They dictate what you can make, how fast you can work, and ultimately, the quality of every single item that comes off the platen. Let's pull back the curtain on the most important features so you can look at any product description and know exactly what you're getting.
Platen Size Is More Than Just Dimensions
The first thing you’ll probably notice is the platen size, usually listed in centimetres like 38x38cm or 40x50cm. It’s easy to think this just limits the maximum size of your design, but it goes much deeper than that. The platen size is all about your workflow and versatility.
A bigger platen, say a 40x50cm model, gives you the freedom to press oversized hoodies, large T-shirts, or even gang up multiple smaller items like tote bags in one go. This can be a massive time-saver. On the flip side, a smaller press is more portable and won't take over your entire workspace, making it a great shout for anyone just starting out or focusing on smaller bits like baby clothes or custom labels.
Key Takeaway: Base your choice on the biggest items you see yourself printing regularly. It’s always better to have a bit of extra room to grow than to find your ambitions are bigger than your platen.
The Critical Role of Heat Distribution
This is the big one. If there's one thing that separates a brilliant transfer from a bin-worthy one, it's even heat distribution. Cheaper machines are notorious for having "cold spots"—areas on the platen that just don't get up to temperature. For DTF printing, that’s a recipe for disaster.
If one part of the plate is cooler than the rest, that bit of your transfer simply won't cure properly. The result? You’ll see faded patches, peeling corners, and a design that looks awful after its first wash. A quality heat press uses well-designed heating elements spread evenly across the platen, ensuring the whole surface stays at a consistent temperature, usually with a variance of only a few degrees. That consistency is what delivers durable, vibrant prints that look properly professional, time after time.
Why Accurate Controls Matter
Finally, let's talk about the command centre: the control panel. Being able to set and hold a precise temperature and time is what really separates the pro gear from the hobbyist models. Modern digital controllers give you pinpoint accuracy, letting you dial in the exact settings needed for different garments and films.
- Temperature Control: Different fabrics have very specific heat needs. A press that holds its temperature steady means you won’t scorch a delicate polyester top or under-cure a transfer on a thick cotton hoodie.
- Time Control: The timer is just as crucial. A reliable, auto-opening timer stops you from over-pressing, which can cause discolouration or that tell-tale shiny box around your design. It also frees you up to get the next garment ready, smoothing out your workflow.
Getting these settings right is the key to consistent, repeatable quality. For a deep dive into which temperatures work best for different materials, check out our complete heat press temperature guide for all the details. Once you understand these core specs, you’re no longer just browsing—you’re a confident buyer, ready to invest in a machine that will be a real asset to your work.
Why You Need a Heat Press for DTF Printing
Direct-to-Film (DTF) printing has completely changed the game for creating vibrant, full-colour designs, but the printed film is only half the battle. The real magic, the part that turns a print into a professional garment, happens in the final step. And for that, a heat press machine isn't just a nice-to-have—it's completely essential.
Thinking about using a household iron? Don't. It's a shortcut to disaster, guaranteed to give you prints that peel away, crack after one wash, and fade before your eyes.
A proper heat press delivers the holy trinity that a domestic iron just can't touch: precise temperature, consistent pressure, and accurate timing. DTF transfers use a special adhesive powder that has to be melted perfectly to create a permanent bond with the fabric. This process demands a specific, steady temperature across the entire design to activate the adhesive without scorching the garment.
Then there's the pressure. It has to be perfectly even. An iron pushes hard in the middle and leaves the edges weak, leading to a patchy, unreliable application. A heat press, in contrast, clamps down with uniform force, making sure every single millimetre of your design fuses deep into the fabric's fibres.
The Science of a Perfect DTF Bond
The incredible durability and soft feel of a professional DTF print come down to how the heat press works its magic. When that heated platen comes down, it's doing two critical jobs at once. First, it melts the thermoplastic adhesive powder on the back of the DTF film. Second, the immense pressure forces that molten adhesive right into the weave of the fabric.
This one-two punch is what creates a bond that's both tough and flexible. The ink literally becomes part of the garment, not just a sticker sitting on top of it. This is why a properly pressed DTF print can survive dozens of washes, stretch without cracking, and keep its brilliant colours long after an iron-on transfer has given up.
A heat press machine transforms a DTF transfer from a delicate film into a durable, commercial-grade graphic. It's the difference between a homemade craft project and a professional product that customers will be happy to pay for and wear proudly.
Achieving Consistency and Professionalism
One of the biggest wins of using a quality heat press is repeatability. Once you've dialled in the perfect settings for a certain fabric and film combo, you can churn out hundreds of identical items, confident that every single one will meet the same high standard. That kind of consistency is just impossible with an iron.
This reliability is the backbone of any small business or print shop. Your customers expect their orders to look the same, whether they're buying one t-shirt or one hundred. A heat press gives you the control to eliminate the guesswork and deliver professional-grade results, every single time.
If you're curious about the whole setup, getting to know the components of a full DTF printing machine will show you how each part plays its role. The heat press is the final, crucial step in that workflow. Ultimately, investing in a proper heat press isn't just buying equipment; it's investing in the quality and reputation of your brand.
Heat Press Settings for Perfect DTF Results
Getting a flawless, long-lasting DTF print really comes down to one thing: precision. The right mix of temperature, pressure, and time is what turns a simple transfer into a professional-quality garment that feels great and can handle countless washes. Guessing is a fast track to wasted materials and a lot of frustration, but once you nail these settings, you'll be producing top-notch results every single time.
Think of it like a recipe. A baker wouldn't use the same oven temperature for a delicate sponge as they would for a dense fruitcake. In the same way, you need to adjust your heat press machine for different fabrics. The settings that work wonders on a thick cotton hoodie could easily scorch a thin polyester sports top. This guide will give you a solid starting point for the most common materials you'll be working with.
Understanding Hot Peel vs. Cold Peel Films
Before we jump into the numbers, it's crucial to know what kind of DTF film you're using. The type of film determines when you peel off the carrier sheet after pressing, which has a massive impact on your workflow and the final finish.
- Hot Peel Films: These are built for speed. You can peel the backing away almost as soon as the heat press opens. This is a game-changer for big jobs, letting you get into a rhythm and move from one garment to the next without delay.
- Cold Peel Films: With these, you need a bit of patience. The film has to cool down completely before you even think about peeling. Try to rush it, and you’ll ruin the transfer. The trade-off is that cold peel often gives you a slightly glossier, smoother finish.
Always, always check with your film supplier to know what you've got. Using the wrong peeling method is one of the most common—and expensive—mistakes newcomers make.
Your DTF supplier is your best friend here. Always start with their recommended settings because ink and adhesive formulas can differ. Use the temperatures and times in this guide as a trusted baseline, but be ready to tweak things slightly to get that perfect result.
Recommended Settings for Common Fabrics
To take the guesswork out of the equation, we’ve put together our tried-and-tested settings for applying DTF transfers ready to press onto the most popular fabrics here in the UK. The table below covers both the first press to get the design on and the essential second press to lock it in and improve the feel.
Here’s a quick-reference guide to get you started.
DTF Heat Press Settings for Common Fabrics
| Fabric Type | Temperature (°C) | Pressure | First Press Time | Second Press Time |
|---|---|---|---|---|
| 100% Cotton | 150 - 165°C | Medium to Firm | 10-15 seconds | 5-7 seconds |
| 100% Polyester | 135 - 145°C | Medium | 8-12 seconds | 5 seconds |
| 50/50 Poly-Cotton | 145 - 155°C | Medium | 10-15 seconds | 5-7 seconds |
| Tri-Blends | 135 - 145°C | Light-Medium | 8-12 seconds | 5 seconds |
Remember, for that second press, always cover the design with a Teflon sheet or a sheet of parchment paper. This protects both your print and your heat platen. This last step is what really embeds the ink into the fabric fibres, making it more durable and giving it that professional, matte finish we all love. With these settings in your toolkit, you're well on your way to mastering your heat press.
A Smart Buyer's Guide for UK Businesses
Investing in a heat press machine is a big step for any UK business, but it’s about more than just finding the cheapest price online. A smart purchase means thinking about local support, safety, and supply chains. Get it right, and your new machine will be a reliable asset; get it wrong, and it could quickly become a frustrating liability.
The demand for custom apparel in the UK is undeniable, driven by a booming e-commerce scene and a wave of creative home-based businesses. It's no surprise that online platforms have seen a year-on-year jump of over 20% in heat press sales. You can get more insights into the global heat press market growth on Verified Market Reports. With so many people buying, it’s more important than ever to choose wisely.
Buying Local: The Smart Choice
It’s tempting to order a machine from an overseas marketplace to save a few quid, but that's often a false economy. Buying from a reputable UK-based supplier gives you crucial advantages that genuinely protect your investment.
- A Valid UK Warranty: When something goes wrong, a local warranty means you get straightforward repairs or replacements without the nightmare of international shipping and customs forms.
- Reliable Customer Support: Need a hand? Being able to call someone in your own time zone who actually understands the UK market is invaluable.
- UK Safety Standards: A machine from a UK supplier will be CE marked, which confirms it meets British and European standards for safety, health, and environmental protection. This is a non-negotiable for workplace safety and your business insurance.
Choosing a UK supplier isn't just about convenience; it's a strategic move. It ensures your machine is safe, support is just a phone call away, and your warranty holds up, giving you a solid foundation to build your business on.
Your Pre-Purchase Checklist
Before you even start browsing, take a minute to think about what you actually need. Answering these questions will help you cut through the noise and focus on machines that are a perfect fit for your goals.
- What are you going to make? Will you be sticking to standard t-shirts, or do you plan on pressing thicker items like hoodies, tote bags, or even ceramic tiles? Your answer will point you towards the right type of press (clamshell vs. swing-away) and the platen size you’ll need.
- What’s your expected production volume? An Etsy seller working from home has completely different needs to a print shop handling bulk orders. Be honest about your output so you can choose a machine that keeps up without being total overkill.
- How much space do you have? Get the tape measure out. Remember that a swing-away press needs a lot of clearance to the side, whereas a clamshell model has a much smaller, vertical footprint.
Answering these questions honestly will guide you to a heat press that not only works for your business today but has the capacity to grow with you. And once you have the right equipment, you'll need to sell what you make. For UK businesses, it's vital to pair your production power with effective marketing. Discover valuable strategies to increase e-commerce sales to get the best possible return on your investment.
Common Heat Press Questions Answered
Even when you feel you've got the hang of your heat press machine, questions always seem to pop up. It's completely normal. Here, we'll tackle some of the most common queries we get from both newcomers and seasoned printers, giving you quick, clear answers to help you perfect your process.
Can I Just Use My Home Iron Instead of a Heat Press?
Let's cut straight to it: no—not if you want professional results. A home iron simply isn't a substitute for a heat press when you're working with DTF transfers. Irons just can't deliver the two things that matter most for a solid application: consistent, even pressure and precise temperature control.
This lack of control is exactly why you'll see uneven transfers, designs peeling at the edges, and graphics that don't survive the first wash. A heat press guarantees uniform heat and pressure across the entire design, and that’s the only way to create the permanent, high-quality bond you’re looking for.
What’s Causing Faded Spots or Ghosting on My Prints?
Ghosting—that faint double image that ruins a perfectly good print—or random faded spots are usually down to one of three culprits.
- Something Moved During Pressing: The transfer film or the garment itself shifted slightly as you opened or closed the press. Always make sure everything is secured before you press and be gentle when opening the platen.
- Uneven Pressure: This is a classic issue when pressing over seams, zips, or thick collars without a heat press pillow. These simple foam pillows lift the print area, ensuring the platen makes solid, even contact everywhere.
- Cold Spots on the Platen: Unfortunately, cheaper machines can suffer from inconsistent heating elements. This creates cooler areas on the platen that lead to under-cured, patchy transfers.
A great way to check for inconsistent heating is with a digital infrared thermometer. Test multiple spots across your platen's surface to see if the temperature is stable and actually matches what your controller says it is.
How Should I Clean My Heat Press Platen?
Keeping your platen clean is non-negotiable if you want to prevent leftover gunk from ruining your next project. Before every session, just give the cool platen a quick wipe with a soft, dry cloth to get rid of any dust or lint.
For more stubborn build-up from ink or adhesives, heat the press to around 100°C, then switch it off and unplug it. Very carefully, wipe the warm Teflon-coated surface with a clean cloth. Whatever you do, never use abrasive scrubbers or harsh chemical cleaners. They will permanently damage the non-stick coating and wreck your machine’s performance.
What Else Can I Use a Heat Press For?
Heat presses are incredibly versatile tools that go way beyond t-shirts. You can use them to apply designs to a huge range of items, which is a brilliant way to expand your product line-up. Some popular choices include:
- Tote bags and canvas shoppers
- Hoodies and sweatshirts
- Custom mouse pads
- Ceramic tiles and coasters
- Certain types of flat metal plates
The main thing to remember is that the item—or substrate, as it's known in the biz—must be flat and able to withstand the heat. You'll also need to use the right type of transfer material designed specifically for that surface to get a great result.
At Psyque, our professional heat presses are the workhorses of our studio. They're essential for creating the vibrant, long-lasting apparel you see in our collections. Discover the difference quality makes by exploring our designs at https://psyque.co.uk.