
A Beginner's Guide to Heat Transfer Printing
Heat transfer printing is a fantastic way to get a custom design onto a surface, usually fabric, using a combination of heat and pressure. If you ever played around with iron-on patches as a kid, you’re already familiar with the basic idea. This is just the professional, grown-up version of that – far more durable and incredibly versatile.
So, What Exactly Is Heat Transfer Printing?
At its core, heat transfer printing is a straightforward process. You start with a design that's been printed onto a special transfer material, like vinyl, paper, or a specialised film. Then, using a heat press, that design is permanently bonded to your item (what we call the substrate). It's one of the most popular methods out there for decorating t-shirts, hoodies, and all sorts of other textiles.
The real magic comes down to three key ingredients:
- Time: How long the heat press clamps down.
- Temperature: The exact heat needed to activate the design's adhesive.
- Pressure: The force required to create a strong, even bond with the fabric.
When you get this trio perfectly balanced, the adhesive on the back of your design melts and fuses right into the fibres of the material. What you’re left with is a sharp, vibrant graphic sitting beautifully on the surface, bringing your digital idea to life.
The Key Players Explained
To really get your head around it, it helps to know the four main components in any heat transfer project. First up is your digital design—the artwork you want to press. Second is the transfer medium, which is the carrier for your design before it meets the heat. This could be a sheet of coloured vinyl, a printed film, or special transfer paper.
Next, you have the most vital piece of kit: the heat press. This machine delivers the consistent temperature and even pressure that a home iron just can't compete with. Finally, there's the substrate, which is simply the blank item you're decorating—most often a t-shirt, tote bag, or hat.
Heat transfer printing has become a go-to for so many different projects. It gives small businesses, hobbyists, and even large companies the power to create high-quality, customised gear quickly and without breaking the bank.
Why Is It So Popular?
A big reason for its popularity is how accessible it is. Compared to something like screen printing, the setup costs are much lower, making it perfect for small runs or even one-off custom pieces. If you're exploring options for custom t-shirt printing, you’ll quickly find that heat transfer gives you amazing flexibility for detailed, multi-coloured designs without all the complicated screen prep.
But this technique isn't just for crafters making unique gifts at home. It’s a huge part of the branded merchandise world, used for everything from corporate event t-shirts to local sports team uniforms. The ability to produce vivid, high-detail graphics on demand makes it an indispensable tool for modern customisation.
Comparing The Core Heat Transfer Methods
While the basic idea of using heat and pressure is the same across the board, not all heat transfer printing is created equal. The method you pick will massively change the look, feel, and durability of your final product. Let's break down the three powerhouse techniques you'll come across most often: Heat Transfer Vinyl (HTV), Direct to Film (DTF), and Dye Sublimation.
Each method has its own unique strengths, a bit like choosing the right type of paint for an art project. One might be perfect for bold lettering on a sports jersey, while another is a master at capturing photographic detail. Getting to grips with these differences is the key to matching your creative vision with the right technical process.
Heat Transfer Vinyl (HTV): The Reliable Workhorse
Think of Heat Transfer Vinyl, or HTV, as the digital version of stencilling. It's a straightforward and incredibly popular method, especially for designs made up of clean lines and distinct colours. The process involves cutting your design from a sheet of coloured vinyl with a plotter, then pressing it firmly onto the garment.
HTV is the go-to for so many applications because it's reliable and produces bold, opaque results that really stand out. It’s perfect for:
- Text and Numbers: Think custom names and numbers on the back of football shirts.
- Simple Logos: Ideal for company uniforms or merchandise with clear, graphic-based branding.
- Single-Colour Designs: When you need a solid, vibrant colour that pops, HTV delivers every time.
This method’s popularity has cemented its place in the UK's custom apparel industry. In fact, the UK heat transfer vinyl (HTV) market was valued at around USD 55.54 million in 2024. It's expected to keep growing by about 5.1% each year, thanks to huge demand in fashion, sportswear, and promotional goods.
The final print has a distinct feel, as it sits on top of the fabric. While modern vinyls are very thin and flexible, you can still feel the design as a slightly raised layer.
Direct to Film (DTF): For Full-Colour Freedom
This is where heat transfer printing truly shines for complex, detailed artwork. Unlike HTV, which is limited to the solid colours of vinyl you have on hand, Direct to Film (DTF) allows for unlimited colours, gradients, and fine details. It beautifully bridges the gap between digital printing and traditional transfer methods.
The process itself is fascinating. A specialised printer prints your full-colour design onto a clear film. A powder adhesive is then applied to the back of the wet ink, cured with heat, and the entire transfer is ready to be pressed onto almost any type of fabric you can think of.
DTF printing is a genuine game-changer. It removes the colour limitations of vinyl without forcing you into the fabric restrictions of sublimation. It really offers the best of both worlds for creating vibrant, detailed designs on cotton, polyester, and blends.
This makes DTF the superior choice for photorealistic images, intricate illustrations, or any design with complex colour blending. The final print is remarkably soft and flexible, integrating into the fabric much more smoothly than traditional vinyl. If you'd like to dive deeper, our complete guide fully explains what is DTF printing and how it works.
Dye Sublimation: The Art of Infusion
Dye Sublimation is a truly unique process that feels a bit like magic. Instead of placing a layer on top of the fabric, sublimation permanently dyes the fibres themselves. It works by turning solid ink into a gas under high heat, which then bonds with the polyester molecules of the garment on a chemical level.
This reaction means the final design has absolutely zero feel, or 'hand'. You can run your hand over it, and it feels exactly the same as the unprinted fabric. Because the ink becomes part of the material, the print is also incredibly durable—it will not crack, peel, or fade, ever.
However, there are two key limitations you must know about:
- Fabric Type: Sublimation only works on polyester or materials with a special poly-coating. It won't work on natural fibres like cotton.
- Fabric Colour: It must be done on white or light-coloured garments. The inks are transparent, so they simply won't show up on dark fabrics.
This method is perfect for all-over prints on sportswear or creating stunning, photorealistic images on items like mugs, keyrings, and mousepads, as long as they have the correct polymer coating.
To help you visualise how these methods stack up against each other, we've put together a handy comparison table.
Heat Transfer Printing Methods at a Glance
Here's a quick look at how HTV, DTF, and Dye Sublimation compare, helping you choose the best option for your project.
| Method | Best For | Compatible Materials | Feel of Final Print |
|---|---|---|---|
| HTV | Bold text, numbers, simple logos, and single-colour graphics. | Cotton, Polyester, Blends, Leather, Nylon | A distinct, slightly raised layer. |
| DTF | Full-colour photos, complex graphics, and detailed illustrations. | Cotton, Polyester, Blends, Canvas, Denim, and more. | Soft, flexible, and smooth to the touch. |
| Dye Sublimation | All-over prints, photorealistic images on hard surfaces. | 100% Polyester or Poly-Coated Items (mugs, etc.) | Zero feel—the ink is part of the fabric. |
As you can see, each technique has its moment to shine. Your choice ultimately depends on the design's complexity, the material you're printing on, and the final feel you're aiming for.
The infographic below offers another way to visualise the trade-offs between durability, cost, and vibrancy for each method.
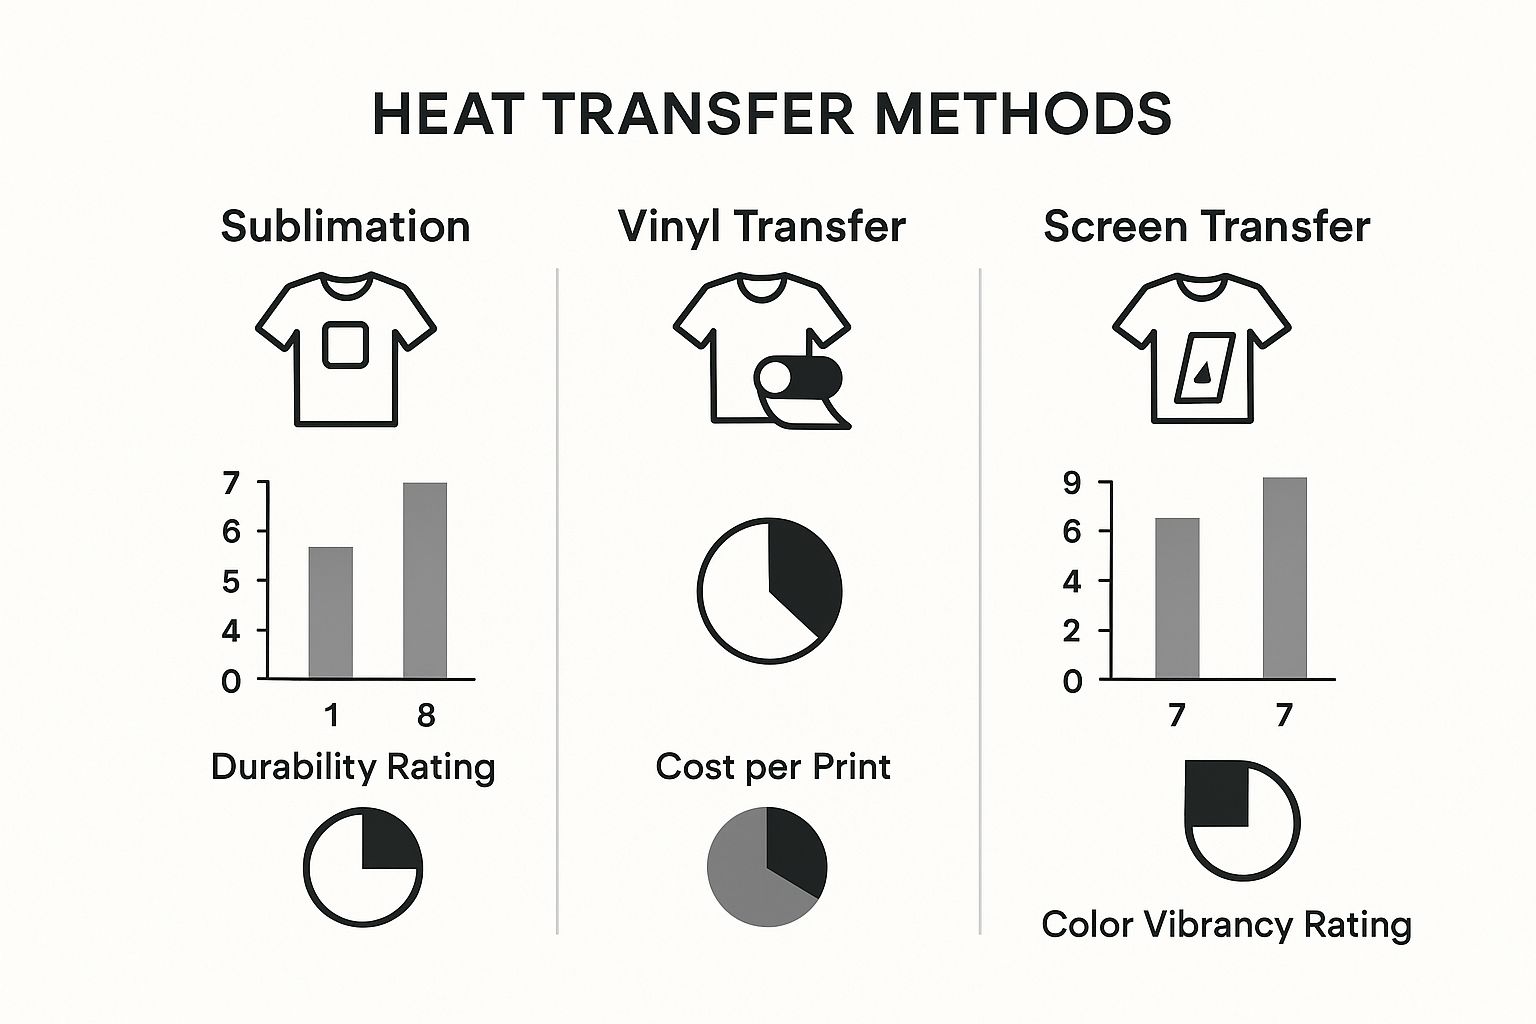
As the chart illustrates, sublimation scores highest on durability and vibrancy but is also the most expensive to get started with, while vinyl offers a brilliantly cost-effective solution with strong vibrancy for simpler jobs.
Your Essential Heat Transfer Printing Toolkit

Alright, so you’ve got the concepts down. Now for the fun part: getting your hands on the right gear. Moving from theory to practice means building your own heat transfer printing toolkit, and knowing what to buy is the first real step on that journey.
Think of this as your shopping list for success. We’ll walk through the core machinery, essential supplies, and those little accessories that make all the difference in turning a digital file into a physical product you can be proud of.
The Heart of Your Setup: The Heat Press
Let's get one thing straight from the start: the single most crucial piece of kit you'll own is the heat press. You might be tempted to try a standard household iron, but it’s a recipe for disappointment. An iron just can't provide the consistent, even pressure and stable temperature needed for a professional, long-lasting print.
Investing in a good heat press isn't just a recommendation; it's essential for getting reliable results every single time.
They generally come in three main styles, each with its own pros:
- Clamshell: This is a hugely popular design that opens and closes just like a clamshell. It’s compact, making it a great choice for smaller workspaces, and it’s very beginner-friendly for printing T-shirts and other flat items.
- Swing-Away: Just as the name suggests, the top heated plate swings away to the side. This gives you a completely clear view of the base, making it much easier to line up your garments and transfers perfectly without rushing.
- Draw: A clever hybrid where the bottom plate slides out towards you like a drawer. You get the easy access of a swing-away without needing as much side-to-side space, and it keeps your hands well away from the heat.
Which one is right for you? It really boils down to your workspace and what you plan on making. For a more detailed look at the options, our guide on choosing a t-shirt transfer printer and press can help steer you in the right direction.
Core Machinery for Each Method
After the heat press, your next big purchase depends entirely on which printing method you’ve chosen. You don't need everything here—just what’s right for your specific workflow.
If you're going the HTV route, a vinyl cutter (often called a plotter) is non-negotiable. This machine is your precision workhorse, taking your digital design and cutting it perfectly from sheets of vinyl. It hooks up to your computer and acts a bit like a printer, but instead of ink, it uses a tiny blade to trace the outlines of your artwork.
For both DTF and sublimation, a specialised printer is key. A DTF printer is built to handle specific inks that print onto a clear PET film. In the same vein, a sublimation printer uses its own unique inks and paper, creating transfers that turn into a gas under heat to permanently dye polyester fabrics.
Essential Consumables and Supplies
Consumables are all the materials you'll use up and need to restock for each project. Your shopping list here will be very specific to your chosen technique.
- For HTV: You’ll be stocking up on rolls or sheets of Heat Transfer Vinyl. It comes in a massive range of colours and cool finishes like matte, glitter, holographic, and flock.
- For DTF: The key ingredients are DTF film (your transfer sheets), the correct DTF inks for your printer, and a special powdered adhesive that's sprinkled over the wet ink to create the bond.
- For Sublimation: This method requires sublimation inks and special sublimation paper, which is engineered to release the ink as a gas when heated.
Think of these consumables as your artist's palette. The quality of your vinyl, film, and inks directly impacts the vibrancy, feel, and durability of your final print. Skimping here can lead to disappointing results, even with the best equipment.
Small but Mighty Accessories
Finally, there are a few small tools that make a world of difference. They might seem minor, but they are absolutely vital for getting that clean, professional finish and making your life easier.
- Weeding Tools: These look a bit like dental picks and are used to remove all the tiny bits of excess vinyl from around your cut HTV design. A true must-have for intricate work.
- Heat-Resistant Tape: This special tape is your best friend for sublimation and DTF. It holds your transfer perfectly in place on the garment, preventing any annoying shifting or "ghosting" during pressing.
- Teflon Sheets or Parchment Paper: You'll place one of these protective sheets between your transfer and the hot plate of the press. It stops any stray ink from staining your equipment and helps distribute the heat evenly.
A Step-by-Step Walkthrough of the Printing Process
Right, we've talked about the core concepts and the gear you'll need. Now it’s time to get our hands dirty and turn theory into practice. Think of this as your roadmap for creating that first custom tee, taking you from a digital file on your screen to a finished product you can actually wear.
We're going to break the whole heat transfer printing workflow down into four simple stages. We’ll cover getting your design ready, prepping your materials, the actual press, and those all-important finishing touches. Stick to these steps, and you'll sidestep the common pitfalls and end up with a professional-quality print to be proud of.
Stage 1: Design Preparation
Every fantastic print begins with a solid design file. Nailing this first step saves a world of headaches later on. The kind of file you need really boils down to which printing method you're using.
If you're working with Heat Transfer Vinyl (HTV), you absolutely need a vector file. Imagine a vector as a connect-the-dots map for your vinyl cutter—it tells the blade precisely where to slice. You'll typically see these as SVG, AI, or EPS files. They're perfect for logos, text, and any graphic with sharp, clean lines.
For Direct to Film (DTF) and sublimation, on the other hand, you’ll be using a high-resolution raster image. These are the pixel-based files you're probably familiar with, like JPEGs and PNGs. To dodge a blurry, pixelated mess on your final print, make sure your image is at least 300 DPI (dots per inch) at the final print size.
Stage 2: Material Preparation
With your design file good to go, it's time to prep the physical transfer. This is where things get a bit more hands-on, and again, the steps change depending on your chosen method.
- For HTV: You'll load your vinyl sheet into a cutter and send over the vector file. The machine then gets to work, cutting your design with incredible precision. Once it’s done, you have to "weed" it—which is just a fancy term for using a little tool to peel away all the extra vinyl that isn't part of your design.
- For DTF: Here, your high-res image is printed directly onto a special DTF film. While the ink is still wet, it gets a dusting of fine powder adhesive that sticks only to the printed areas. A quick blast of heat cures the film, turning that powder into a solid, durable adhesive layer that’s ready for the press.
- For Sublimation: This one is refreshingly straightforward. Your design is printed onto special sublimation paper using sublimation inks. That’s it. Your transfer is now ready for action.
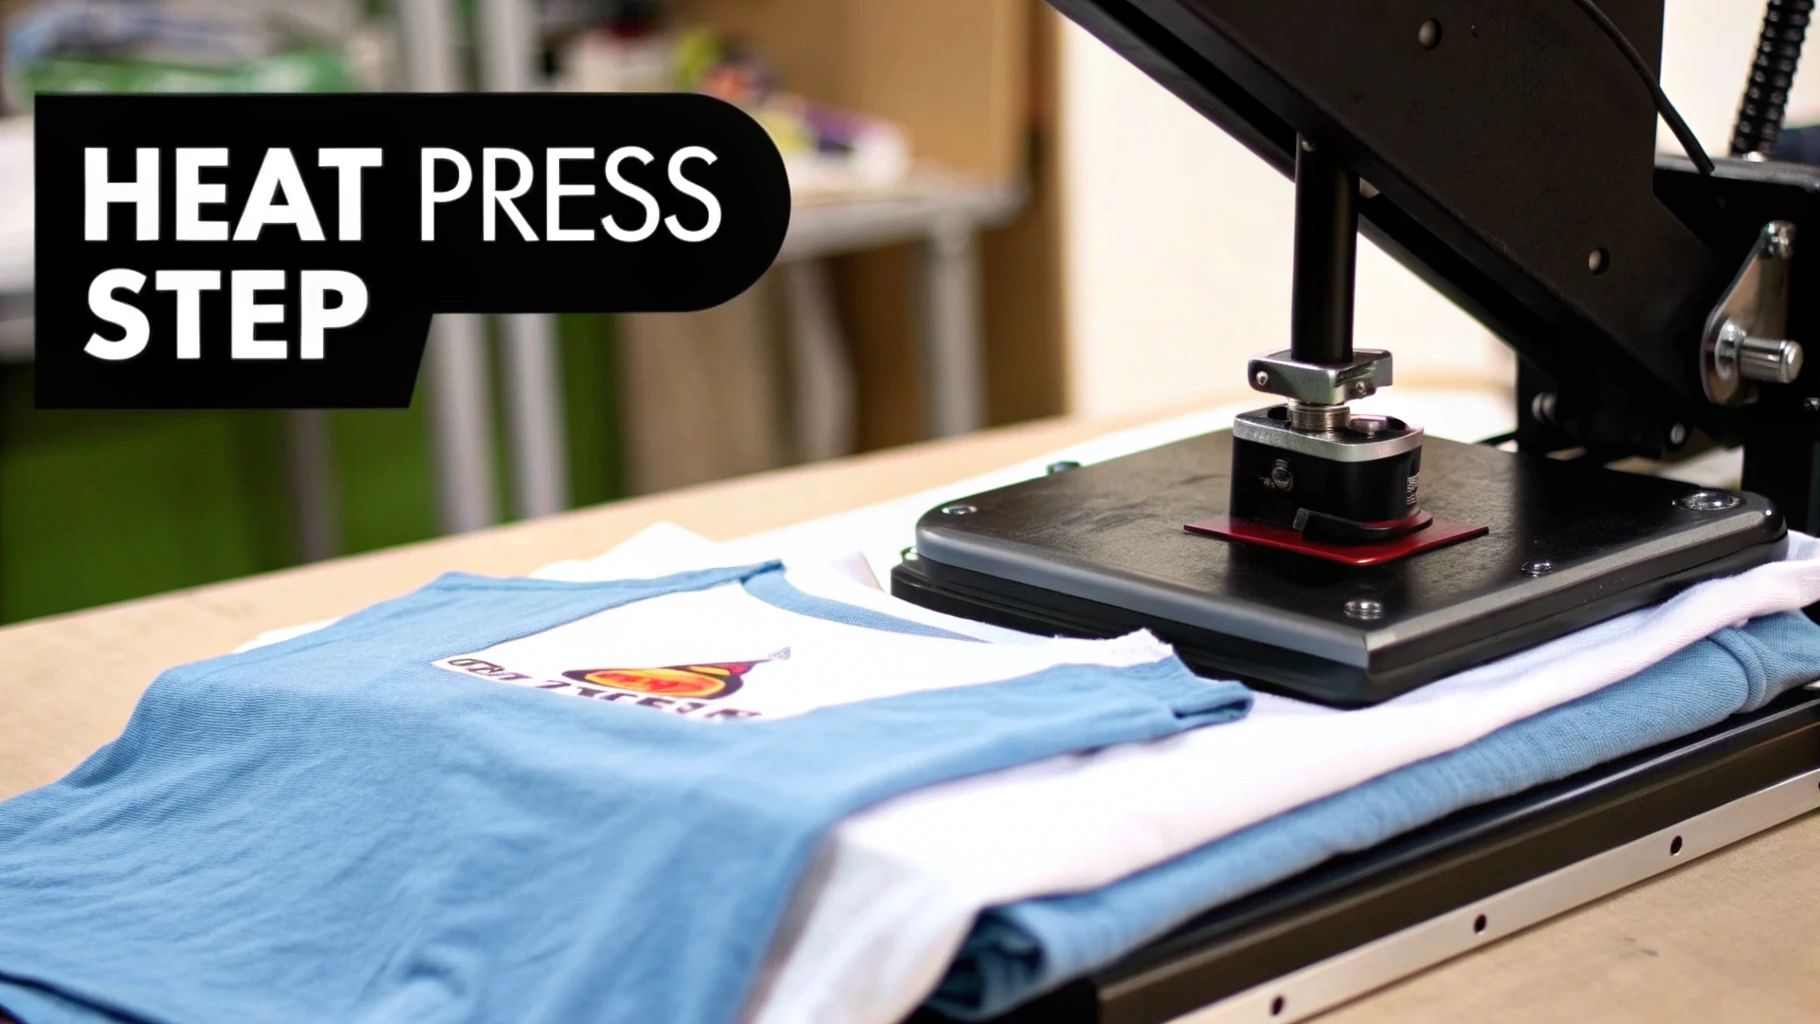
Stage 3: The Pressing Stage
This is the main event—where the real magic happens. A successful press is all about striking the perfect balance between three critical elements: time, temperature, and pressure. Getting this formula right is the secret to a vibrant, durable transfer that will stand the test of time.
First things first, always pre-press your garment for about 5-10 seconds. It might seem like a small thing, but this step removes any hidden moisture and smooths out wrinkles, giving you a perfectly flat, dry canvas for your design.
Next, carefully position your transfer. On a t-shirt, a good rule of thumb is to place it about three or four fingers down from the collar. A ruler or a T-square alignment tool can be a lifesaver here for getting it perfectly straight. If you’re using sublimation or DTF, a couple of small pieces of heat-resistant tape will stop the transfer from sliding about during pressing.
The combination of time, temperature, and pressure isn't just a suggestion; it's a precise formula. Each transfer material has its own specific requirements, and following them is the key to a flawless application.
Once you’re happy with the placement, it's time to press. The exact settings will vary depending on your specific materials and equipment. For a really deep dive into the right settings for different fabrics and vinyls, check out our detailed heat press temperature guide.
Stage 4: Finishing and Aftercare
The final step is the big reveal, but how you peel the transfer backing is crucial. Transfers are either a "hot peel" or a "cold peel." As the names suggest, this tells you whether to rip off the carrier sheet immediately while it's still hot, or to wait for it to cool down completely. Always, always check the instructions for your specific material—peeling at the wrong time can completely ruin an otherwise perfect print.
The industry is always pushing to make this process quicker. In the UK, we're seeing some great advancements in low-temperature transfers, including 'Hot Peel' materials that let you peel straight after pressing. This is a massive time-saver, helping printers meet the ever-growing demand for rapid turnarounds in the custom apparel world.
Finally, a little bit of aftercare goes a long way in making your creation last. To keep it looking its best:
- Wait at least 24 hours before its first wash.
- Always turn the garment inside out before washing.
- Stick to a cold wash cycle.
- Tumble dry on low, or even better, let it hang dry.
By following these four stages, you can confidently work through the entire heat transfer printing process and get brilliant, consistent results every time.
Creative Ideas and Real-World Applications
Knowing the theory is one thing, but seeing heat transfer printing out in the wild is where the real magic happens. This isn't just about slapping designs onto t-shirts; it's a versatile technology that powers creativity for everyone from bedroom hobbyists to big-name brands. Its adaptability is its greatest asset.
Just look at the custom apparel scene. It’s completely changed the game for independent artists and bands, who can now produce small, profitable runs of merch without the eye-watering upfront costs of screen printing. Small businesses, too, can kit out their teams with professional uniforms that build a sharp, cohesive brand identity.
Custom Apparel and Gifting
The appetite for personalised gear is absolutely massive, and heat transfer printing is the perfect tool for the job. We're talking about those truly one-of-a-kind gifts for birthdays, stag and hen dos, or family holidays. A DTF transfer lets you press a full-colour photo onto a hoodie, turning it into a gift that’s genuinely heartfelt and unique.
For those bolder, simpler graphics, HTV is the go-to.
- Small Business Uniforms: Think a crisp, single-colour logo on polo shirts or aprons.
- Band Merchandise: Perfect for getting striking band names and logos onto t-shirts and tote bags.
- Personalised Gifts: Adding that custom bit of text or a sweet graphic to a babygrow or cushion cover.
Sportswear and Team Kits
Head down to any local football pitch or basketball court, and you're guaranteed to see heat transfer printing in action. When it comes to customising team jerseys, HTV is the undisputed champion. Its durability and vibrant finish are spot-on for adding player names, numbers, and sponsor logos to sportswear.
The vinyl is tough enough to handle the rough-and-tumble of a match and countless cycles in the washing machine – an absolute must for any team kit.
Promotional Products and Branding
Beyond clothing, heat transfer printing is a heavyweight in the promotional products industry. It's a brilliantly effective way for businesses to get their brand into the hands of potential customers. The possibilities are almost endless, allowing companies to create a consistent look across a huge range of items.
Heat transfer technology allows brands to create tangible connections with their audience. A branded tote bag or cap is more than just a giveaway; it’s a walking advertisement that builds recognition and loyalty.
Some of the most popular promotional items include:
- Branded Tote Bags
- Custom Caps and Hats
- Personalised Mousepads
- Printed Mugs (using sublimation)
This technology is a huge part of the UK’s thermal printing market, which continues to grow in sectors like retail and logistics. On a global scale, the thermal printing market was expected to reach around USD 48.1 billion in 2025 and keep growing at 5.5% annually through to 2035. That's a clear signal of just how vital this tech has become. You can explore more about this growing market and its industrial applications.
Expanding into Home Décor
Finally, don't sleep on the creative potential for home décor. Dye sublimation, especially, blows the doors wide open for creating stunning, permanent designs on polyester-based fabrics. You can design and press custom cushion covers, unique tea towels, or personalised fabric wall art, adding a bespoke touch that transforms any living space.
How to Troubleshoot Common Printing Problems
Even with years of experience under your belt, heat transfer printing can throw a curveball now and then. But don't worry—knowing what to look for will save you a world of time, wasted materials, and headaches. Let's get straight into the most common issues and how to fix them.
Probably the number one complaint is a design that starts peeling or cracking after its first trip through the washing machine. This is almost always a dead giveaway that one of the big three—time, temperature, or pressure—was off during the press.
If your design is lifting at the edges, it’s a strong sign the heat press wasn't hot enough or didn't clamp down with enough force. The adhesive needs a specific combination of these elements to properly melt into the fabric’s fibres. Always, always double-check the recommended settings for your specific transfer material.
Faded Colours and Press Marks
Are your sublimation prints looking a bit washed out, or are your DTF colours just not popping like you expected? This usually points to a problem with either your garment choice or your press settings.
- For Sublimation: Dull colours are the classic symptom of not using a 100% polyester garment. Sublimation ink can only permanently bond with polyester fibres. If you press it onto a cotton blend, you'll get a faded, vintage look instead of a vibrant one.
- For DTF and HTV: Faded results often mean your temperature or pressure was too low. It's worth making sure your heat press is calibrated correctly and giving you even heat across the whole platen. To dive deeper into this, you can learn all about how DTF transfers work in our detailed guide.
Another tell-tale problem is that faint, rectangular "box" left on your shirt where the heat press made contact. This usually happens when the pressure is too high or the heat is too intense for that particular fabric, causing a slight scorch mark around the design.
An easy fix for this is a pressing pillow or a simple sheet of heat-resistant foam placed inside the shirt. These accessories raise the actual print area, making sure the press only applies firm pressure to the transfer itself, not the surrounding fabric.
Once you learn to spot these key symptoms, you can quickly get to the root of the problem. Whether it means adjusting your pressure, bumping up the temperature a few degrees, or just grabbing the right kind of t-shirt, these small tweaks are what separate good results from flawless ones.
Your Top Heat Transfer Printing Questions, Answered
Once you start exploring the world of heat transfer printing, a few questions tend to pop up right away. Getting solid answers from the get-go can save you a lot of headaches and help you make smarter choices for your projects or business.
Let’s dive into some of the most common queries we hear.
How Long Will the Print Actually Last?
This is the big one, isn't it? Nobody wants a design that cracks or fades after one trip through the washing machine. While any professional method will give you good results, if we're talking about pure longevity, dye sublimation is the undisputed champion.
With sublimation, the ink literally becomes one with the polyester fibres. It's not sitting on top; it's in the material. This means it will never crack, peel, or fade, period.
DTF prints are a very close second and are incredibly tough. They hold up brilliantly in the wash and have the huge advantage of working on all sorts of fabrics, not just polyester. HTV is also a reliable workhorse, but you have to be careful—cheaper vinyls or a poor application can lead to peeling down the line.
Can I Just Use My Home Iron Instead of a Heat Press?
It's a tempting thought, especially when you're just starting out. But if you want professional, sellable results, the answer is a firm no. A home iron just can't deliver the two most critical ingredients for a successful transfer: consistent, even temperature and uniform pressure.
Your iron has hot and cool spots, and it's impossible to press down evenly with your hands. This leads to patchy, weak transfers that will almost certainly start peeling after the first wash. Think of a heat press as a non-negotiable piece of kit for anyone serious about quality.
A heat press is to printing what a proper oven is to baking. Sure, you could try to bake a cake over a campfire, but an oven gives you the controlled heat and environment you need for perfect results every single time. Your heat press does exactly that for your prints.
What's the Real Startup Cost for a Small Business?
The initial investment for a small heat transfer printing setup can vary quite a bit depending on the path you choose.
If you're starting with HTV, your main expenses are a quality heat press and a reliable vinyl cutter. You can find a solid entry-level bundle for anywhere between £500 and £2,000+.
For DTF or sublimation, the budget needs to stretch a bit further to include a specialised printer. A realistic starting budget for quality gear that won’t just cause frustration is typically in the £1,500 to £4,000 range. This will get you set up for success, depending on the scale you're aiming for.
Ready to bring your unique designs to life with professional quality? Psyque specialises in vibrant, durable DTF printing perfect for custom apparel, streetwear, and branded merchandise. Explore our collections or bring your own vision to us at https://psyque.co.uk.