
How to Order DTF Prints in the UK
So, before you jump in and order dtf prints, let’s quickly cover why this technology has become such a go-to for UK creators and businesses alike. Direct-to-Film (DTF) printing is a fantastic method for getting full-colour, detailed designs onto a massive range of fabrics—from cotton to polyester—without the messy, complicated setup of older techniques.
Why DTF Printing Is a Game Changer
If you've ever felt held back by the limits of traditional printing, Direct-to-Film is a breath of fresh air. Think about screen printing, where you need a separate screen for every single colour in your design. DTF scraps all that by printing your entire graphic in one go, making it incredibly efficient for vibrant, multi-coloured images.
This is huge for a small clothing brand launching a new hoodie collection. They can print a complex, full-colour graphic on both light and dark garments without paying the steep setup costs that come with making multiple screens. It genuinely opens up creative avenues that used to be far too expensive for smaller print runs.
The Key Advantages of DTF Transfers
DTF isn't just about being efficient; it's about the quality and versatility you get. The benefits have a direct impact on the final look, feel, and durability of your custom gear.
Here’s what makes DTF stand out from the crowd:
- Fabric Versatility: DTF works brilliantly on pretty much everything, including cotton, polyester, and blends. This is a big deal, as other methods like Direct-to-Garment (DTG) can really struggle with synthetic fabrics.
- Vibrant, Full-Colour Prints: The process is amazing at reproducing photo-quality images and tricky gradients with crisp, sharp details. What you see on your screen is what you get on the fabric.
- Soft and Flexible Feel: DTF prints have a soft-to-the-touch finish that moves and stretches with the garment. You won't get that thick, plastic-like feeling that some older transfer methods are known for, keeping the clothing comfy to wear.
- Exceptional Durability: When applied properly, these transfers are tough. They can handle wash after wash without cracking, peeling, or fading, so your designs stay looking sharp for much longer.
This isn't just a trend, either. The numbers back it up. The global DTF printing industry has seen explosive growth, churning out over 7.2 billion prints worldwide with an impressive 30% year-over-year increase. It’s clear this has shifted from a niche technology to a mainstream solution for custom apparel.
Bottom line: choosing to order DTF prints means you're getting the versatility of heat transfers combined with the quality of screen printing, but without the high setup costs. It’s a modern solution built for today's creative projects.
Whether you're starting a clothing line or just need some top-notch promotional merch, getting to grips with what DTF can do is the first step. To really dive in, have a look at our complete guide on the fundamentals of DTF printing. A little bit of background knowledge will give you the confidence to move forward and get your order just right.
Getting Your Artwork Ready for Flawless Prints

The secret to a stunning print isn’t in the printer itself, but in the digital file you send us. What you see on your screen is only half the story; it’s the technical details hidden inside the file that dictate how perfectly your design transfers onto fabric.
Getting this right from the start is the difference between a professional result and a costly, frustrating mistake.
Let’s zero in on the two most critical elements: file type and resolution. For DTF printing, a PNG file with a transparent background is absolutely essential. This format is what allows us to print just your design, without any unwanted box around it.
Equally important is a resolution of 300 DPI (dots per inch). There’s a reason this is the industry standard—it guarantees every line, curve, and tiny detail prints with crisp, clean edges. Anything less, and you'll end up with pixelated, blurry prints that just look amateur.
A Real-World Design Scenario
Imagine you're a graphic designer prepping a multi-coloured logo with some fine, delicate text for a client's new t-shirt line. You've nailed the design in Adobe Illustrator, and it looks perfect on your monitor. What's next?
Before you even think about uploading, you need to export a print-ready file.
First, check the resolution. Whether you’re using Illustrator, Canva, or Photoshop, you can set this when you create the document or during export. Always, always select 300 DPI.
Next, you need to export it correctly.
- Choose the Right Format: Go to "Export As" and choose PNG.
- Ensure Transparency: Look for a tickbox that says "Transparent Background" and make sure it's selected. This is vital for avoiding that dreaded white or coloured box around your logo.
- Confirm Resolution: Just before you hit save, double-check that the export resolution is still set to 300 DPI.
This simple checklist is your best friend for optimising files for DTF. Another crucial element is your file's colour mode. For a deeper dive into how this affects your final print, check out our guide on the differences between CMYK vs RGB for print projects.
Common Artwork Mistakes to Avoid
Submitting a flawed file is the most common reason projects get delayed or end in disappointment. Even the best DTF printers in the world can't fix a poor-quality source file—we can only print what we're given.
Submitting a low-resolution JPEG with a white background is one of the most frequent errors we see. JPEGs compress your image, losing valuable detail, and the solid background will be printed along with your design. The result is a clumsy, sticker-like effect on the fabric.
Keep an eye out for these other common slip-ups:
- Forgetting to remove the background: This is an easy mistake, but it results in an unwanted coloured square being printed around your design.
- Using a low-resolution image: That 72 DPI image you pulled from a website might look fine online, but it will look jagged and unprofessional when printed on a t-shirt.
- Flattening layers with a background: If you flatten your image in a programme like Photoshop, make sure the background layer is switched off first.
By preparing your artwork with these guidelines in mind, you can be confident that the vibrant, sharp design you created on-screen is exactly what you’ll get on your finished garment.
How to Place Your DTF Print Order Online
Right, so you’ve got your artwork polished and ready to go. The final step is actually placing the order, which can feel a bit intimidating the first time you navigate an online portal. But honestly, most UK suppliers have made the process incredibly straightforward. It really just comes down to a few key decisions to get everything spot on for your project.
First things first, you’ll need to choose the size of the DTF transfer. This isn’t just about the dimensions of your artwork file; it’s about how that design will actually look and feel on the garment. A small, subtle logo for the left chest of a polo shirt needs a completely different transfer size than a massive, eye-catching graphic for the back of a hoodie.
Maximising Value with Gang Sheets
Here’s a pro tip that can save you a serious amount of money: use a gang sheet. This is one of the smartest ways to order DTF prints, especially if you have multiple designs. A gang sheet is just a large sheet of transfer film where you can arrange, or ‘gang’, as many different designs as you can fit.
Instead of ordering dozens of individual small transfers, you cram them all onto one or two bigger sheets. This dramatically slashes your cost per print.
Let's imagine you're sorting out merch for a local charity run. You'll need:
- Small logos for the front of the t-shirts.
- A larger "FINISHER" design for the back.
- Maybe a little sponsor logo for one of the sleeves.
If you ordered these three designs separately, it would be wildly inefficient and expensive. With a gang sheet, you simply arrange all three—the chest logo, the back graphic, and the sleeve logo—repeatedly onto a single large sheet. The beauty of it is that you pay for the sheet, not for how many designs are on it.
This method is an absolute game-changer for small businesses or independent clothing brands where every penny counts. You get all the prints you need with minimal waste. If you're digging into the business side of things, our guide on finding the right custom t-shirt printers has some more useful perspectives.
The Final Steps: Uploading and Confirming
Once you’ve settled on your transfer sizes and decided if a gang sheet is right for you, the rest is pretty simple. You’ll be prompted to upload your print-ready PNG files. Most online portals have a simple drag-and-drop tool, so it only takes a second.
After your files are uploaded, you just need to select your quantity and review the order. This is your moment to be meticulous. Double-check everything—the sheet size, the number of sheets, and the artwork itself. It's always a good idea to make sure your design is positioned correctly and fills the space as you intended. And before you hit that final purchase button, it never hurts to brush up on some general smart online shopping tips for a smooth transaction.
Take a moment to preview the final layout. A good supplier’s portal will show you a digital mock-up of your gang sheet. This visual check is your last line of defence against any mistakes, making sure what you’ve ordered is exactly what you’ll get.
With everything confirmed, you're ready to head to the checkout. By following this simple approach, you can place your order with total confidence, knowing you've optimised for both quality and cost.
Choosing the Right Transfer for Your Fabric
Let’s be honest, not all DTF transfers are created equal. The material you’re pressing onto makes a massive difference to the final look and feel. A transfer designed for tough, synthetic polyester sportswear just isn’t the same as one meant for a soft, premium cotton tee. Nailing this choice is what separates a professional-looking garment from one that just doesn’t last.
So, where do you start? First, think about what the garment is actually for. Is it a fashion piece that needs a soft, barely-there feel, or is it hard-wearing workwear that needs to be bulletproof? For your everyday cottons and poly-cotton blends, a standard DTF transfer is usually your best bet. It’s the versatile workhorse of the industry, giving you that perfect sweet spot of vibrant colour, a soft touch, and reliable performance in the wash.
But when you really want to make an impression, that’s when specialty transfers come into their own.
Standard vs Specialty Transfers
Think of standard transfers as your bread and butter – they’ll handle most jobs brilliantly. But for those projects that need a little something extra, exploring specialty options can take your design from great to genuinely unforgettable. These aren't just gimmicks; they’re designed to solve specific challenges and create premium finishes that let you charge a higher price.
- Glitter Transfers: An absolute must for adding some sparkle. Think dance costumes, festive gear, or any design that needs to catch the light and command attention.
- Metallic Transfers: These give you that slick, foil-like reflective finish. Perfect for luxury branding or high-end fashion pieces where you want a touch of gold, silver, or another metallic sheen.
- UV Colour Change Transfers: These are really clever. They look quite subtle indoors but burst into vibrant colours when they hit the sunlight, adding a cool, interactive element to your design.
Getting your head around these options is the key to matching the transfer to your creative vision. For a deeper dive into what’s out there, our overview of different DTF transfer sheets available in the UK is a great place to start.
Here’s a quick guide to help you match the right transfer to your fabric for the best results.
Matching Your Transfer to Your Fabric
Use this comparison table to select the best DTF transfer type based on the garment material and the desired outcome for your project.
| Fabric Type | Recommended DTF Transfer | Key Considerations and Tips |
|---|---|---|
| 100% Cotton & Poly-blends | Standard DTF | Your go-to for t-shirts, hoodies, and tote bags. Offers a soft feel and excellent wash durability. |
| Polyester & Sportswear | Standard or Low-Temp DTF | Low-temp transfers help prevent dye migration (colour bleed) on tricky polyester fabrics. |
| Stretch Fabrics (Lycra/Spandex) | High-Stretch DTF | Essential for gym wear or cycling gear. The transfer stretches with the fabric to prevent cracking. |
| Specialty Items (Fashion) | Glitter, Metallic, UV | Use these to add a premium, eye-catching finish. Always test press to get the application just right. |
| Workwear & Heavy-Duty | Industrial-Strength DTF | Look for transfers with maximum durability and wash resistance for uniforms and safety vests. |
Choosing the right transfer isn't just about the fabric; it's about making sure your final product lives up to your (and your customer's) expectations. A little bit of planning here goes a long way.
Why Your UK Supplier Matters
When you order DTF prints, the quality and consistency of what you receive are everything. Partnering with a reputable UK-based supplier like Psyque means you’re getting transfers made with top-notch films, inks, and adhesives. This isn't just a minor detail – it directly affects how durable the print is, how accurate the colours are, and how easy it is to press.
The UK's direct-to-film printing scene is growing for a reason, with a steady compound annual growth rate of 4.1%. This points to a mature industry with high standards, where established suppliers in hubs like Manchester and London are using advanced printing systems to deliver consistent, reliable results. You can find more insights on the European direct-to-film market here.
A good supplier doesn’t just sell you transfers; they provide a consistent, reliable product you can build your entire brand on. It means that every time you reorder, you’ll get the same colour profile and performance. That’s absolutely critical for businesses that need uniform results for staff workwear or entire retail collections. Making the right choice from the start saves you a world of headaches and costly reprints down the line.
Applying Your DTF Transfers Like a Pro
Right, your custom DTF prints have landed. Now for the best bit – getting those brilliant designs onto fabric. This is where the magic happens, but it’s also where things can go wrong if you’re not careful. A top-quality print needs a top-quality application to match. This last step is what locks in that professional, durable finish that your customers will love.
Getting it right comes down to the big three of heat pressing: temperature, time, and pressure. Think of them as a team. They have to work together perfectly to cure the adhesive and fuse the ink right into the fabric fibres. If one is off, you’ll end up with a print that peels, cracks, or just doesn’t stick properly in the first place.
This little flowchart is a great visual guide for matching the fabric to the transfer type. It really simplifies the process.
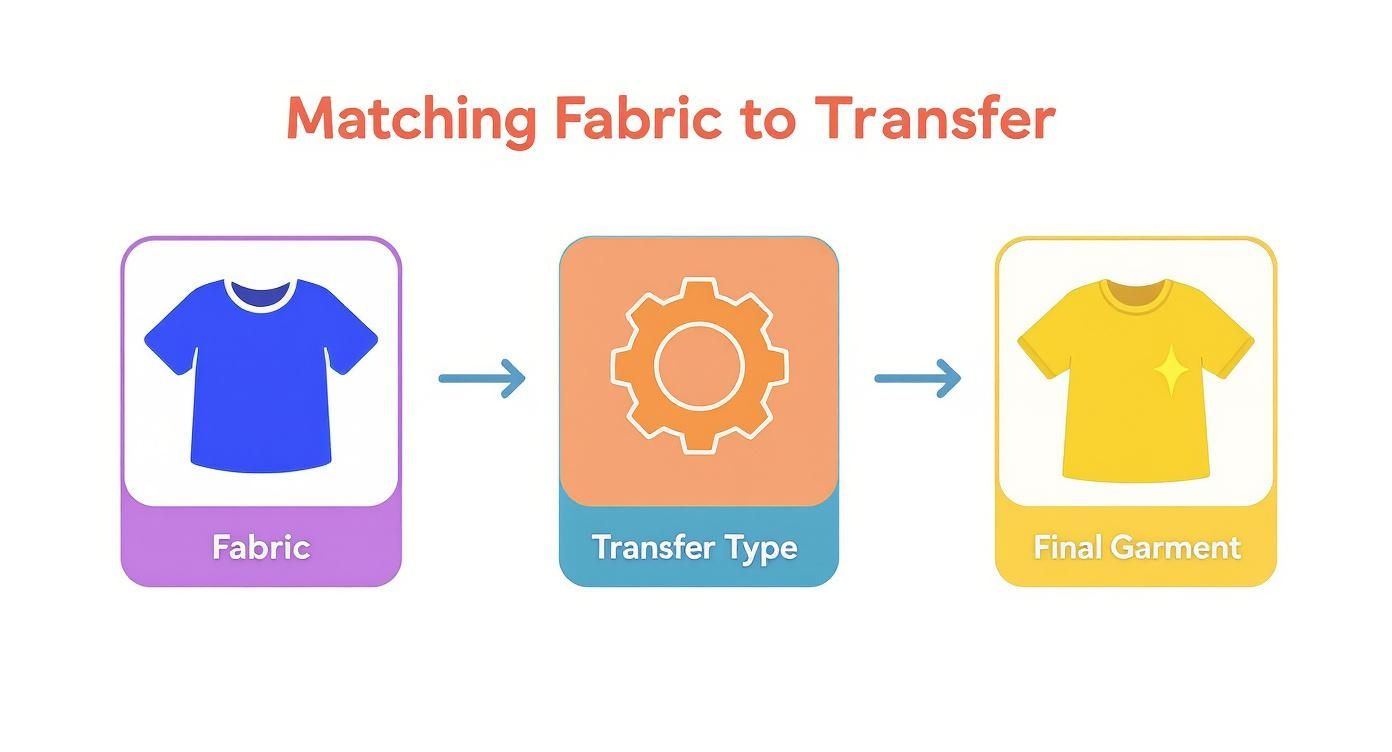
As you can see, a successful press starts with knowing your material. The fabric dictates the transfer you need, and that ultimately determines how good your final product looks and feels.
Nailing Your Heat Press Settings
I wish I could give you a single "magic" setting that works for everything, but it just doesn't exist. The perfect mix of heat and time is totally dependent on the fabric you're pressing. What works a treat for a cotton tee could easily scorch a polyester polo shirt.
Here are some solid starting points I use for the most common fabrics:
- 100% Cotton: Go for a temperature between 160-170°C and press for about 15-20 seconds. Cotton is a tough cookie and can handle the heat, which helps create a really strong bond.
- Polyester & Blends: You need to be a bit more careful here. Drop the temperature to 140-150°C for 10-15 seconds. Too much heat is your enemy—it can cause dye migration, where the fabric's colour bleeds into your nice, clean print.
- Tri-blends & Heat-Sensitive Fabrics: The motto here is low and slow. I’d start around 135°C for about 10 seconds. If you're ever in doubt, always do a quick test press on a scrap piece of fabric or an inconspicuous area.
Pressure is the final piece of the puzzle. You’re aiming for firm, even pressure right across the design. If your press doesn't have a pressure gauge, a good rule of thumb is to set it so it takes a bit of muscle to close and lock it.
The Great Peel Debate: Warm vs. Cold
Once that timer beeps, it's time to peel off the carrier film. But should you do it while it’s still warm or wait until it's completely cooled down? This depends entirely on the type of transfer you’re using, and getting it wrong can absolutely ruin your print.
Warm Peel: This means peeling the film just a few seconds after the press opens, while it’s still noticeably warm. This usually gives the print a softer feel and a more matte finish.
Cold Peel: For this, you need a bit of patience. You have to wait until both the garment and the transfer are completely cool to the touch. Cold peel transfers often leave a glossier, slightly thicker finish and are fantastic for durability.
Always, always check the instructions that came with your transfers. If you’ve misplaced them or you’re just not sure, a cold peel is generally the safer bet to avoid accidentally lifting any part of the design.
Troubleshooting Common Application Issues
Let’s say you’re in the middle of a run of 20 hoodies for a client. You’re on the fifth one, and suddenly the transfer isn't sticking properly. Don’t panic. It happens.
Here are a few common hiccups and how to fix them:
- Transfer Not Sticking: Nine times out of ten, this is a pressure or temperature problem. First, try increasing the pressure. If that doesn’t solve it, nudge the temperature up by about 5°C.
- Residue or Outline Left Behind: This usually means your temperature is too high or you’ve pressed for too long. Dial both back a little and see if that clears it up.
- Colours Look Faded: This is a classic sign that your temperature is too low. The ink hasn't been properly cured. Bump the heat up in small increments until the colours look vibrant.
Perfecting your pressing technique definitely takes a bit of practice, but keeping these guidelines in mind will get you producing fantastic results in no time. For a deeper dive into what to expect when your prints arrive, check out our guide on DTF transfers ready to press.
Got Questions About Ordering DTF Prints?
Even when the process seems straightforward, it's natural to have a few questions before you hit that "order" button. Getting the final details ironed out is the key to a stress-free experience, so let’s tackle some of the most common queries we see.
Is There a Minimum Order?
This is probably the number one question we get, especially from those used to traditional screen printing. The great news? DTF printing has no minimum order requirement.
Unlike older methods that need hefty setup, making small batches expensive, DTF is just as efficient for one print as it is for one hundred. Need a single, one-off transfer for a special gift? No problem. Need a whole batch for your new clothing line? We’ve got you covered.
This flexibility is a game-changer for small businesses and independent creators. You can test new designs and order exactly what you need without tying up cash in a huge, risky inventory.
What About My Artwork and Files?
Lots of people worry their designs might be too complex. Can DTF really handle photos, intricate gradients, or super-fine details? Absolutely. That’s where this technology truly shines. It’s perfect for reproducing photographic images and complex, multi-coloured graphics with incredible clarity.
All you need to do is make sure your file is a 300 DPI PNG with a transparent background. If you’ve got that, our printers can replicate your vision faithfully.
A quick but important note on copyrighted images: we can't print trademarked logos or artwork you don't own. You must have the rights to reproduce any design you send us.
For instance, you can’t just grab a Disney character or the Nike swoosh off the internet and ask us to print it. It’s crucial to use your own original artwork or designs you have a commercial licence for. This keeps both you and us on the right side of the law.
How Do I Apply Them and Will They Last?
Another common concern is about the application process. "Do I really need a professional heat press?" While a proper heat press will always deliver the most consistent, pro-level results, you don't have to have one. Many DIY creators get fantastic results using a high-quality home iron or a portable craft press like a Cricut EasyPress.
The secret is consistent heat and firm, even pressure. Take your time, follow the instructions, and you’ll be golden.
And finally, the big one: how durable are these prints? When applied correctly, DTF prints are incredibly tough. They’re made to handle dozens of washes without cracking, peeling, or fading into a shadow of their former selves.
To get the longest life out of your custom gear, just follow a few simple rules:
- Wash garments inside out on a cool cycle.
- Skip the tumble dryer – air drying is always your best bet.
- Never iron directly on top of the printed design.
Stick to these simple care tips, and your custom apparel will stay looking vibrant for a long, long time.
Ready to bring your own designs to life with prints that are as durable as they are brilliant? Check out the collections and custom printing options at Psyque. Place your order today and see the quality for yourself! Find out more at https://psyque.co.uk.