
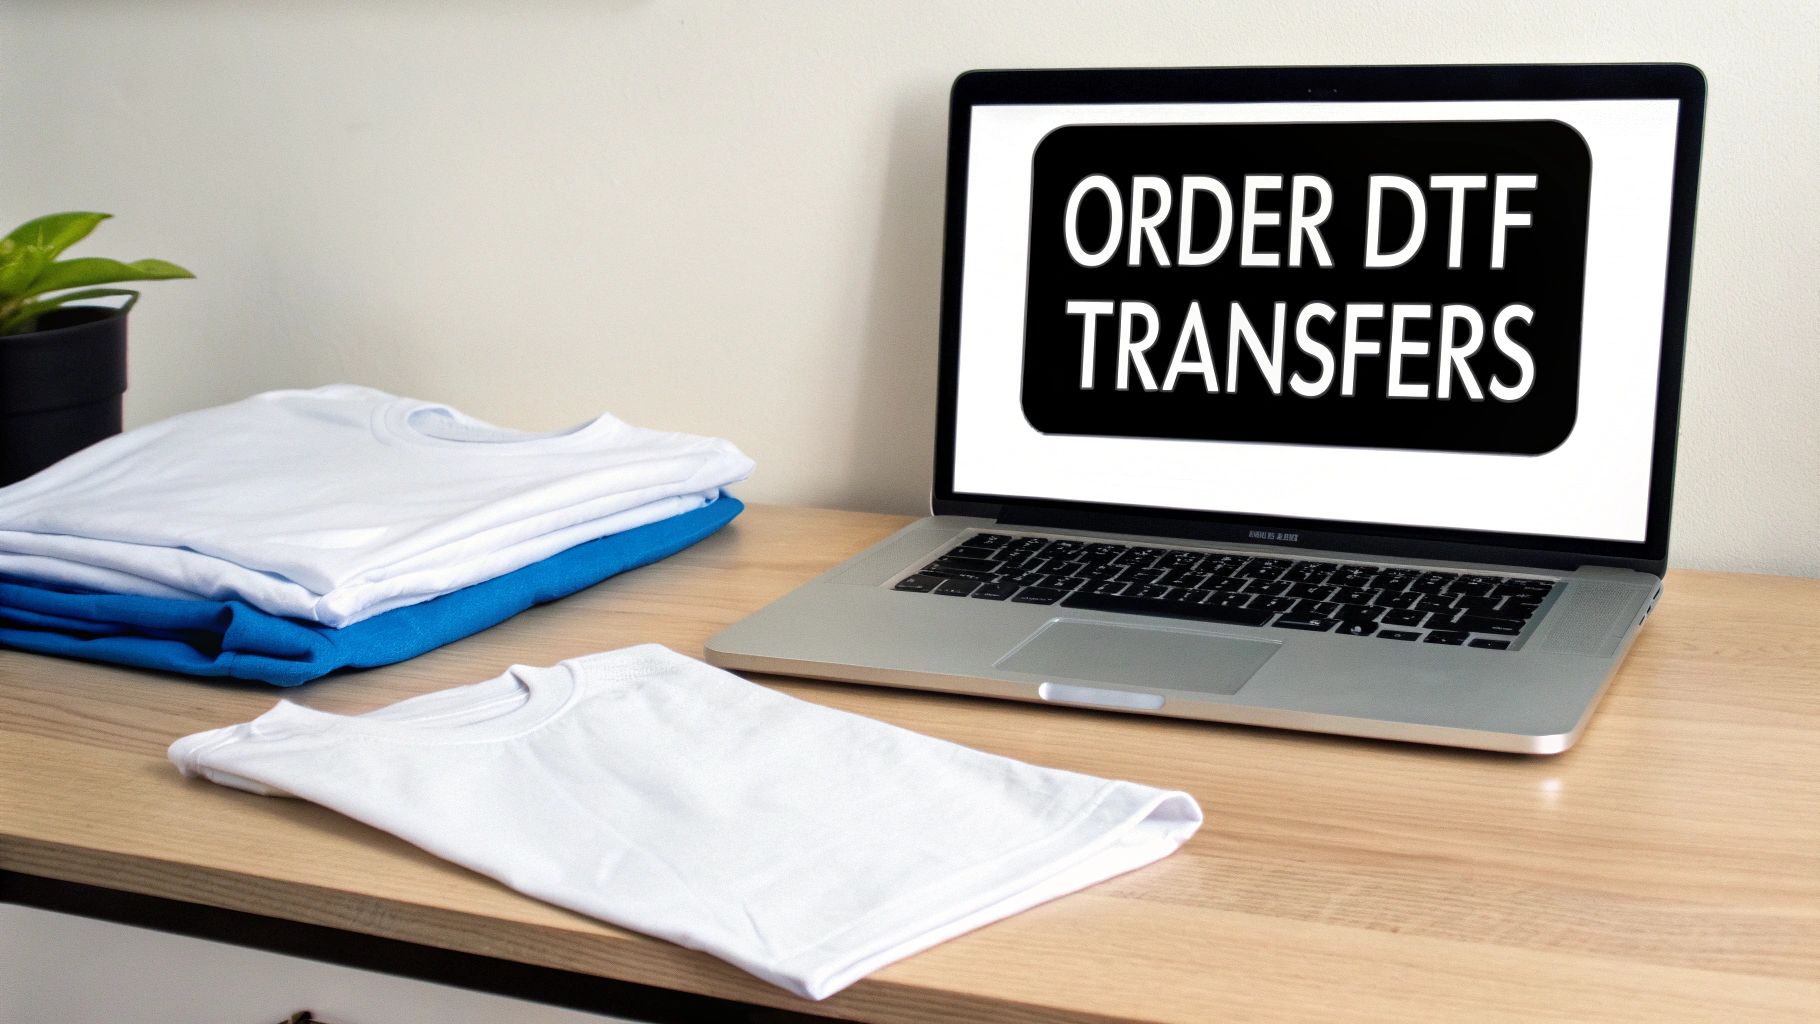
How to Order DTF Transfers for Custom Apparel
Dipping your toes into the world of custom apparel can feel a bit daunting, but when you order DTF transfers, you’ll find the process is a whole lot simpler than you might think. Direct-to-Film (DTF) has quickly become the go-to for creators and businesses alike, and for good reason. It delivers brilliant, punchy colours and incredible durability on pretty much any fabric you can throw at it.
This guide is here to pull back the curtain on the entire process, making sure your creative vision comes to life exactly as you imagined.
Why DTF Is Your Secret Weapon for Custom Apparel
Direct-to-Film transfers have completely changed the game, especially for small businesses and independent designers. Forget the old days of complex screen setups or being limited to certain fabrics. DTF is all about flexibility, which makes it perfect for a massive range of products.
While the tech first appeared in the early 2000s, it really hit its stride in the late 2010s, offering a versatility for decorating garments that was once way too expensive for small print runs. Here in the UK, its rise went hand-in-hand with the boom in e-commerce and the growing demand for personalised gear that could be turned around quickly.
We've put together a clear roadmap to help you navigate your first order with total confidence. We’ll walk you through everything, from getting your artwork ready to pressing that final, perfect design.
Key Advantages of Using DTF Transfers
- Fabric Versatility: DTF is a true all-rounder. It works beautifully on cotton, polyester, blends, and even tricky materials like leather or nylon. This opens up a whole world of creative possibilities far beyond just the basic t-shirt.
- Vibrant, Full-Colour Prints: There are no colour limitations here. You can print complex, photorealistic images with smooth gradients and tiny details without ever sacrificing quality. The results are consistently stunning.
- Exceptional Durability: When applied correctly, DTF prints feel incredibly soft and hold up brilliantly in the wash. They stretch with the fabric without cracking or peeling, so your designs look great for the long haul.
The real power of DTF is its accessibility. It genuinely empowers anyone with a good idea and a heat press to produce professional-quality clothing, levelling the playing field between small creators and big-time operations.
Whether you're launching a brand new clothing line or just need some custom workwear, knowing how to order DTF transfers efficiently is a must. For a deeper dive into the technical side, check out our guide on what DTF prints are and how they can seriously benefit your projects.
Getting Your Designs Ready for Flawless Prints
The secret to a stunning final product isn't some complex industry trick; it all begins long before you order dtf transfers. It starts with a perfectly prepared design file. Honestly, submitting artwork that isn't print-ready is one of the most common hiccups we see, but it’s entirely avoidable with a few quick checks.
Think of your design file as the blueprint for your final print. If the blueprint is flawed, the end result is guaranteed to be, too.
A crisp, professional-looking transfer really hinges on one thing: resolution. Your artwork absolutely must be created and saved at 300 DPI (dots per inch). If you start with a lower resolution, like the standard 72 DPI used for web images, your print will look pixelated and blurry on a garment. There’s no magic button to add that quality back in, so getting the resolution right from the very start is non-negotiable.
File Format and Transparency
Next up is something just as crucial: making sure your design has a transparent background. You only want the artwork itself printed, not a big white or coloured box sitting around it. The best way to lock in that transparency is to save your file as a PNG.
This is especially important if you have a detailed design with lots of negative space. A format like JPG, for instance, will automatically fill any transparent areas with white, and you can bet that white will show up in your final print.
A good rule of thumb: the printer will produce exactly what it sees in the file. If your design has a faint background haze or a tiny border you missed, that will appear on your transfer. Always double-check your artwork on a dark background to spot any of these unwanted extras before you upload.
Before you call it done, there are a couple more pro tips. Make sure to convert all text to outlines or curves. This simple step turns your fonts into vector shapes, which completely prevents any font substitution errors if our system doesn’t have the exact same font installed. It’s a small thing that guarantees your typography looks precisely as you intended.
Also, be mindful of extremely fine details. Lines thinner than a pencil tip might not translate well, simply because the adhesive powder needs a decent surface to bond to. Keep your thinnest lines at a reasonable thickness to ensure they adhere properly when you press them. Finally, understanding the colour model is vital. We've put together a handy guide to help you learn more about the differences between CMYK vs RGB for print and get your colours spot on.
A Walkthrough of the DTF Ordering Process
Once your designs are polished and print-ready, it’s time to actually get them ordered. Navigating a supplier's website for the first time can feel a bit like reading a new map, but the core steps are pretty straightforward and designed to get you from upload to checkout without a fuss. The first big decision is always choosing your sheet size.
Most suppliers offer a whole range of dimensions, from small sheets perfect for a few chest logos to massive rolls for high-volume production. This is where the concept of a ‘gang sheet’ becomes your absolute best friend for saving a bit of cash.
A gang sheet lets you arrange multiple different designs—logos, sleeve prints, neck tags, and main graphics—all onto a single sheet. By filling the space intelligently, you really do maximise the value of every square inch you pay for.
DTF Sheet Size and Typical Use Cases
To help you get a feel for what size you might need, here's a quick reference guide. Think about the types of garments you're making and how many designs you need to print in one go.
| Sheet Size | Dimensions (Approx.) | Best For | Example Use |
|---|---|---|---|
| A4 | 21 cm x 29.7 cm | Small logos, neck tags, individual small prints | A few chest logos for a sample run or a set of custom neck labels. |
| A3 | 29.7 cm x 42 cm | Multiple chest logos, one large front/back print | Ganging up 4-6 different small designs or printing one large graphic for a hoodie. |
| 55cm x 50cm | 55 cm x 50 cm | Medium-volume runs, mixing large and small designs | A good mix of main T-shirt designs alongside some sleeve prints and branding logos. |
| 55cm x 100cm | 55 cm x 100 cm | High-volume production, maximum cost-efficiency | Filling the sheet with as many designs as possible for a full production batch. |
Choosing the right size from the start saves you both time and money, so it’s worth taking a moment to plan out your gang sheet.
Navigating the Online Builder
Many suppliers, including us at Psyque, provide an online builder tool to make this process dead simple. You just upload your high-resolution PNG file, and then you can duplicate, resize, and shuffle your designs around directly on the digital canvas. It’s a visual approach that completely removes the guesswork, showing you exactly how your transfers will be laid out.
This little graphic highlights the key design elements to double-check before you upload your artwork to the online builder.
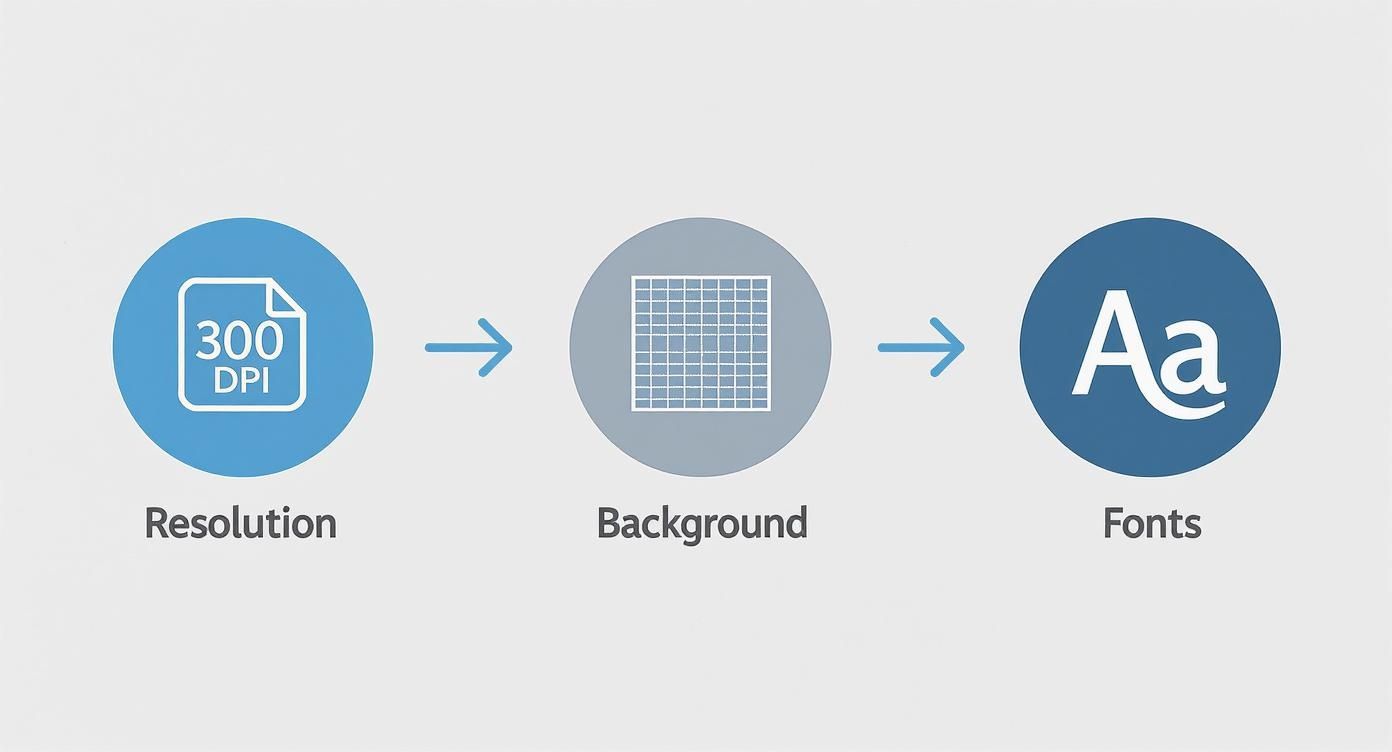
Honestly, getting these three things right is the foundation for a flawless print. It prevents all the common headaches like pixelation, unwanted background boxes, or font errors showing up on your final transfers.
As you add sheets to your basket, you’ll probably notice that bulk pricing automatically kicks in. Ordering 10 sheets, for instance, is nearly always cheaper per sheet than ordering just one. This tiered pricing is there to support growing businesses, making things more affordable as you start to scale up production.
The most common mistake I see beginners make is leaving too much empty space on their gang sheet. Before you finalise your order, take a minute to see if you can squeeze in a few extra small logos or tags—they essentially become free prints that you can use for future projects or promotional bits.
Finally, you’ll head to the checkout page. This is where you'll select your preferred shipping method and pop in your payment details.
To make things even easier for repeat orders, or even to simplify the buying journey for your own customers, you can explore some clever tools like pre-filled checkout options with cart permalinks. Once everything’s confirmed, you'll get an order confirmation email, and the production process begins.
And if you’re still weighing up local options versus the convenience of ordering online, our guide on searching for "DTF printing near me" has some really valuable insights.
Breaking Down Costs and Turnaround Times
Every successful print project comes down to two things: managing your budget and hitting your deadlines. When you’re ordering DTF transfers, the cost is mainly driven by the sheet size you pick and how many you buy. It’s pretty straightforward – the more you order, the less you pay per print.
This economy of scale is there to help your business grow. Grabbing a single A3 sheet for a one-off sample is perfect for testing, but ordering twenty sheets for a proper production run will slash your cost per unit. That saving goes straight to your bottom line, boosting the profit margin on every single item you sell.
Getting this balance right is crucial for making smart purchasing decisions. I often advise people to bundle smaller projects into one larger order. You’ll unlock better pricing and save a good bit on shipping, too.
Calculating Your Profitability
For UK startups jumping into the custom apparel game, DTF transfers are a brilliant way to get going. A typical custom t-shirt made with an outsourced DTF transfer costs roughly £4.50 to produce, which includes the print and shipping when you buy in bulk. If you sell that same t-shirt for £20, you’re looking at a gross profit of around £15.50 per shirt.
Even at a modest scale, like 100 shirts a month, that could translate to over £1,500 in gross profit. Of course, that’s just the start. To get a complete picture, you need to understand calculating your true product costs, which helps you factor in everything from the blank garment itself to your marketing budget.
Understanding Production and Shipping Times
Cost is only half the story; turnaround time is just as important. Here at Psyque, we’re really proud of our fast production schedule. Most orders are printed and dispatched within 1–3 working days as part of our standard service, getting your transfers out the door without any extra rush fees.
It's worth remembering that the production clock only starts once your order is confirmed and your artwork is fully approved. A print-ready file means no back-and-forth, so your job goes straight into the production queue without any delays.
Once your order is dispatched, we use Royal Mail tracked delivery for all UK orders. If you’re in a real hurry, we usually have expedited services available for an extra fee, which bumps your order to the front of the print queue.
And if you want to squeeze every last drop of value out of your order, have a look at our guide on how DTF gang sheets can help you maximise your print area and your profits.
Applying Your DTF Transfers Like a Pro
Right, your custom DTF transfers have arrived—now for the fun part. Nailing the application is the final hurdle to creating a flawless, long-lasting garment that looks like it came straight from a high-end shop. Getting it right really comes down to three things: temperature, time, and pressure.
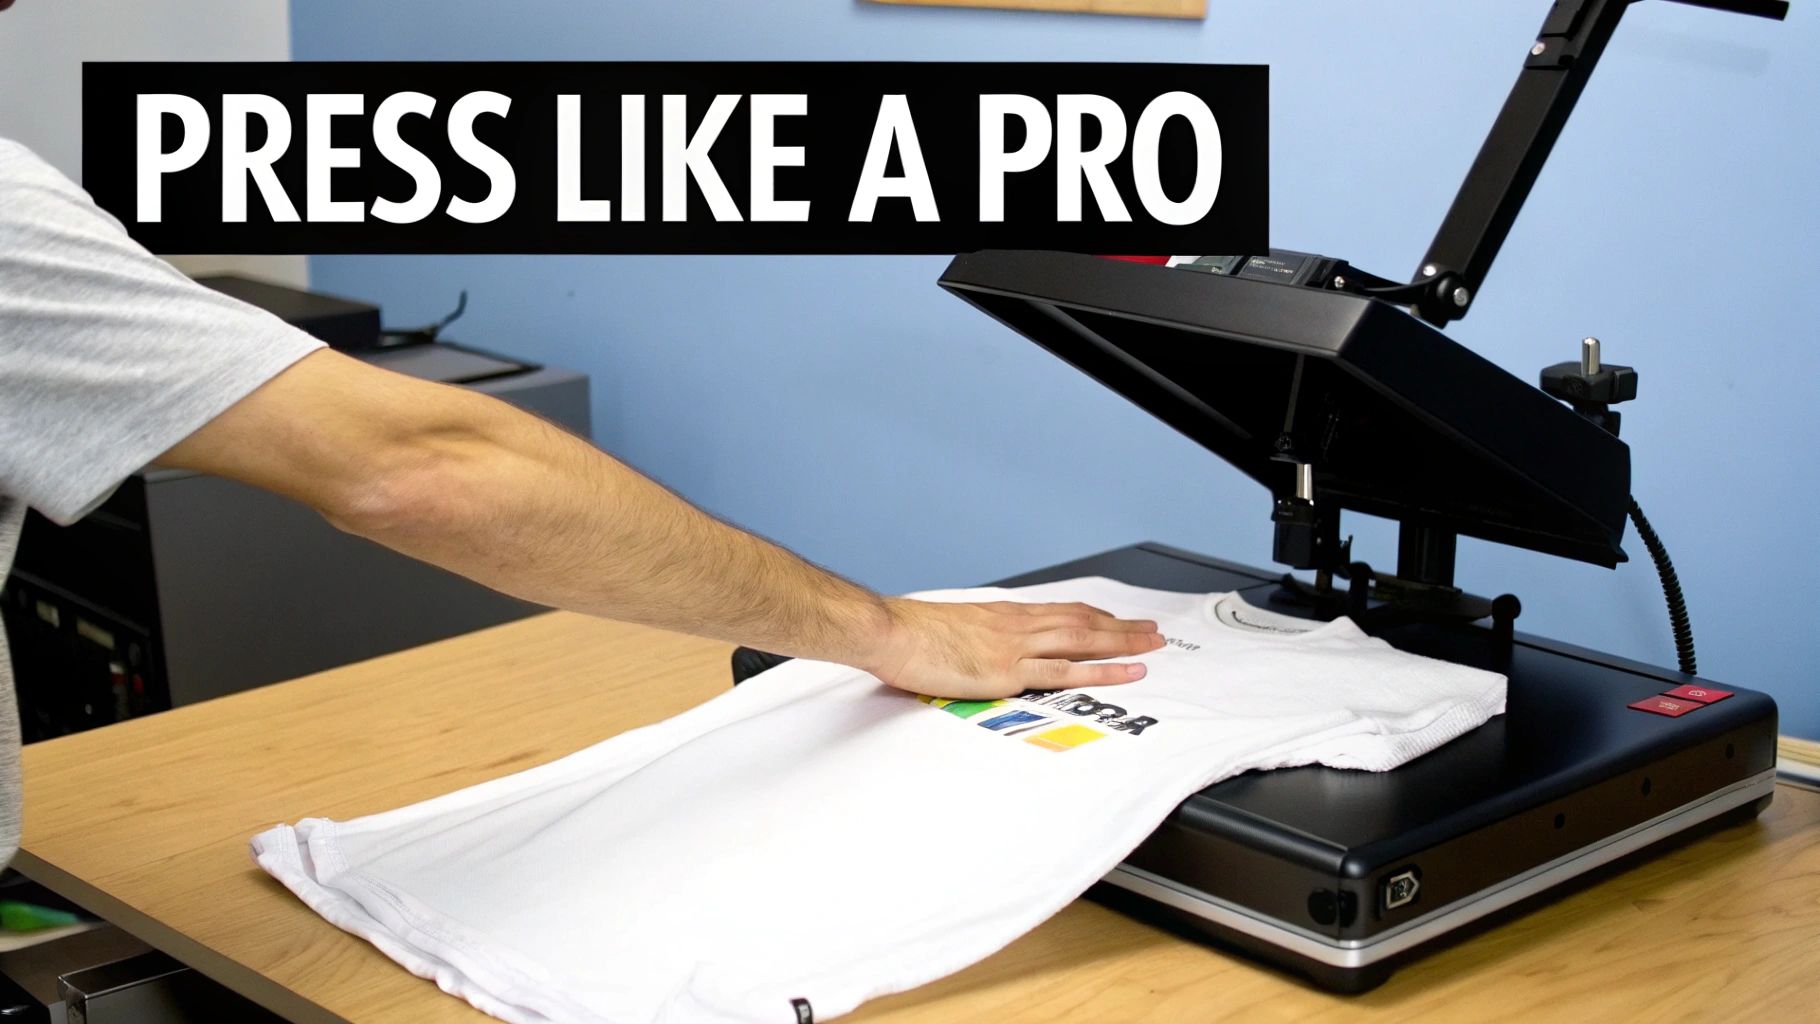
Before you even think about laying down the transfer, always give your garment a quick pre-press for about 5-7 seconds. This is a simple but crucial step. It zaps any lingering moisture and smooths out wrinkles, creating the perfect canvas for the transfer’s adhesive to get a proper grip.
Once your garment is prepped, it's time to position the transfer and press. The perfect settings can vary a little depending on the material you're working with, but a solid starting point for most fabrics is 150°C (300°F) for about 12–15 seconds using medium pressure.
Hot Peel vs Cold Peel Techniques
One of the biggest questions we get is about peeling. Our transfers are designed for a hot peel, which means you can pull the film away pretty much immediately after the heat press opens. It's fast, efficient, and an absolute lifesaver when you're powering through a big batch of orders.
If you ever run into an issue, like the edges of a design lifting just a tiny bit, don't panic. Just place a Teflon sheet over the design and give it another press for 5-10 seconds. This second press really helps cure the adhesive and lock everything in place.
Pro Tip: Consistency is everything. If you're serious about your results, you need a reliable heat press. A standard home iron just can't deliver the even temperature and pressure needed across the whole design, which is why you sometimes see patchy or peeling transfers. A good press avoids that headache entirely.
With these techniques in your back pocket, you'll be pressing like a pro in no time. For a deeper dive, check out our complete guide on DTF transfers ready to press for even more detailed advice.
Got Questions About Our DTF Transfers?
Dipping your toes into the world of DTF for the first time? It's completely normal to have a few questions buzzing around. From which fabrics work best to how to keep your prints looking sharp, getting the right info upfront means you can order with total confidence. Let’s run through some of the most common things we get asked by creators just like you.
Probably the biggest question we hear is about fabric compatibility. The brilliant news is that DTF is one of the most flexible print methods out there. It works beautifully on 100% cotton, polyester, poly-cotton blends, and even trickier materials like nylon or leather. This versatility is a massive win over other techniques.
Another popular query is all about durability. Just how long will these prints actually last?
Wash Care and Making Prints Last
To get the absolute most out of your DTF-printed garments, a little bit of care goes a long way. We always recommend these simple steps to keep them looking fresh:
- Always turn the garment inside out before washing.
- Stick to a cool wash cycle, ideally at 30°C.
- Skip the tumble dryer – air drying is much kinder to the print.
- Never, ever iron directly over the transfer.
Following these guidelines will keep your designs looking vibrant and prevent any cracking or peeling for dozens of washes. It’s the key to maintaining that professional quality your customers will love.
What about minimum orders? With modern suppliers like Psyque, there are none. You can order a single small sheet for a one-off project just as easily as you can order a hundred for a full production run. It really is accessible for everyone.
Ready to bring your creative vision to life with professional-quality prints? Explore our custom DTF transfer options at Psyque and see just how easy it is to get started.