
Sublimation T Shirt Printing The Ultimate Guide
Ever seen a t-shirt with a design that seems like it was born right into the fabric? That’s not just you imagining things—that’s the magic of sublimation t-shirt printing. It’s a game-changing method that creates stunning, full-colour designs that you literally can’t feel, and they’ll never crack or peel away.
So, What Exactly Is Sublimation T-Shirt Printing?
At its core, sublimation printing is a pretty clever bit of chemistry. It’s a process that takes solid ink and turns it directly into a gas, completely skipping the liquid phase. Think of how dry ice creates fog—it goes straight from a solid to a gas. This gas then seeps into the polyester fibres of the t-shirt, becoming a permanent part of the material itself.
This is a world away from other techniques where ink is just laid on top of the fabric. With those methods, you can often feel a distinct layer. Sublimation, on the other hand, dyes the actual fibres, resulting in a print that’s as soft and breathable as the t-shirt itself. It’s no wonder it’s considered a top-tier choice for custom gear.
The Science Behind the Magic
This whole process relies on a perfect dance of heat and pressure. It starts with special sublimation inks printed onto transfer paper. Once this paper is placed onto a polyester t-shirt and put into a heat press at around 200°C, the science really kicks in.
- Vaporisation: The intense heat turns the solid inks on the paper into a gas.
- Fibre Infusion: At the same time, the heat opens up the pores of the polyester fabric.
- Permanent Bond: The ink, now in its gaseous state, flows right into these open pores. As the t-shirt cools, the pores close up, trapping the ink inside the fibres for good.
The result isn't just a design printed on the shirt; it's a design that has become a fundamental part of the shirt’s fibres. This molecular bond is the secret to its incredible durability and wash-resistance—often outlasting the garment itself.
This handy visual guide breaks down how sublimation works, from solid ink to a permanent design locked into the fabric.
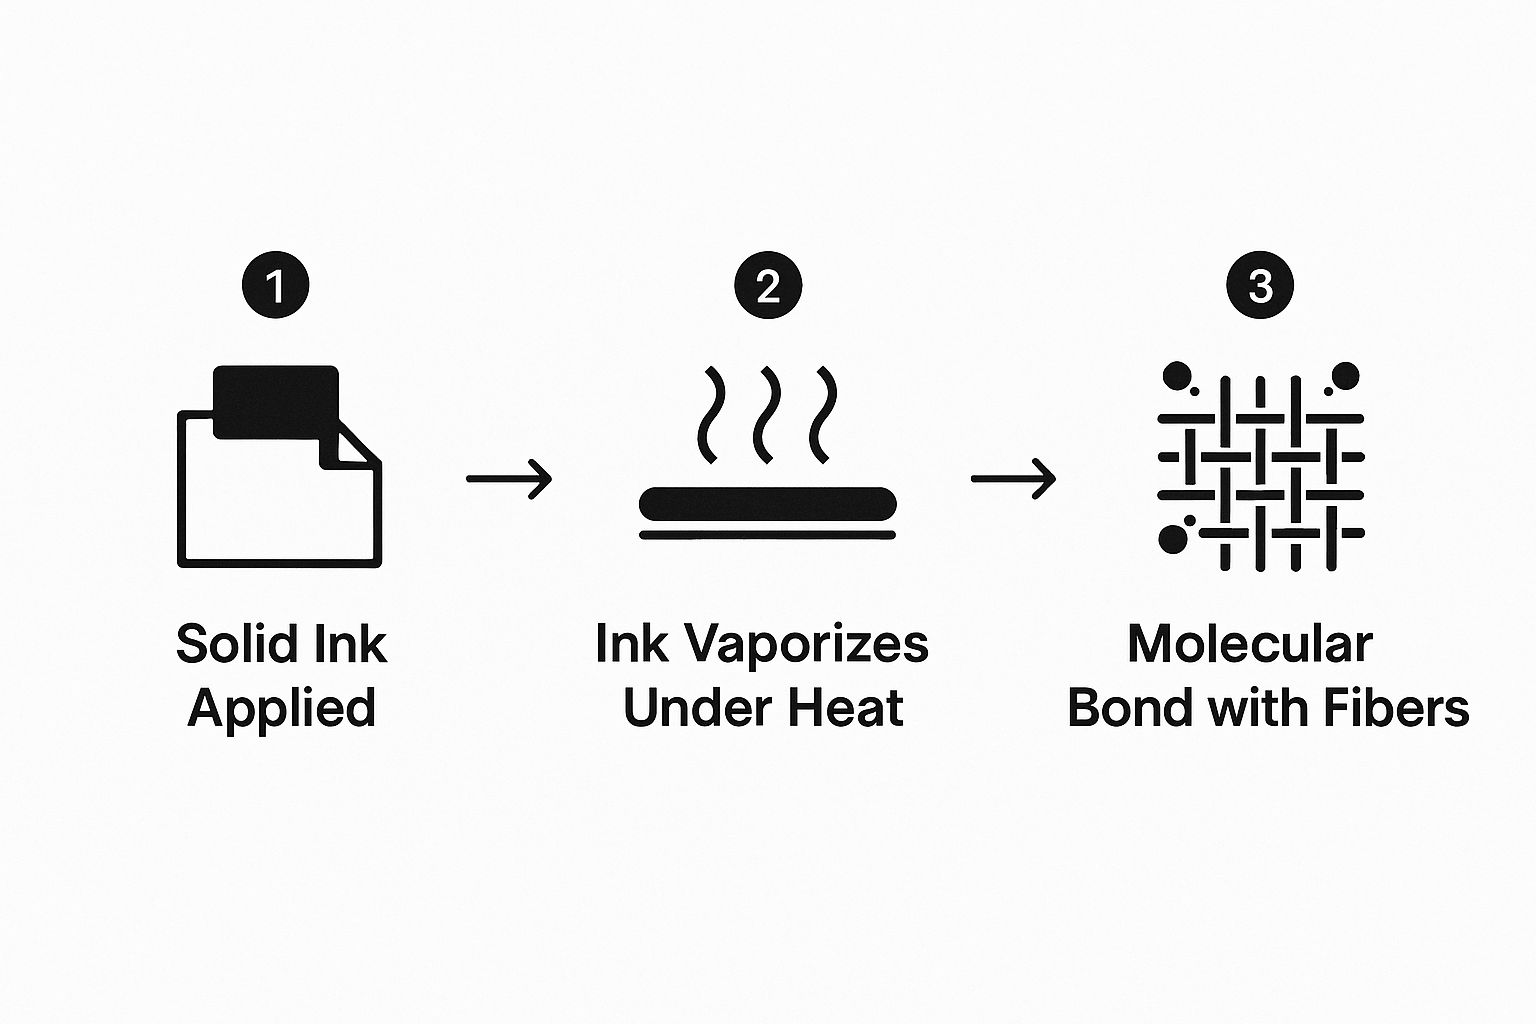 The infographic shows how the heat press transforms the dye into a gas, allowing it to merge with the fabric for a finish that truly lasts.
Why Go with Sublimation?
The biggest draw for sublimation is its ability to create photorealistic, all-over prints without changing the feel of the garment one bit. It’s the go-to method for custom sportswear, bold fashion pieces, and personalised gifts where vibrant colours and longevity are non-negotiable.
While it's best suited for light-coloured polyester fabrics, the quality and durability of the results are simply unmatched. If you're looking for methods that work on other materials, you might want to explore the versatile world of heat transfer printing. But when it comes to dyeing fabric with a design that stays brilliant and sharp, wash after wash, sublimation is in a league of its own.
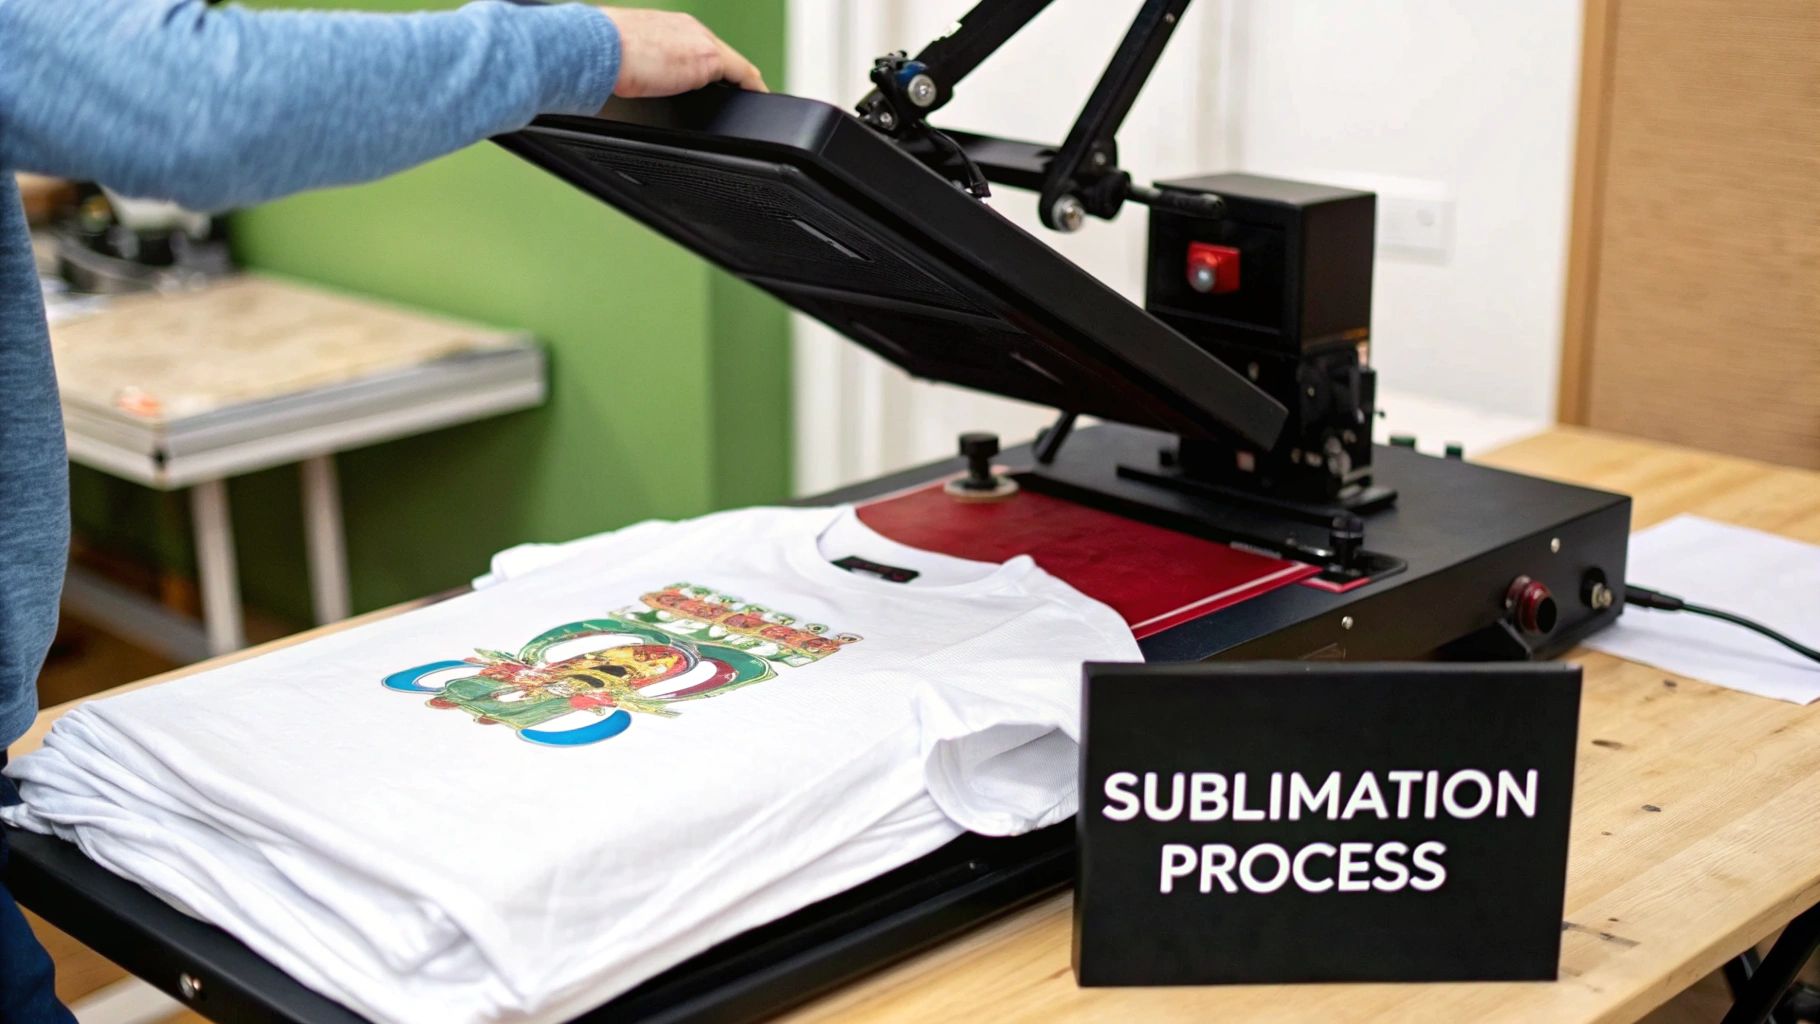
The Sublimation Process From Screen to Shirt
So, how does a digital idea actually become a piece of wearable art? The sublimation t shirt printing workflow is a careful dance where every step sets the stage for the next. Getting your head around this process is the key to creating those stunning, permanent designs that make sublimation so popular.
It all starts on a screen, not with a shirt. Your design is first printed onto special transfer paper using sublimation inks, which are designed to react to high temperatures. This printout has to be a mirror image of the final design—a simple but vital detail to get right.
From there, the real magic happens at the heat press. This is where the science kicks in, turning solid ink into a gas that bonds permanently with the very fibres of the fabric.
Step 1: Preparing Your Design and Materials
Before you even think about switching on the heat press, preparation is everything. The final quality of your t-shirt is directly linked to how much care you take at the start. A rushed design or a wonky transfer paper will always lead to a disappointing result.
First up, get your digital artwork sorted. It needs to be a high-resolution file—think at least 150 DPI—to keep it sharp and avoid any fuzzy, pixelated edges. Once it's ready, print the design onto a sheet of quality sublimation paper with a dedicated sublimation printer. And don't forget to print it as a mirrored version!
Next, get the garment ready. It’s a good idea to pre-press the t-shirt for about 5-10 seconds. This little step gets rid of any moisture and smooths out wrinkles, giving you a perfectly flat, dry canvas for the ink.
Step 2: The Heat Press Transfer
With all your prep done, it’s time for the main event. This is where heat, pressure, and time come together to create the finished product. Getting this bit right is non-negotiable if you want a flawless print.
Here’s a quick checklist for a perfect transfer:
- Position the Transfer: Carefully place the printed sublimation paper face-down on the t-shirt where you want the design. A bit of heat-resistant tape will keep it locked in place and prevent any shifting that causes "ghosting" or blurry lines.
- Protect Your Equipment: Slip a sheet of protective paper (butcher paper works well) inside the shirt and another on top of your transfer. This stops any ink from bleeding through onto your heat press.
- Apply Heat and Pressure: Clamp down the heat press using the right settings. For most polyester t-shirts, you’re looking at around 195-205°C for 45-60 seconds with medium pressure.
Getting these settings just right is the secret to a professional finish. Too little heat or time results in a faded, dull print, while too much can scorch the fabric or cause the colours to bleed. For detailed guidance, our complete heat press temperature guide is an invaluable resource for mastering your machine.
Step 3: The Final Reveal
As soon as the timer beeps, open the press. Be careful—everything will be seriously hot, so pop on some heat-resistant gloves. While the shirt is still hot, peel away the transfer paper in one smooth, confident motion.
You’ll see the ink has completely left the paper and is now part of the t-shirt fabric, looking bright and vibrant. Run your hand over it; the design should feel completely smooth, with no raised texture at all. Let the t-shirt cool down completely before you fold or wear it, as this gives the ink time to fully set.
The importance of quality materials can't be overstated. In the UK's custom printing industry, inks and consumables make up the largest market segment at a massive 46.61%. It just goes to show that investing in the right supplies is crucial for getting professional results in sublimation t shirt printing. You can explore more about the growing UK dye sublimation market to understand its trends.
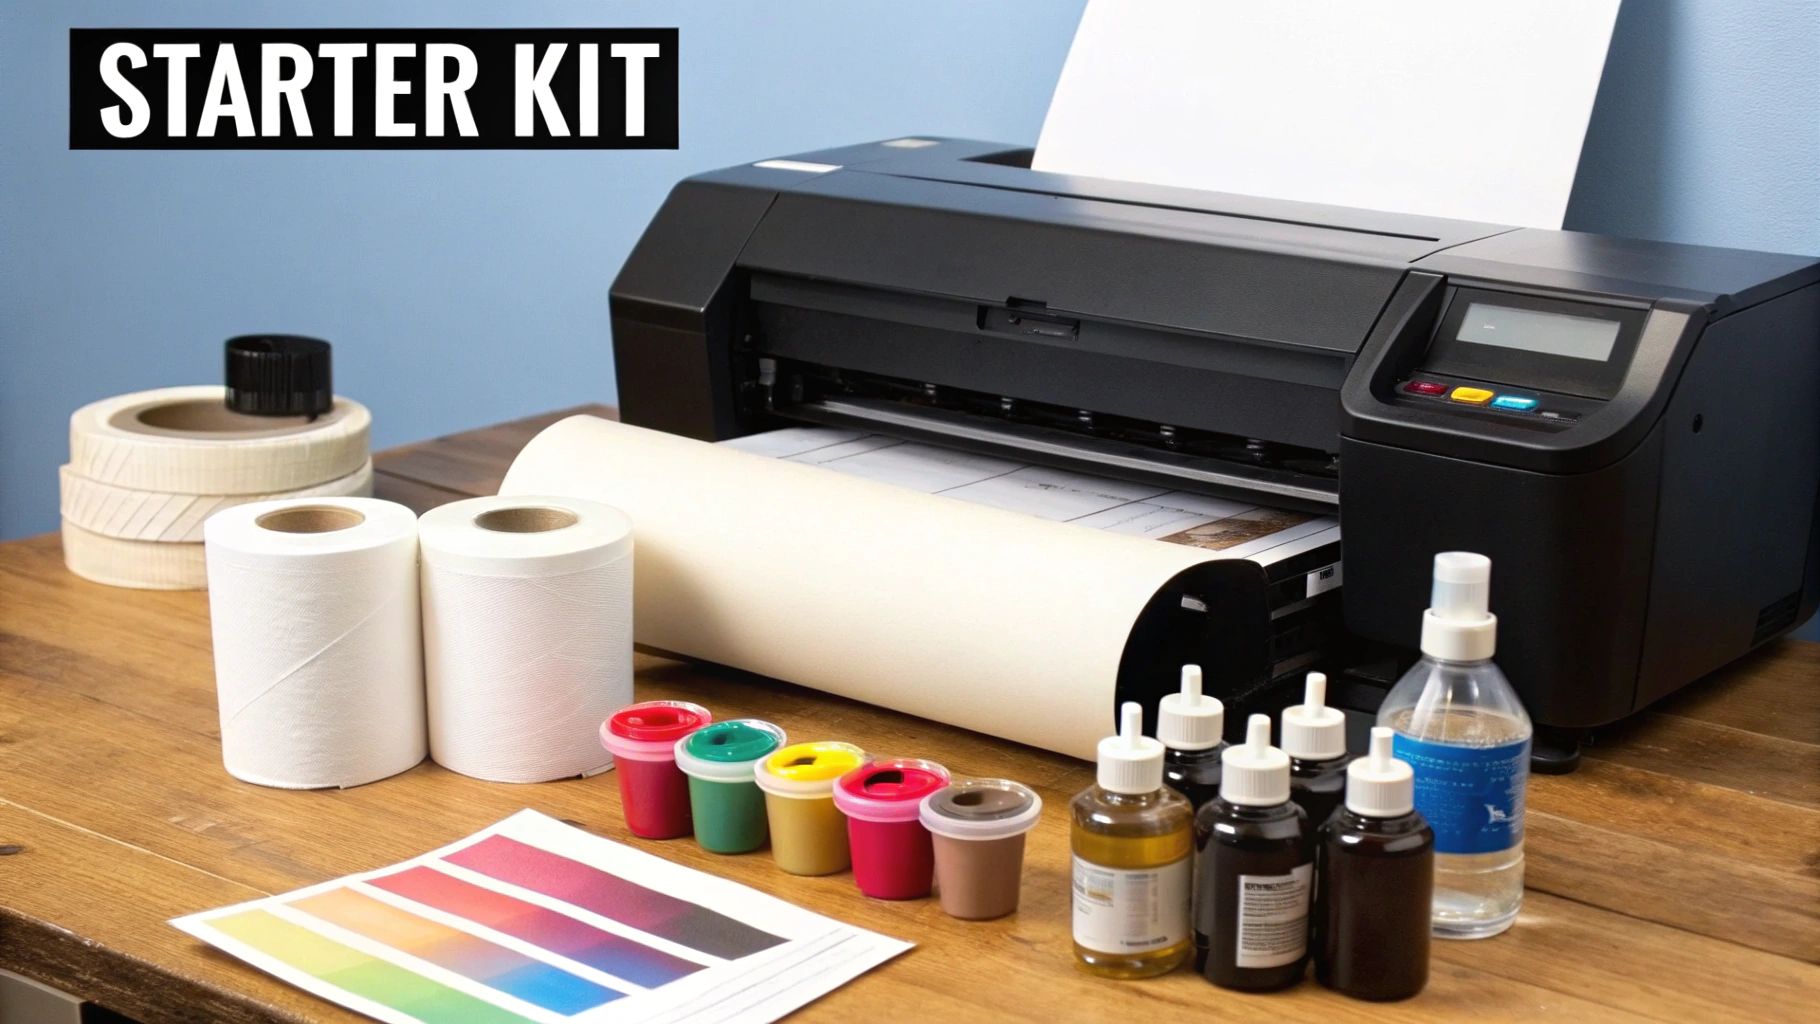
Your Essential Sublimation Starter Kit
 Diving into the world of sublimation t-shirt printing might seem a bit daunting at first, but trust me, getting your hands on the right gear from the get-go changes everything. Think of it like building a toolkit; every single piece plays a part in creating that final, professional-looking T-shirt you're aiming for.
With a solid setup, you'll be knocking out incredible, permanent designs before you know it. Your whole operation really just boils down to a few core pieces of hardware. These are the absolute must-haves, and investing wisely in them now will save you a world of frustration and wasted materials later on.
The Core Hardware Trio
First up, you need a dedicated sublimation printer. And I really mean dedicated. You can’t just grab any old inkjet printer from the office and hope for the best. Sublimation printers are built specifically to handle the unique chemistry of sublimation inks, which are the secret sauce that magically turns into a gas when you apply heat.
Next, you have the heart of the entire operation: the heat press. This beast is what delivers the perfect combination of heat and pressure to make the sublimation magic happen. Without one, the ink simply won’t transfer from the paper to the fabric. You'll generally find two main styles out there:
- Clamshell: This design opens and closes just like a clamshell (or a book). It’s brilliant if you’re tight on space and often comes with a friendlier price tag, making it a go-to for beginners.
- Swing-away: With this model, the top heating element swings out to the side. This gives you a completely clear view of your work area, which makes lining up your T-shirt and transfer paper an absolute breeze.
Finally, you’ll need a computer or laptop running some kind of design software. This could be a professional powerhouse like Adobe Photoshop, or more beginner-friendly options like Canva. This is where you bring your creative visions to life before they're sent off to the printer.
So many newcomers underestimate just how crucial a good heat press is. You need consistent heat and even pressure across the entire design to avoid patchy, faded spots. Choosing the right machine is a huge step, and you can find out more in our comprehensive guide to selecting a UK heat press machine.
Essential Materials and Consumables
Once you’ve got your hardware sorted, it’s time for the materials that will actually become your finished products. These are just as important as the big machinery.
The first thing you'll need is proper sublimation transfer paper. This isn't your average A4 paper. It has a special coating designed to hold the sublimation ink and then release it cleanly as a gas when it gets hot. Using the wrong paper will give you blurry, washed-out designs that just look cheap.
Then, of course, you have the T-shirts themselves. This part is critical: sublimation ink only bonds with polyester. For those unbelievably bright, punchy colours, you have to use 100% white or light-coloured polyester shirts. You can use poly-blends (like 65% polyester), but the colours will look much softer and more "vintage" because the ink has nothing to grab onto in the cotton fibres.
The Supporting Cast of Accessories
Beyond the main gear, a few smaller accessories will make your printing process so much smoother. These are the little things that prevent common mistakes and help you get perfect results every time.
You will absolutely need heat-resistant tape. This stuff is a lifesaver. It holds your transfer paper perfectly still on the T-shirt inside the press, stopping it from shifting and creating those dreaded blurry "ghosting" effects.
Protective paper, which you might see called butcher paper or parchment paper, is another non-negotiable. You pop a sheet inside the shirt and another over the top of your design. This stops ink from bleeding through to the back of the T-shirt or, even worse, staining your heat press and ruining every project after it.
Last but not least, a simple lint roller is your best friend. Even tiny bits of dust or loose fibres you can't even see will mess with the ink transfer, leaving you with annoying blue or black specks on your finished print. A quick once-over with the roller guarantees a perfectly clean slate.
How Sublimation Stacks Up Against Other Printing Methods
Choosing the perfect printing method can feel like wading through a maze. Each technique has its own strengths, and while sublimation is a true powerhouse, it isn't always the right tool for every job. Getting to grips with where sublimation T-shirt printing really shines—and where other methods might be a better fit—is the secret to getting the results you’re after.
When you dive into the world of custom apparel, you'll hear a few names come up time and time again: Screen Printing, Direct-to-Garment (DTG), and Heat Transfer Vinyl (HTV). Each one has a completely different process, feel, and ideal use case.
So, let’s put these methods head-to-head to see how they really compare, focusing on the things that actually matter for your projects.
Feel and Durability
The most incredible thing about sublimation is its zero-feel finish. Because the ink literally becomes part of the fabric’s fibres, you can’t feel the design at all. It’s just as soft and breathable as the original T-shirt, which is exactly why it’s the go-to for sportswear and all-over prints.
In contrast, other methods add a layer on top of the fabric. HTV has a distinct, often smooth or rubbery texture you can definitely feel, while screen printing ink creates a slightly raised layer. DTG printing is softer than screen printing but can still have a minimal texture, especially on dark shirts that need a white underbase to make the colours pop.
Durability is where sublimation truly leaves the competition behind. A sublimated design is essentially permanent. It will not crack, peel, or fade, no matter how many times you wash it. In fact, the print will often outlast the T-shirt itself, looking just as vibrant after 50 washes as it did on day one.
Fabric and Colour Limitations
This is probably the biggest fork in the road when choosing your method. Sublimation is a bit picky: it only works its magic on 100% polyester or high-polyester blends. It’s also limited to white or very light-coloured garments. Why? There's no white sublimation ink, so the process relies on the T-shirt’s light background to create vibrant colours.
This is where the other techniques step in to save the day.
- Screen Printing: The classic choice for cotton, and it works brilliantly on both light and dark fabrics. It’s incredibly versatile.
- DTG Printing: Think of this as the "digital" alternative. DTG is best for 100% cotton and is fantastic for printing complex, photo-realistic designs on shirts of any colour, including black.
- HTV (Heat Transfer Vinyl): This method is super flexible and can be applied to cotton, polyester, and blends of any colour. It’s perfect for simple text or bold, single-colour graphics.
For a completely different look and feel, you can also explore other garment decoration techniques like embroidery on work shirts, which offers a premium, textured finish.
Cost and Scalability
Your budget and how many T-shirts you need will also point you in the right direction. Sublimation is extremely cost-effective for one-off prints or small batches. There's almost no setup involved—you just print your design and press it.
Screen printing, on the other hand, is much more involved. It requires a separate screen for each colour in the design, which makes it expensive for small orders. But for large bulk orders of 100 units or more, it becomes incredibly cheap per shirt. If you want to see how it stacks up against another modern method, check out our analysis of DTF vs screen printing for graphic tees.
DTG is similar to sublimation, being ideal for small runs and complex designs, but the equipment is often a lot more expensive. HTV is also great for single items but becomes very labour-intensive for bigger orders, as each design has to be cut, weeded, and pressed one by one.
Sublimation vs Other T-Shirt Printing Methods
Choosing the right T-shirt printing method really comes down to what you want to achieve. Are you after a permanent, breathable print on a polyester sports top, or a bold graphic on a dark cotton tee? Each technique has its own set of pros and cons.
This table breaks down the key differences to help you decide which method is the best fit for your next project.
| Feature | Sublimation Printing | DTG (Direct-to-Garment) | Screen Printing | HTV (Heat Transfer Vinyl) |
|---|---|---|---|---|
| Best Fabric | 100% Polyester | 100% Cotton | Cotton, Blends | Cotton, Polyester, Blends |
| Feel of Print | No feel, part of fabric | Soft, minimal feel | Slightly raised layer | Smooth, plastic-like layer |
| Durability | Permanent, won't fade | Good, can fade slowly | Very durable | Good, can crack over time |
| Best Order Size | Small to medium runs | Small runs, one-offs | Large bulk orders | Small runs, one-offs |
| Colour Vibrancy | Excellent on white | Excellent on all colours | Good, limited colours | Excellent, solid colours |
Ultimately, there's no single "best" method—only the best method for your specific needs. By understanding these differences in feel, fabric compatibility, durability, and cost, you can confidently pick the perfect technique to bring your T-shirt ideas to life.
Avoiding Common Sublimation Mistakes
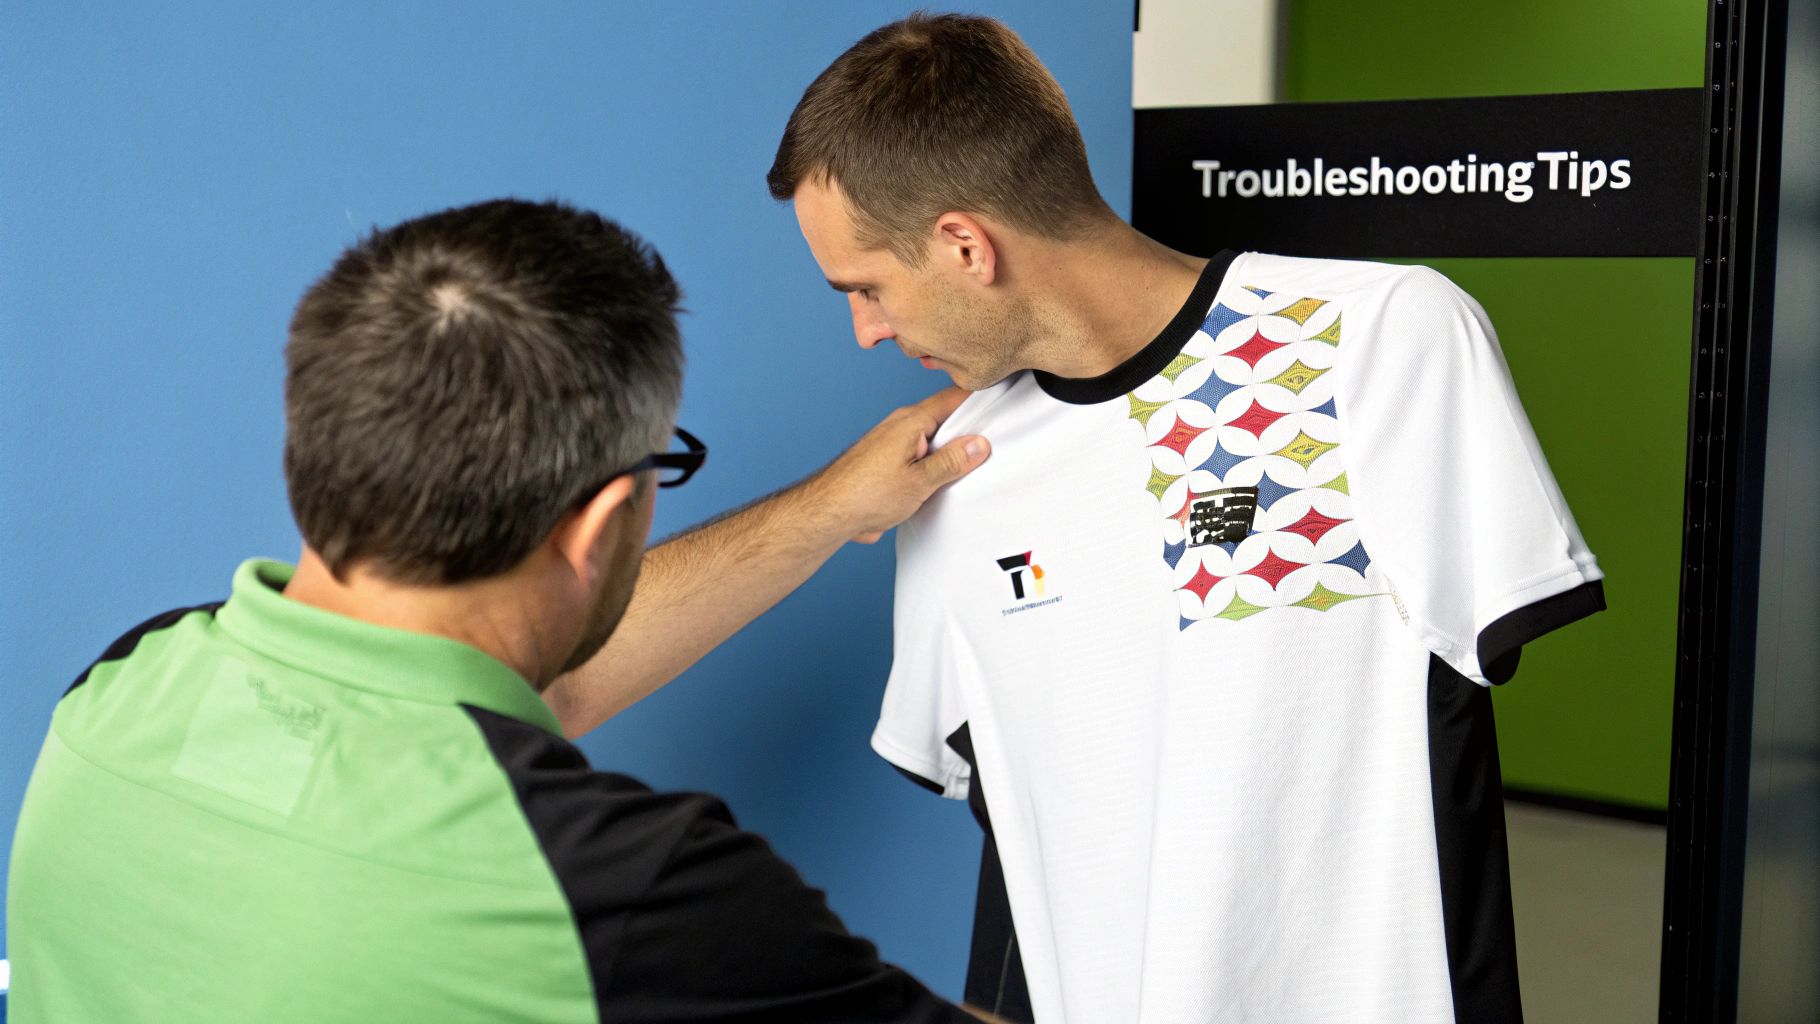
Starting your journey with sublimation t shirt printing is exciting, but it’s easy to get frustrated when your results don’t quite match what you had in mind. Don't worry—even seasoned pros run into hiccups. The good news is that most beginner issues come from a few common, easily fixable mistakes.
Knowing what to look out for will save you time, materials, and a whole lot of headaches. Let’s get these common problems sorted.
Sidestepping Ghosting and Blurry Images
One of the most frequent (and annoying) problems is "ghosting" or blurry images. This is what happens when your sublimation paper shifts, even just a tiny bit, while it's under the heat press. A movement of even a millimetre can create a faint, shadowy double of your design, ruining those sharp lines you were aiming for.
Thankfully, the solution is simple but absolutely crucial: heat-resistant tape. Just a few small pieces are all you need to securely anchor your transfer paper to the T-shirt. This tiny step ensures it stays perfectly still, giving you crisp, professional results every single time.
Diagnosing Faded and Patchy Prints
Is your finished design looking a bit dull, faded, or uneven? This is almost always a sign that your heat press settings are off or you're using the wrong materials. Sublimation is a bit like baking—it needs a precise combination of time, temperature, and pressure to work its magic.
If your prints are looking lacklustre, check these common culprits:
- Incorrect Temperature: For most polyester tees, the sweet spot is somewhere between 195-205°C. If the temperature is too low, the ink won't turn to gas properly, leading to a weak transfer.
- Insufficient Time: The ink needs enough time to fully move from the paper to the fabric. A typical press should last between 45-60 seconds. Cutting this short will leave you with a faded, incomplete image.
- Wrong Fabric: This is a big one. Remember, sublimation ink only bonds with polyester fibres. If you try to print on a 100% cotton shirt, you'll end up with a washed-out design that will practically disappear after the first wash. The higher the polyester count, the more vibrant and permanent your print will be.
Here's a key takeaway: not all printing problems are complicated. Often, a simple adjustment to your heat press or a quick double-check of your T-shirt’s material is all it takes to turn a disappointing print into a masterpiece.
Preventing Press Marks and Other Errors
Another common frustration is finding unwanted press marks or scorch lines on your pristine white T-shirt. These indentations are usually caused by the edges of the heat press or the transfer paper digging too hard into the fabric.
The fix here is to use a protective layer. Placing a sheet of butcher paper or parchment paper over your design helps to diffuse the pressure and shields the fabric from harsh, direct heat. Easy.
Finally, there’s one simple step that’s surprisingly easy to forget: mirroring your design. Before you hit 'print' on your transfer, you must flip the image horizontally in your software. If you forget, all your text and any asymmetrical parts of the design will appear backwards on the final shirt. It’s a tiny detail, but it makes all the difference.
By avoiding these common slip-ups, you'll be well on your way to producing flawless sublimated T-shirts you can be proud of. For more insights on different transfer methods, you can explore our guide to T-shirt transfers printing.
Ready to Turn Your Passion into Profit?
So, you’ve got a handle on sublimation T-shirt printing. It’s more than just a creative outlet; it's a genuine business opportunity waiting to happen. The demand for custom clothing is massive, with customers everywhere looking for unique, top-quality gear that actually says something about them. This is where sublimation really comes into its own.
The start-up costs are surprisingly low, and its ability to pump out premium, on-demand items makes it a brilliant choice for small businesses, Etsy sellers, and independent brands. Unlike screen printing, you don't have to worry about complicated setups for small runs. You can create a one-off masterpiece or a limited edition collection and still make a healthy profit. That flexibility is your biggest advantage.
Find Your Niche (and Own It)
The key to standing out is to avoid being a jack-of-all-trades. Instead of trying to please everyone, find a specific corner of the market where sublimation's unique strengths meet a real customer need. Become the go-to person for that one thing.
Here are a few ideas to get you started:
- Personalised Sportswear: Think custom jerseys for local football clubs, running groups, or school sports days. Sublimated polyester is durable, breathable, and perfect for getting active.
- Corporate Merchandise: Businesses always need high-quality branded gear, from polo shirts for staff to T-shirts for events. Sublimation delivers a professional finish that makes their brand look good.
- Unique Gift Items: The market for personalised photo T-shirts, cheeky stag and hen do tops, and custom birthday designs is always buzzing.
The demand for durable, one-of-a-kind products is only growing. In fact, the UK's custom printing market is expected to more than double by 2030, thanks in large part to advances in digital printing. This is a massive wave of opportunity for anyone in the custom apparel game, making right now the perfect time to jump in.
Building Your Business, One Print at a Time
Once you know who you’re selling to, it's time to build a solid foundation. You don't need a massive, complicated setup to start. A simple online store or an Etsy shop is a great place to showcase your creations. Just remember, your product photos are everything—they're your digital shop window, so make them look amazing.
Your superpower is creating vibrant, permanent prints that feel like part of the fabric. Shout about this! Emphasise the quality, longevity, and "zero-feel" finish in all your marketing. This is what sets you apart from cheaper, peel-prone alternatives.
As your business picks up steam, you'll need to think about how to scale. Combining your printing skills with smart business acumen is crucial. Looking into proven small business growth strategies can give you great ideas on everything from marketing and customer service to making your workflow more efficient. With the right approach, you can turn your creative hobby into a business you love.
Your Sublimation Printing Questions, Answered
Even after getting your head around the basics, a few specific questions always seem to pop up when you're just starting out with sublimation t-shirt printing. Let's tackle the most common ones with some straight-talking answers to clear up any confusion and get you printing with confidence.
How Long Does Sublimation Last on a Shirt?
This is where sublimation really shines: the prints are pretty much permanent. Because the ink becomes part of the actual polyester fibres, instead of just sitting on top like a layer of paint, the design won't crack, peel, or wash away.
Honestly, a sublimated print will almost always outlast the t-shirt itself. Throw it in the wash dozens of times, and the colours will stay just as punchy as they were on day one. It’s an incredibly durable choice for clothing that’s meant to be worn and loved.
One study put different print methods through 25 laundry cycles, and the sublimated design showed absolutely no wear and tear. It looked exactly the same at the end as it did at the start, which says a lot about its incredible staying power.
Can You Sublimate on Dark Coloured Shirts?
Sadly, no. Sublimating onto dark or black shirts is a non-starter. The process doesn’t use white ink, so it needs the light background of the fabric to make the design’s colours pop.
Think of it like using watercolour paints. On crisp white paper, your colours look bright and true. But try painting on black paper, and they’d be almost invisible. It’s the exact same idea here—any design you print on a dark shirt will just get swallowed up by the fabric's colour. For the best results, you need to stick with white or very light-coloured polyester garments.
What Is the Best Fabric for Sublimation Printing?
The science of sublimation is picky: it only bonds with polyester. If you're chasing those super vivid, photorealistic results, you'll want to use 100% polyester fabric every time. This gives the ink the maximum amount of fibre to bond with, creating those deep, rich colours everyone loves.
You can use polyester blends, like a 65% polyester/35% cotton mix, but you'll get a different effect. The final print will have a much softer, more vintage or heathered look. That's because the ink has nothing to grab onto in the cotton fibres; it only sticks to the polyester. And printing on 100% cotton? It just won't work. The design will look incredibly faded from the get-go and will almost completely disappear after the first wash.
At Psyque, we specialise in bringing your most creative designs to life with top-quality printing. Explore our collections or get in touch for your own custom apparel project today at https://psyque.co.uk.