
Your Guide to Flawless Custom DTF Transfers
Think of a custom DTF transfer as the ultimate upgrade for your clothing – a high-tech, professional-grade way to bring any digital design to life with incredible colour and detail. It’s a method where we print your artwork onto a special film, which is then transferred to fabric using a heat press. This creates a finish that's not only vibrant and durable but also surprisingly soft and flexible.
What Are Custom DTF Transfers
At its heart, a custom DTF (Direct-to-Film) transfer is a modern approach to applying full-colour, complex graphics onto garments, leaving the limitations of older methods behind.
Imagine you've got a really intricate digital design – maybe a company logo with subtle gradients or a detailed illustration. Instead of trying to print that directly onto the fabric, which can be tricky, the DTF technique prints it onto a sheet of transparent film first.
Once printed, this film gets a dusting of a special adhesive powder that cleverly sticks only to the inked areas. The final step is simple: place the film onto your chosen garment and apply heat. The heat press activates the adhesive, permanently bonding the ink into the fibres of the material. The result? A crisp, clean design that feels great to the touch and moves naturally with the fabric.
The Magic Behind the Film
So, what makes this whole process work so well? The secret sauce is that intermediary film. It acts as the perfect carrier for the ink, giving us some serious advantages over other methods.
- Vibrant Colours on Any Fabric: A base layer of white ink is always printed underneath your design. This acts like a primer, making sure your colours pop with true vibrancy, even if you’re printing on a black or dark-coloured shirt.
- Incredible Detail: The film has a perfectly smooth surface, which allows for much finer details and sharper lines than you could ever get by printing directly onto a textured fabric like cotton.
- Versatility: This method isn't just for cotton t-shirts. It works brilliantly on polyester, poly-blends, canvas, denim, and even some harder surfaces, opening up a whole new world of creative possibilities.
This approach has quickly become a favourite for everyone from small businesses creating their first line of merch to major apparel brands needing consistent, high-quality results at scale. It perfectly bridges the gap between one-off custom prints and large production runs.
Because the process is so direct, it cuts out many of the setup costs you’d see with something like screen printing. This makes it a fantastic and affordable option for smaller orders. If you're keen to get your head around the basics of this tech, our guide on what DTF stands for is a great place to start learning more about the core concepts of Direct-to-Film.
This foundational knowledge helps show why custom DTF is more than just another printing option; it’s a flexible, reliable solution that delivers professional quality every single time.
The Custom DTF Printing Process Explained
So, how does a digital idea actually become a real, wearable design? The custom DTF process is a fascinating journey, a bit like building a high-quality, flexible image layer by layer rather than just printing it on. Each step is crucial, building on the last to create a vibrant and seriously durable final product.
It all starts with your digital artwork—the blueprint for everything. This file gets loaded into special software that preps it for the unique demands of DTF printing, making sure every colour is mapped correctly and no detail gets lost in translation.
This visual breaks down the straightforward flow from a digital file to a finished piece of clothing.
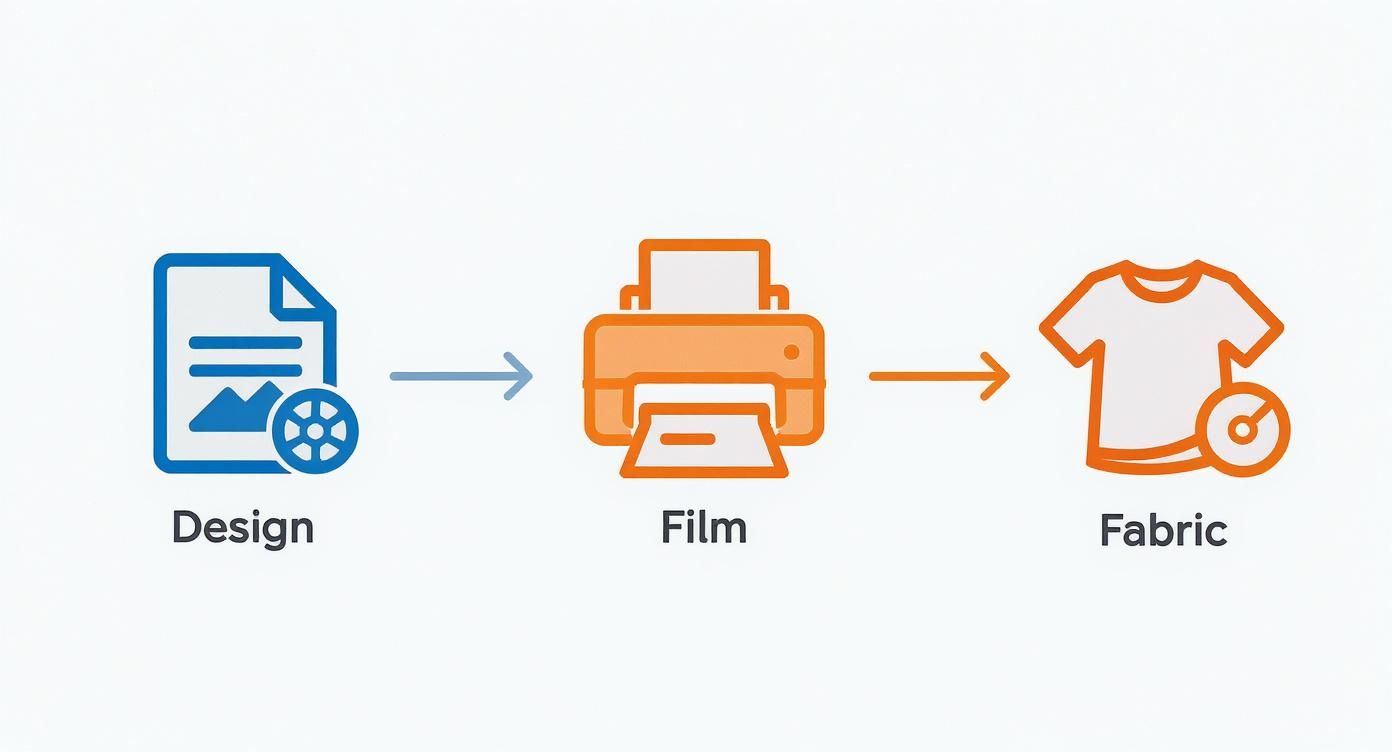
As you can see, the design is printed onto a carrier film first, before it ever touches the garment. This is the secret to its versatility and incredible quality.
Step 1: Printing onto the Transfer Film
The first real-world step involves a specialised DTF printer. This isn't your standard office machine; it’s engineered to print onto rolls of clear PET (polyethylene terephthalate) film. It lays down the coloured inks—Cyan, Magenta, Yellow, and Black—to recreate your design with stunning precision.
Right after the colour layer goes down, the printer adds a crucial layer of opaque white ink. This white underbase is the magic behind DTF's vibrant look on dark or coloured fabrics. It acts like a primer, stopping the garment's colour from bleeding through and ensuring your graphic pops just like it did on the screen.
Step 2: Applying the Adhesive Powder
With the design perfectly printed on the film, it’s time for the adhesive. The still-wet ink passes through a machine that showers it with a fine, granulated thermoplastic polyurethane (TPU) powder.
This special "hot-melt" powder is designed to stick only to the wet ink, leaving the empty areas of the film completely clear. Any extra powder is shaken off, which means only your design gets the adhesive backing it needs to bond to the fabric.
Think of this powder as the invisible glue that will permanently fuse your design to the garment. Without it, the ink would just be a picture on a piece of plastic. The powder is what turns it into a true transfer.
This precision is what gives DTF its soft, flexible feel. You don't get that heavy, plastic box around your design that you see with older transfer methods.
Step 3: Curing the Ink and Adhesive
Now that the adhesive powder is perfectly applied, the printed film heads through a curing oven. This stage melts the TPU powder, transforming it from a grainy substance into a smooth, even layer of adhesive that bonds directly to the back of the ink.
This controlled heating, usually around 100-120°C, accomplishes two things at once:
- It cures the ink: The layers of CMYK and white ink are gently dried and set permanently.
- It melts the adhesive: The powder fuses into a consistent, rubbery layer, ready for the final press.
What comes out the other side is a finished DTF transfer: a stable, storable, and "ready-to-press" graphic on a clear film. For a more technical look at the equipment and technology involved, you can explore the entire DTF printing system in our comprehensive guide.
Step 4: Heat Pressing onto the Garment
This is where it all comes together. The blank garment is laid out on a heat press, and the cured DTF transfer is positioned exactly where you want the design to go.
The heat press applies a combination of high temperature (typically 150-170°C) and firm pressure for about 10-15 seconds. This heat reactivates the cured adhesive, causing it to melt and bond deep into the fabric's fibres. Once the time is up, the press is opened. After a quick cool-down, the clear PET film is peeled away, leaving the vibrant, detailed design permanently part of the garment.
Why Choose Custom DTF for Your Next Project?
When you’re trying to pick a printing method, the sheer number of options can feel a bit overwhelming. You’re looking for something that ticks all the boxes: top-notch quality, the flexibility to print on different items, and good value for your money. You need a solution that brings your vision to life without forcing you to compromise. This is exactly where custom DTF printing shines.
The technology has exploded in popularity, and for very good reason. Its growth in the UK has been huge; the Direct to Film printing market here is projected to hit around USD 192.2 million in 2025. You can discover the full market analysis on Grand View Research if you're curious about the numbers. This isn't just a fleeting trend—it’s a solid, reliable method that’s delivering real benefits for everyone from small businesses to independent clothing brands.
Unmatched Versatility Across Fabrics
One of the biggest wins for custom DTF transfers is their incredible versatility. While other methods can be really picky about the materials they’ll work with, DTF is like a universal adapter for custom apparel.
- Cotton & Polyester: It works beautifully on 100% cotton, making colours pop, but it’s just as brilliant on 100% polyester—a fabric that often gives other print methods a headache.
- Blends: Got a popular tri-blend or a 50/50 cotton-poly mix? DTF handles them with ease, keeping its quality and feel consistent across different fibre combinations.
- Beyond the T-Shirt: This isn't just for t-shirts. DTF can be applied to canvas bags, denim jackets, hats, and even some hard-surfaced promotional gear. It completely opens up your creative possibilities.
Being able to stick to almost any fabric means you don’t have to switch up your entire process just because you want to add a new product to your lineup. It’s simple and consistent.
Stunning Print Quality and Feel
DTF transfers are known for their visual punch and great texture. The process allows for photorealistic detail, clean lines, and brilliant colour gradients that are often tough to get right with other techniques.
Because the design is printed onto a film first, the ink doesn’t soak into the fabric and lose its vibrancy. Instead, it sits right on top, securely bonded by the adhesive. This gives you a print that’s not only bright but also surprisingly soft and flexible. It moves with the garment, so you avoid that stiff, plasticky feeling you get with some older transfer types.
The secret is the white underbase that gets printed beneath every colour. Think of it as a perfect primer, making sure your design looks just as vibrant on a black hoodie as it does on a crisp white t-shirt.
Built for Impressive Durability
A great-looking design is pointless if it doesn’t last. Thankfully, custom DTF prints are built to be tough, holding up incredibly well to daily wear and tear and repeated washes.
The adhesive powder used in the process creates a seriously strong bond with the fabric's fibres when it's heat-pressed. This fusion means the design is highly resistant to cracking, peeling, or fading over time. As long as you look after it—a cool wash, inside out—a DTF print can easily last as long as the garment itself, keeping its colour and sharpness wash after wash.
Cost-Effective for All Order Sizes
In the past, getting small batches of custom gear was notoriously expensive because of the high setup costs of methods like screen printing. This is where DTF completely changes the game. There are no screens to create or complicated colour separations to worry about. The entire setup is digital.
This makes custom DTF a brilliant solution for:
- Small Businesses: Need just 20 uniforms for your team? DTF makes it affordable.
- New Brands: Want to test a new design with a limited run before going all-in? No problem.
- Personal Projects: Creating a one-off gift for a friend is simple and doesn't break the bank.
While screen printing is still the king for massive orders with simple designs, DTF offers a much more economical route for small to medium-sized runs without ever sacrificing that professional quality. If you want to dive deeper, we've broken it all down in our comparison of DTF vs. screen printing for graphic tees. It’s an efficiency that makes high-quality customisation accessible to everyone.
To help you visualise where DTF fits in, here’s a quick comparison with other popular printing methods.
Comparing Printing Methods for Custom Apparel
| Feature | Custom DTF | Screen Printing | Direct to Garment (DTG) | Vinyl Transfer |
|---|---|---|---|---|
| Best For | Full-colour, complex designs on any fabric. Small to medium runs. | Simple designs (1-4 colours) on large bulk orders. | Detailed, full-colour prints on 100% cotton garments. | Simple logos, text, and numbers. Team sportswear. |
| Fabric Versatility | Excellent. Works on cotton, polyester, blends, and more. | Good. Best on cotton but can work on some blends. | Limited. Primarily for 100% cotton; struggles with synthetics. | Very good. Works on most fabrics, including sportswear. |
| Feel on Garment | Soft, smooth, and flexible. Sits on top of the fabric. | Can be slightly thicker, depending on ink layers. | Very soft and breathable as ink soaks into the fabric. | Can feel thick and plasticky, especially on large designs. |
| Durability | High. Very resistant to cracking and fading. | Very high. Extremely durable for long-term wear. | Good, but can fade over time with repeated washing. | Good, but can peel or crack if not applied properly. |
| Cost-Effectiveness | Great for small to medium batches. No setup fees. | Best for very large runs. High initial setup cost. | Good for one-offs and small orders. No setup fees. | Good for small orders of simple, single-colour designs. |
Each method has its place, but as you can see, DTF hits that sweet spot of versatility, quality, and affordability for a huge range of projects. It’s a fantastic all-rounder.
Preparing Your Artwork for Perfect DTF Results
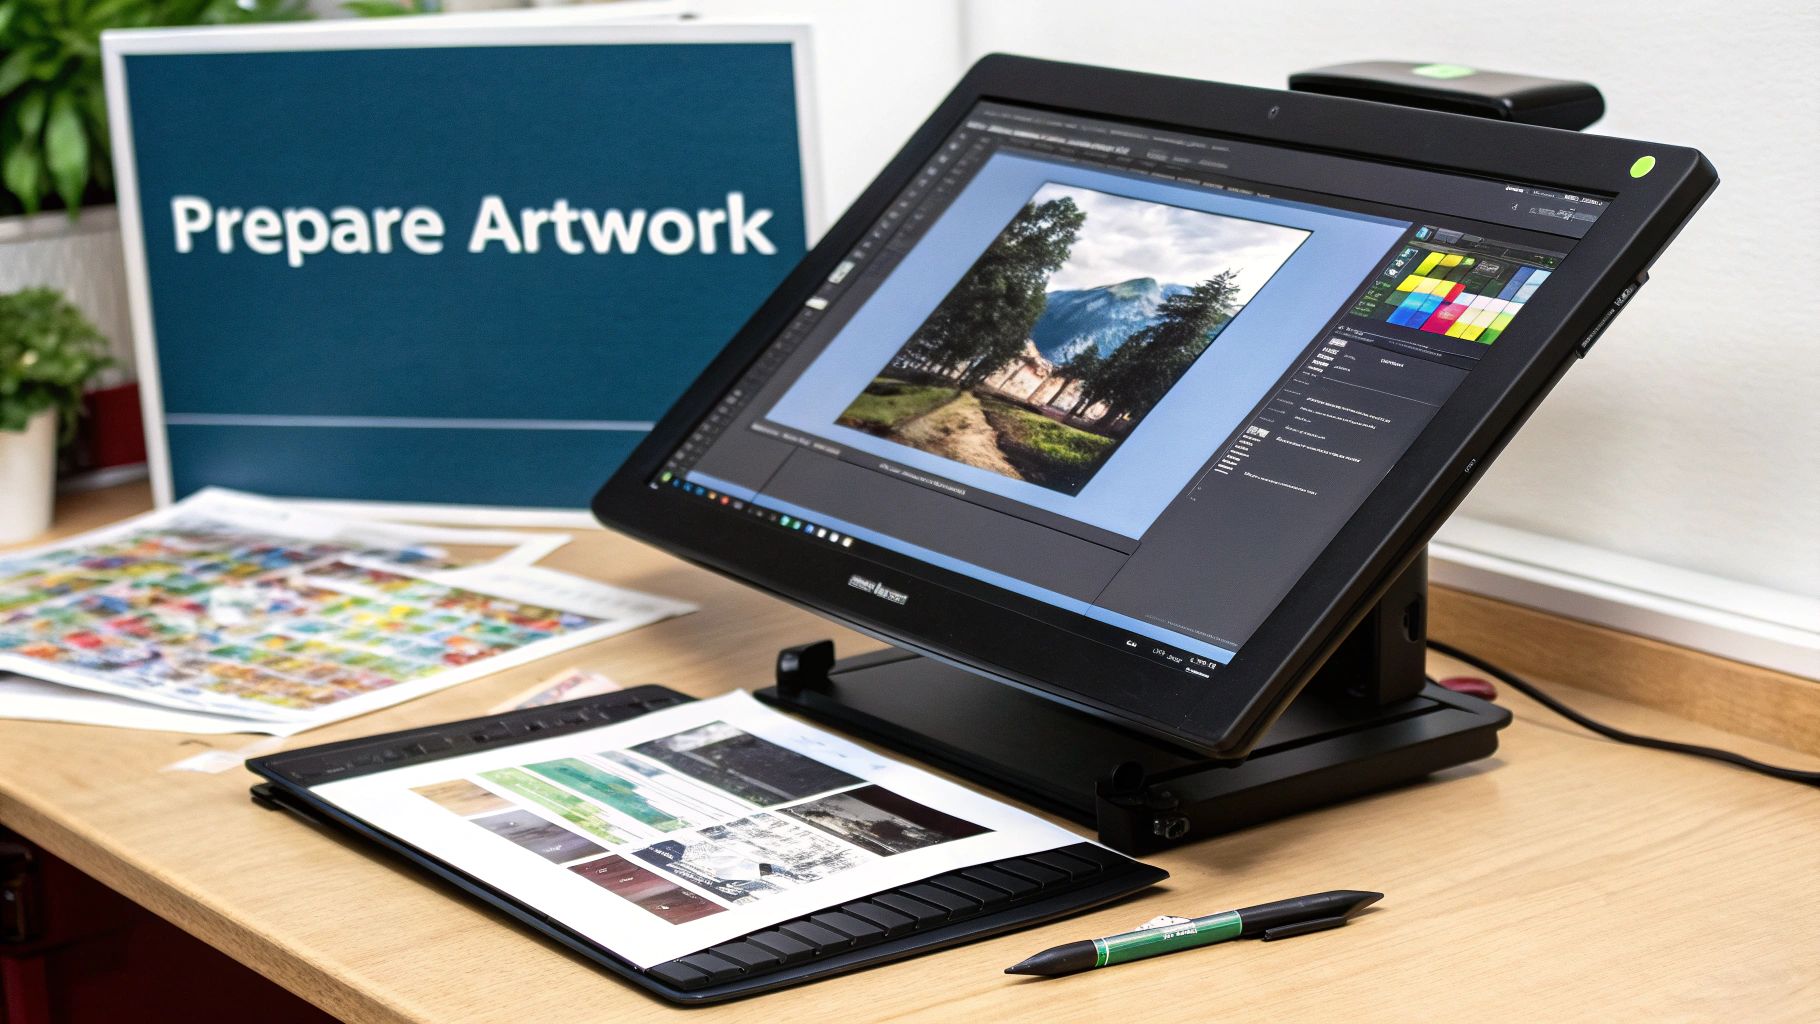
The quality of your finished custom DTF transfer comes down to one thing: the quality of the artwork you send us. A stunning, vibrant print isn’t a happy accident; it all starts with a properly prepared digital file. Getting this first step right is the most critical part of turning a design on a screen into something you’d be proud to wear.
Think of it like building a house—a shaky foundation will undermine the whole structure. In DTF printing, your digital file is that foundation. Rushing this stage with a low-quality image is the fastest route to a blurry, pixelated, and ultimately disappointing result.
The Non-Negotiables for Your Design File
To get those professional, crisp results you're after, your artwork needs to meet a few key technical specs. These aren't just suggestions; they're essential for the printing process to work its magic. Ignoring them can lead to prints with fuzzy edges or colours you didn't expect.
First up, your file must have a transparent background. If you leave a white or coloured background in the file, it will get printed. That means you’ll end up with an ugly, solid box around your beautiful design. The printer needs to know exactly where your artwork stops and the garment begins.
Next is resolution. For sharp, clear prints that look amazing up close, your file should be saved at 300 DPI (dots per inch). If you grab a low-resolution image from a website, it’s going to look blocky and fuzzy when it’s scaled up to fit on a t-shirt. Always, always start with the highest quality file you can get your hands on.
Choosing the Right Colour Mode
Colour is another massive piece of the puzzle. Your computer screen shows colours using RGB (Red, Green, Blue), which is perfect for digital displays. But professional printers don't use light; they use ink. They mix physical inks in CMYK (Cyan, Magenta, Yellow, Black) to create the colours for your print.
When you send us an RGB file, our software has to make its best guess to convert it to CMYK, and that can cause some pretty dramatic colour shifts. That vibrant electric blue on your screen might come out as a much duller, muted shade on the final garment. To avoid any nasty surprises, it's always best to design and export your artwork in CMYK from the get-go.
This one simple step ensures the colours you see on your monitor are a much more faithful representation of what will end up on the fabric. If you want to dive a bit deeper, check out our guide on CMYK vs. RGB for print to see why this is so crucial for predictable, accurate results.
Design Best Practices for Flawless Transfers
Beyond the technical file setup, a few design pointers will help you get the absolute most out of your custom DTF transfers. Think of these as insider tips to sidestep common problems that can affect how the transfer applies and how well it lasts.
- Avoid Ultra-Fine Lines: Details are fantastic, but lines that are too thin (we're talking less than 2-3 pixels wide) might not have enough surface area for the adhesive powder to grab onto. This can cause them to peel away or break after a few washes.
- Understand the White Underbase: Remember that a solid layer of white ink is printed underneath your entire design. This is the secret sauce that makes colours pop on dark and coloured fabrics. It also means even the lightest, most subtle shades in your design will have that white backing, making them completely opaque.
- Feathered Edges Need Care: Soft, feathered, or semi-transparent edges can be tricky. The adhesive powder sticks to any ink, so these soft edges can sometimes print with a faint, speckled white outline where the transparency fades out. If you want the cleanest possible look, stick to hard, well-defined edges.
By keeping these guidelines in mind, you're setting your project up for success. You're ensuring the final product is every bit as sharp, vibrant, and durable as you imagined it to be.
How to Order and Apply Your Custom DTF Transfers
Alright, you've got your killer design ready. So, how do you get it from your screen onto a finished product? This is where the magic happens. Let's walk through the whole process, from picking a solid print partner to pressing your custom DTF transfers like a pro for a finish that looks amazing and actually lasts.
Finding a Quality UK Print Provider
Choosing the right partner is the first and most important step. A great provider is the difference between transfers that are vibrant, tough, and a dream to apply, and ones that... well, aren't. Don't just shop on price alone; look for the signs of real quality and reliability.
A top-notch printer will be open about their gear—what printers they run, the specific inks they use, and the type of adhesive powder. They should also give you crystal-clear artwork guidelines and have a support team that can actually help you sidestep common pitfalls. It's good to know that the UK's DTF scene, especially in hubs like London and Manchester, is pretty serious about quality control, which really pushes the standard up for everyone.
The Typical Ordering Process
Once you've found your printer, placing an order is usually a breeze. Most have a straightforward digital setup that only takes a few clicks.
- Artwork Upload: First up, you'll upload your design file. Just a reminder: make sure it's a high-resolution file (300 DPI) with a transparent background for the best results.
- Size and Quantity Selection: Next, tell them how big you want your transfers and how many you need. A lot of providers offer "gang sheets," which are a fantastic way to squeeze multiple designs onto one sheet and get more bang for your buck.
- Review and Confirmation: You'll get one last look at a digital proof before it goes to print. Check everything carefully here—this is your last chance to catch any mistakes!
This simple workflow is a huge part of what makes custom DTF so appealing and accessible. If you're keen to give it a go, you can easily buy DTF transfers from our online store and see for yourself how easy it is.
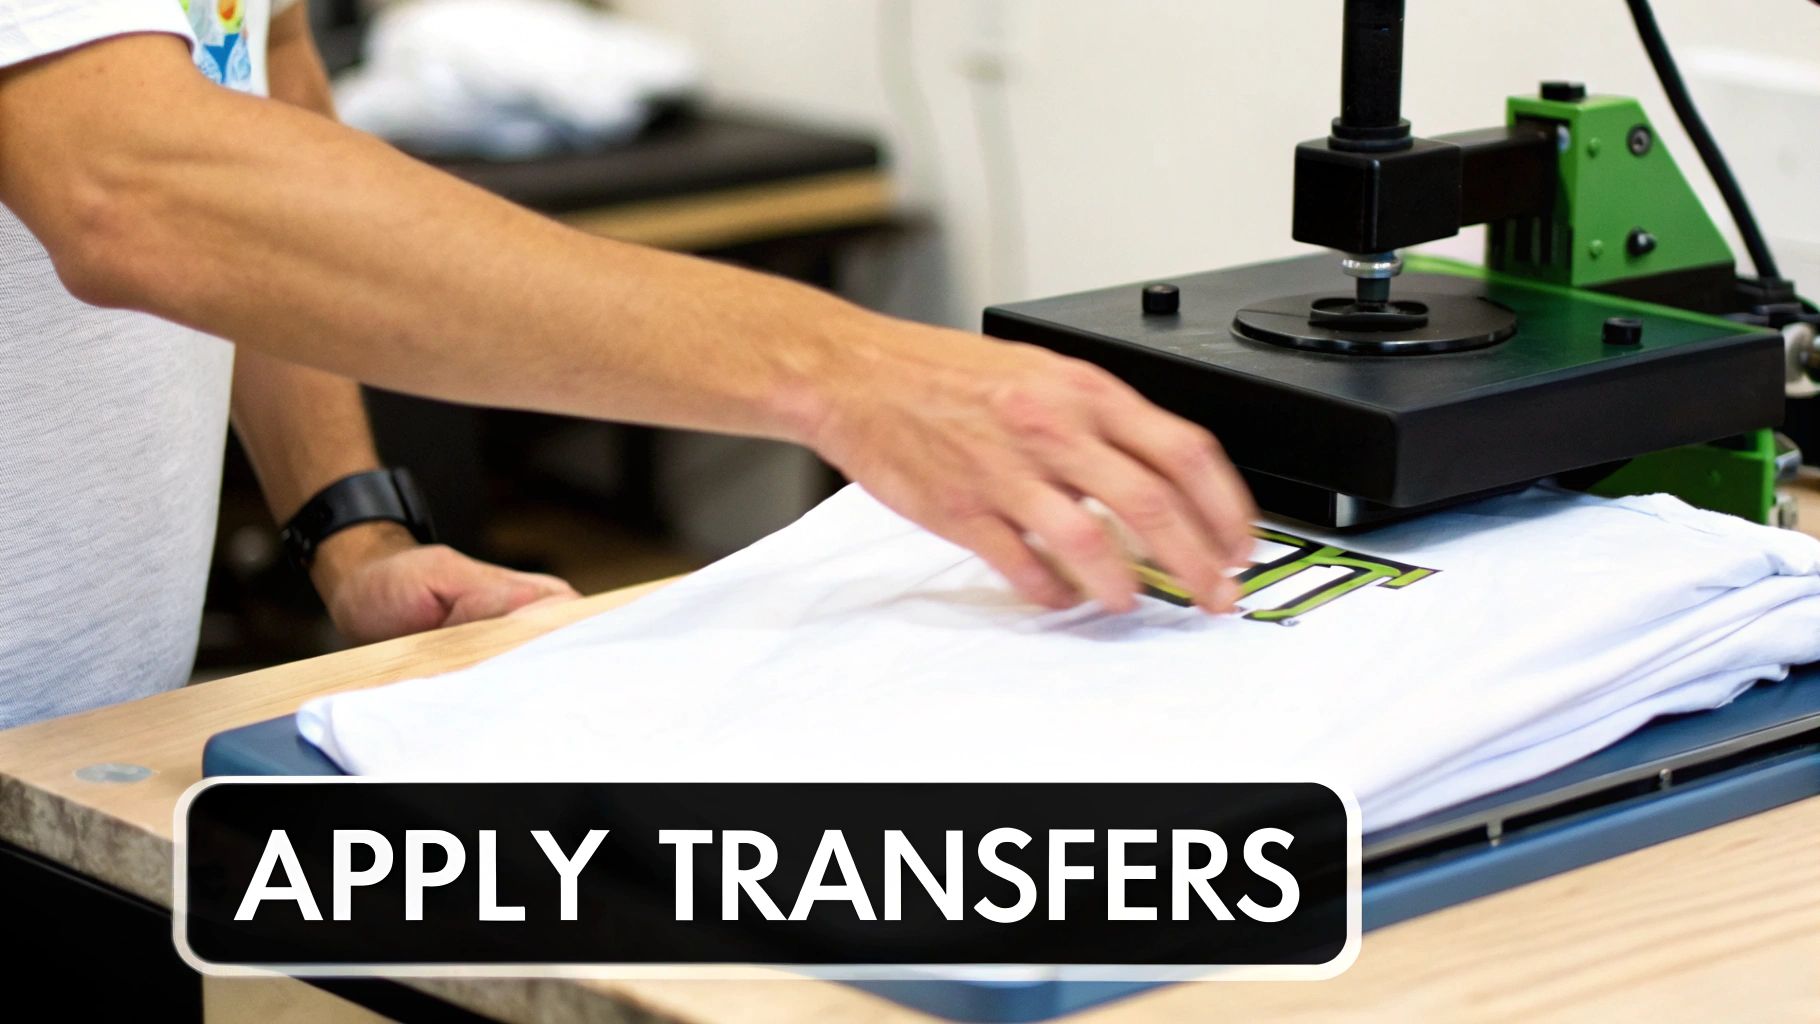
Applying Your Transfers with a Heat Press
With your custom transfers delivered, it's time for the fun part: bringing your design to life. To get that professional, durable bond, you absolutely need a heat press. A home iron just can't deliver the consistent heat and even pressure required for a transfer that will survive the wash.
Preparation is Key:
- Pre-press the Garment: Before you even think about placing the transfer, give the garment a quick press for 5-7 seconds. This smooths out wrinkles and gets rid of any hidden moisture, creating a perfect canvas.
- Position the Transfer: Carefully lay the transfer onto the garment, design-side down. If you're worried about it shifting, a bit of heat-resistant tape can be your best friend.
- Use a Protective Sheet: Always cover the transfer with a Teflon sheet or some parchment paper. This protects both your print and the heat press from any mishaps.
Correct settings are everything. While they can vary slightly based on the fabric and the specific transfers, a good starting point for most cotton and poly-blend garments is a temperature of 150-160°C, a medium-firm pressure, and a press time of 10-15 seconds.
Understanding Hot Peel vs. Cold Peel
After the press, the last step is to remove that clear carrier film. Your provider's instructions will tell you if it's a "hot peel" or "cold peel" transfer. Trust me, you need to follow this instruction for a flawless finish.
- Hot Peel: This means you peel the film away the second the heat press opens, while everything is still scorching hot. It’s quick, efficient, and usually leaves the design with a softer, more matte look.
- Cold Peel: With these, you have to be patient and wait for the garment and transfer to cool down completely before peeling. This method often gives you a glossier finish and is typically recommended for designs with really fine, intricate details.
Once the film is off, I always recommend a final, quick press for 2-3 seconds with the protective sheet back over the design. This "finishing press" does wonders for locking the design right into the fabric's fibres, making it more durable and giving it a much softer feel. Follow these steps, and you’ll be applying your custom DTF transfers with professional-grade results every single time.
Caring for Your DTF Printed Garaments
You’ve got your hands on some great-looking custom DTF prints, and they feel fantastic. Now, how do you keep that just-printed look for as long as possible? It’s simpler than you think. A little bit of care in how you wash and dry your gear makes all the difference in protecting the print and making it last.
The good news? Looking after your DTF garments is incredibly easy. The main thing to remember is to be gentle and stay away from high heat. Heat is the natural enemy of the adhesive that locks your design onto the fabric. Too much of it can soften that bond, leaving your print vulnerable to damage.
The Golden Rules of Washing
First things first: always turn your garment inside out before it hits the washing machine. This one simple step creates a protective barrier for the print, minimising friction as it tumbles around with other clothes. That means less chance of peeling or cracking down the line.
Next, always go for a cool wash. Pop it on a gentle cycle with cold water, because hot water can weaken the transfer’s adhesive. It’s also a good idea to use a mild detergent and steer clear of harsh stuff like bleach or fabric softeners. They can mess with the ink and make the print less flexible over time.
- Turn Garment Inside Out: This is non-negotiable. It’s the single best way to protect the print’s surface.
- Wash in Cold Water: Aim for 30°C or less. This keeps the adhesive bond strong and secure.
- Use a Mild Detergent: Ditch the bleach and strong fabric softeners. They’re just too aggressive for the print.
This careful approach doesn't just keep your clothes looking good; it's also a more sustainable way to do laundry. The UK printing industry's shift towards DTF is partly down to its greener credentials, which are backed by regulations promoting safer chemical use. Washing in cold water fits right in by cutting down on energy consumption. You can dive deeper into how regulations are shaping the UK printing market on kbvresearch.com.
Drying and Ironing Best Practices
When it’s time to dry, air drying is your best friend. Just hang the garment up and let it dry naturally. It’s the safest method and puts zero stress on your design. If you're in a rush and have to use a tumble dryer, make sure you use the lowest heat setting you possibly can.
Never, ever iron directly on a DTF transfer. The intense heat from an iron will melt the ink and adhesive right off, completely wrecking your design. If the garment really needs an iron, keep it inside out, use a low temperature, and carefully work around the printed area.
Got Questions About Custom DTF? We've Got Answers
So, you've got the basics of DTF down, but maybe a few specific questions are still floating around. That's completely normal. Let's dive into some of the most common queries we get, so you can feel 100% confident about your next project.
What Does a DTF Transfer Feel Like on a Shirt?
This is probably the number one question we hear, and for good reason! Nobody wants a shirt that feels like it has a stiff, plastic sticker on it.
The great news is that a finished DTF transfer is surprisingly soft, smooth, and flexible. Think of it less like an old-school iron-on patch and more like a seamless part of the garment. It moves and stretches with the fabric, so you don't get that bulky, cracked feeling. It sits on top of the fibres rather than soaking in, giving it a very slight texture, but it’s so thin and pliable you’ll barely notice it’s there. The end result is a premium, comfortable finish that just feels great to wear.
Can I Use a Regular Household Iron to Apply a Transfer?
Okay, this one is critical. The short answer? No, you really shouldn't use a regular iron. It might seem like a quick and easy solution, especially for a small project, but a household iron just can’t deliver what DTF transfers need to bond properly.
Here’s why a heat press is non-negotiable:
- Consistent Temperature: Your home iron has hot and cool spots all over its surface. This uneven heating means some parts of your design will be perfectly applied while others barely stick at all.
- Even Pressure: It's practically impossible to apply the firm, consistent pressure required across the entire transfer with just your hands and an iron.
Trying to use an iron is a recipe for disaster. You'll almost certainly end up with a patchy application where bits of the design start peeling off, probably after the very first wash. To get that professional, long-lasting finish, a proper heat press is the only way to go.
How Long Can I Store DTF Transfers Before Using Them?
One of the biggest perks of DTF is that the transfers have an excellent shelf life. This is a massive advantage for creators and businesses who want to plan ahead. If stored correctly, your unused transfers can last for up to a year, sometimes even longer, without losing their vibrancy or adhesive power.
To get the most out of your transfers, store them in a cool, dry place away from direct sunlight and humidity. Keeping them flat inside a sealed bag or a box is the perfect way to make sure they’re ready to press perfectly whenever you need them.
This makes it super easy to order in bulk, grab a better price, and press your designs on demand without any pressure to use them all at once.
What Is a DTF Gang Sheet?
If you've been browsing printing options, you've probably come across the term "gang sheet." It sounds a bit technical, but the concept is simple and incredibly useful.
A gang sheet is just a large sheet of transfer film where you arrange multiple different designs to be printed together. Instead of ordering lots of individual transfers, you can fit everything you need—your main chest designs, smaller sleeve logos, neck tags, you name it—onto one single sheet.
This is a brilliantly efficient and budget-friendly way to order custom DTF prints. It dramatically cuts down on wasted material and brings your cost-per-design way down. It's a game-changer for brands that need a variety of graphics or different logo sizes for a complete clothing line.
Ready to bring your unique designs to life with vibrant, durable, and easy-to-apply prints? Psyque offers premium custom DTF transfers for businesses, brands, and creators across the UK. Explore our services and start your next project today at https://psyque.co.uk.