
Your Ultimate Guide to DTF Transfer Printing
So, what exactly is a DTF transfer? At its core, it’s a modern printing technique that gives you a high-quality, durable design—think of it as a next-generation iron-on that's built to last. The process involves printing your design onto a special film, coating it with an adhesive powder, and then heat-pressing it onto a garment. The result is a brilliantly vibrant, flexible print that feels like a natural part of the fabric itself.
Unpacking What DTF Transfer Printing Really Means
The best way to think of a DTF transfer is as a clever, two-step method for decorating clothing. Instead of printing directly onto a t-shirt (which can be tricky and limiting), the design is first printed onto a transparent PET film. This film acts as a temporary carrier for the ink, a bit like the backing paper on a sticker.
Once the design is printed, a special hot-melt adhesive powder is dusted over the wet ink. This powder is the secret sauce; it’s what bonds the design to the fabric fibres when heat is applied. The film is then cured, which locks the ink and powder together to create a ready-to-press transfer. This approach gives you a complete, self-contained graphic that you can apply to almost any material you can think of—from cotton and polyester to leather and blends.
The core idea behind a DTF transfer is separating the printing from the application. This allows for incredibly detailed, multi-coloured designs to be prepared in advance and applied quickly, making it a powerful tool for both small creators and large businesses.
A Growing Industry in the UK
This amazing flexibility and quality have fuelled rapid growth in the industry. The UK's direct-to-film printing market is a perfect example of this boom, with revenues projected to climb from an estimated USD 192.2 million in 2025 to USD 249.0 million by 2030. This impressive growth, tracked by industry experts at Grand View Research, really highlights the soaring demand for custom apparel and better printing solutions.
Ultimately, getting your head around the concept is pretty straightforward. If you want to dive deeper into the technical side and truly understand what DTF stands for, we have a detailed guide that breaks it all down. The DTF transfer method offers a genuinely practical solution for creating professional-grade custom clothing with fantastic durability and visual pop, no matter the garment's colour.
How the DTF Printing Process Works
Taking a digital design and turning it into wearable art with a DTF transfer is a surprisingly logical and straightforward journey. It might sound a bit technical, but the whole process from screen to shirt breaks down into a few key stages. Each step simply builds on the one before it, all leading to a high-quality, durable finish.
It all kicks off with the printing. Using a special inkjet printer filled with DTF pigment inks, your design is printed straight onto a sheet of PET (polyethylene terephthalate) film. This film isn't like paper; it's just a temporary home for the ink. A clever part of this stage is how the printer lays down a solid white ink layer first, then prints the coloured CMYK inks on top. This is the secret to making sure your design pops, even on the darkest fabrics.
The Magic of the Adhesive Powder
While the ink is still wet on the film, it’s time for the ingredient that makes it all stick: a hot-melt adhesive powder. The printed film gets an even coating of this fine, white powder, which cleverly clings only to the wet ink. You can think of it like dusting a sticky surface with flour. Any excess powder is simply shaken off, leaving a perfectly shaped adhesive layer that’s an exact mirror of your design.
Next, this powdered film needs to be cured. It's heated carefully, either in a curing oven or by hovering a heat press just over the surface. This melts the powder and fuses it into the ink, creating a single, stable, and flexible transfer sheet. Once it cools down, your DTF transfer is good to go. You can find plenty of ready-to-press options by checking out our DTF transfer sheets online.
This simple infographic breaks down the three main stages of the DTF process: Print, Powder, and Press.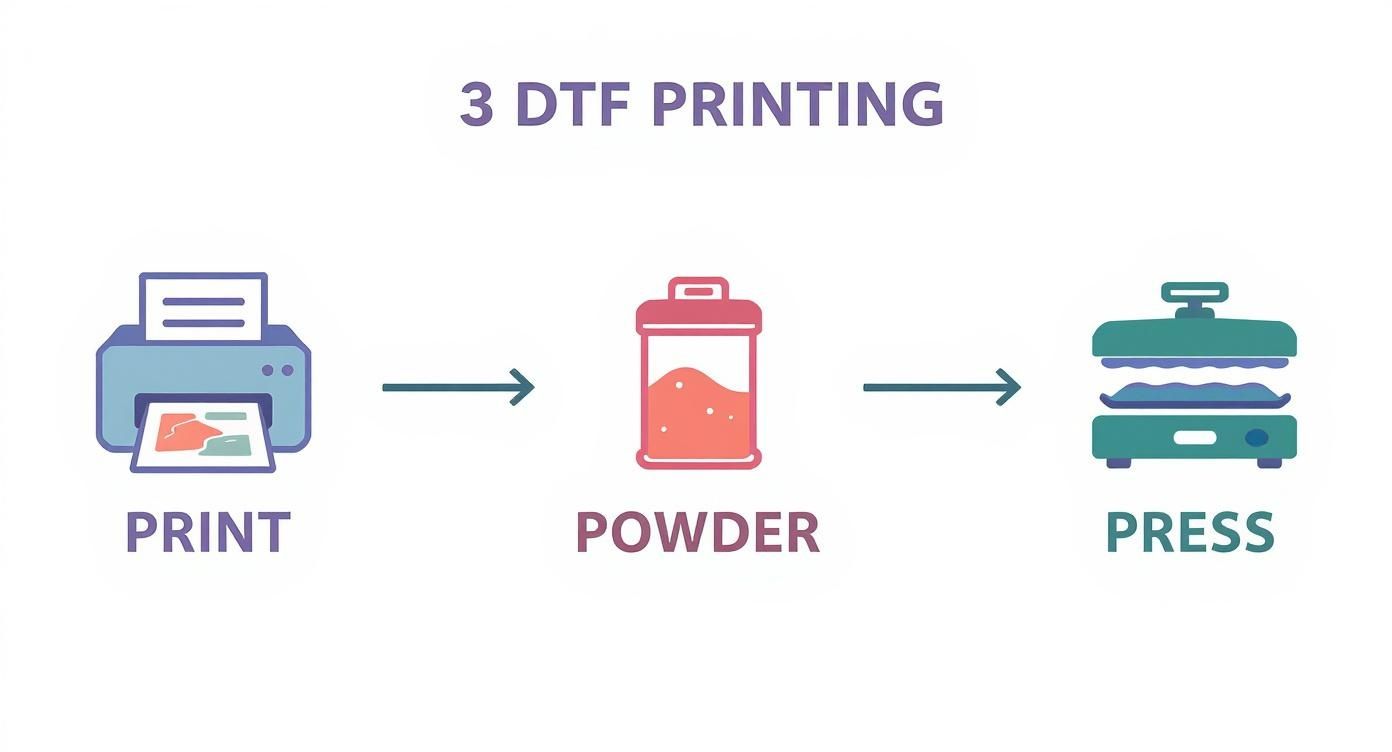
As you can see, it’s a clear progression that takes a printed film and turns it into a design that's ready for any garment.
The Final Pressing Stage
The final step is getting that finished transfer onto the clothing. This is where a good heat press is absolutely essential for getting professional-looking results.
- Preparation: First, the garment is placed on the heat press and given a quick pre-press for a few seconds. This gets rid of any moisture or wrinkles and creates a perfectly flat canvas to work on.
- Placement: The cured DTF transfer is then positioned on the garment, ink-side down.
- Application: The heat press is closed, applying consistent heat and pressure for a set amount of time – usually 15-20 seconds at around 160°C. This reactivates the adhesive, bonding the design permanently into the fabric's fibres.
- Peeling: After pressing, the transfer needs to cool down completely (this is known as a "cold peel") before the PET film is gently peeled away.
What you're left with is a crisp, vibrant, and incredibly tough graphic that feels like it’s a natural part of the fabric. It’s this reliable, repeatable process that makes the DTF transfer a favourite for creators and businesses alike.
Why Choose DTF Over Other Methods?
When you start looking into custom apparel, you’ll come across a few different printing methods, and each has its place. But there's a reason why the DTF transfer is gaining so much ground. Both creators and established brands are making the switch because it neatly solves some of the biggest headaches in printing, offering a killer combination of quality, versatility, and affordability that’s hard to beat.
One of its biggest selling points is its incredible flexibility with fabrics. Unlike Direct-to-Garment (DTG) printing, which can be a bit fussy and prefers high-cotton blends, DTF is not picky at all. It sticks beautifully to a massive range of materials.
- Cotton and Polyester: Perfect for all the classics like t-shirts, hoodies, and sportswear.
- Blended Fabrics: Handles common poly-cotton blends without breaking a sweat.
- Beyond the Basics: You can even press DTF transfers onto tougher stuff like denim, leather, and nylon.
This freedom opens up a whole new world of possibilities. You can brand everything from corporate polo shirts to custom leather patches, all using the same printing setup.
Unmatched Detail and Colour Vibrancy
A huge reason to go with a DTF transfer is the way it reproduces designs with almost photorealistic quality. Because the graphic is printed onto a special film first, the ink sits on top of the fabric rather than soaking into the fibres. The result? Exceptionally sharp lines, tiny intricate details, and colours that properly pop, especially on dark garments.
The white ink underbase printed behind the design is the secret sauce here, making sure the colours are completely opaque. Your design will look just as bright and bold on a black t-shirt as it does on a white one—something other methods can really struggle with. On top of that, these prints are impressively durable. They stretch with the fabric to resist cracking and hold up brilliantly through wash after wash.
The real magic of DTF is that it brings together the vibrant, solid colours of screen printing with the unlimited detail of digital printing, all while working on almost any fabric you can think of.
Cost-Effectiveness for Modern Demands
This is where DTF really shines, particularly for small businesses or anyone needing smaller batches. Traditional screen printing is brilliant for massive orders, but the setup costs are high. You need a separate screen for every single colour in your design, which makes it far too expensive for small runs.
A DTF transfer gets rid of that barrier completely. There are no screens to prepare and no complicated setup for each colour. This makes it the perfect solution for producing small batches, one-off samples, or fulfilling on-demand orders with colourful, complex designs at a low cost per item.
For a deeper look at how it stacks up against the old guard, our guide on DTF vs screen printing for graphic tees breaks it all down. But in a nutshell, DTF offers a practical, affordable path to professional-quality custom gear, no matter how many you need.
To make the choice clearer, let's put these methods side-by-side.
Comparing DTF Transfer with Other Printing Methods
This table breaks down the key differences between DTF, Screen Printing, and Direct-to-Garment (DTG), helping you see at a glance which method best fits your project's needs.
| Feature | DTF Transfer | Screen Printing | DTG Printing |
|---|---|---|---|
| Best For | Small-to-medium runs, full-colour designs, and a wide variety of fabric types. | Large bulk orders (100+ units) with simple designs (few colours). | Small runs or one-offs on 100% cotton, especially for photorealistic prints. |
| Fabric Versatility | Excellent. Works on cotton, polyester, blends, leather, nylon, and more. | Good. Best on cotton and poly-blends, but can be adapted for others. | Limited. Primarily for high-cotton content fabrics; struggles with polyester. |
| Colour & Detail | Excellent. Unlimited colours, sharp details, and great vibrancy on all colours. | Good. Colours are very vibrant, but each additional colour increases cost. | Very Good. Full-colour photographic detail, but can lack vibrancy on darks. |
| Durability | Excellent. Stretchy, crack-resistant, and holds up very well to washing. | Excellent. Extremely durable and long-lasting when cured properly. | Good. Can fade over time with repeated washing, especially on dark garments. |
| Feel on Garment | A soft, flexible layer that sits on top of the fabric. | A thicker layer of ink that can be felt on the shirt. | Very Soft. Ink soaks into the fabric, leaving almost no feel. |
| Cost-Effectiveness | High for small to medium runs; no setup fees per colour. | High for very large runs; low for small runs due to setup costs. | High for single items or very small runs; becomes expensive for larger orders. |
As you can see, while screen printing still rules for massive bulk orders and DTG offers the softest feel on cotton, DTF provides an unbeatable balance of versatility, quality, and cost for the modern creator.
Your Essential DTF Equipment Checklist
Thinking about bringing DTF transfer production in-house? It might seem like a big leap, but once you get to know the core equipment, the whole process becomes much less intimidating. Nailing your setup from the start is the key to creating professional, long-lasting prints every single time.
Each piece of gear has a vital part to play in turning a digital file into a high-quality finished garment. You can think of it like a production line where every station is non-negotiable.
It all starts with the DTF printer, which is really the heart of the whole operation. This isn't your average office printer; it's a specialised inkjet machine built to handle specific pigment inks. Crucially, it can print a white layer at the same time as the colour layer, which is the secret to making your designs pop on fabrics of any colour.
But the printer is only as good as the supplies you feed it. The entire workflow relies on a few key consumables working together perfectly to create the final transfer.
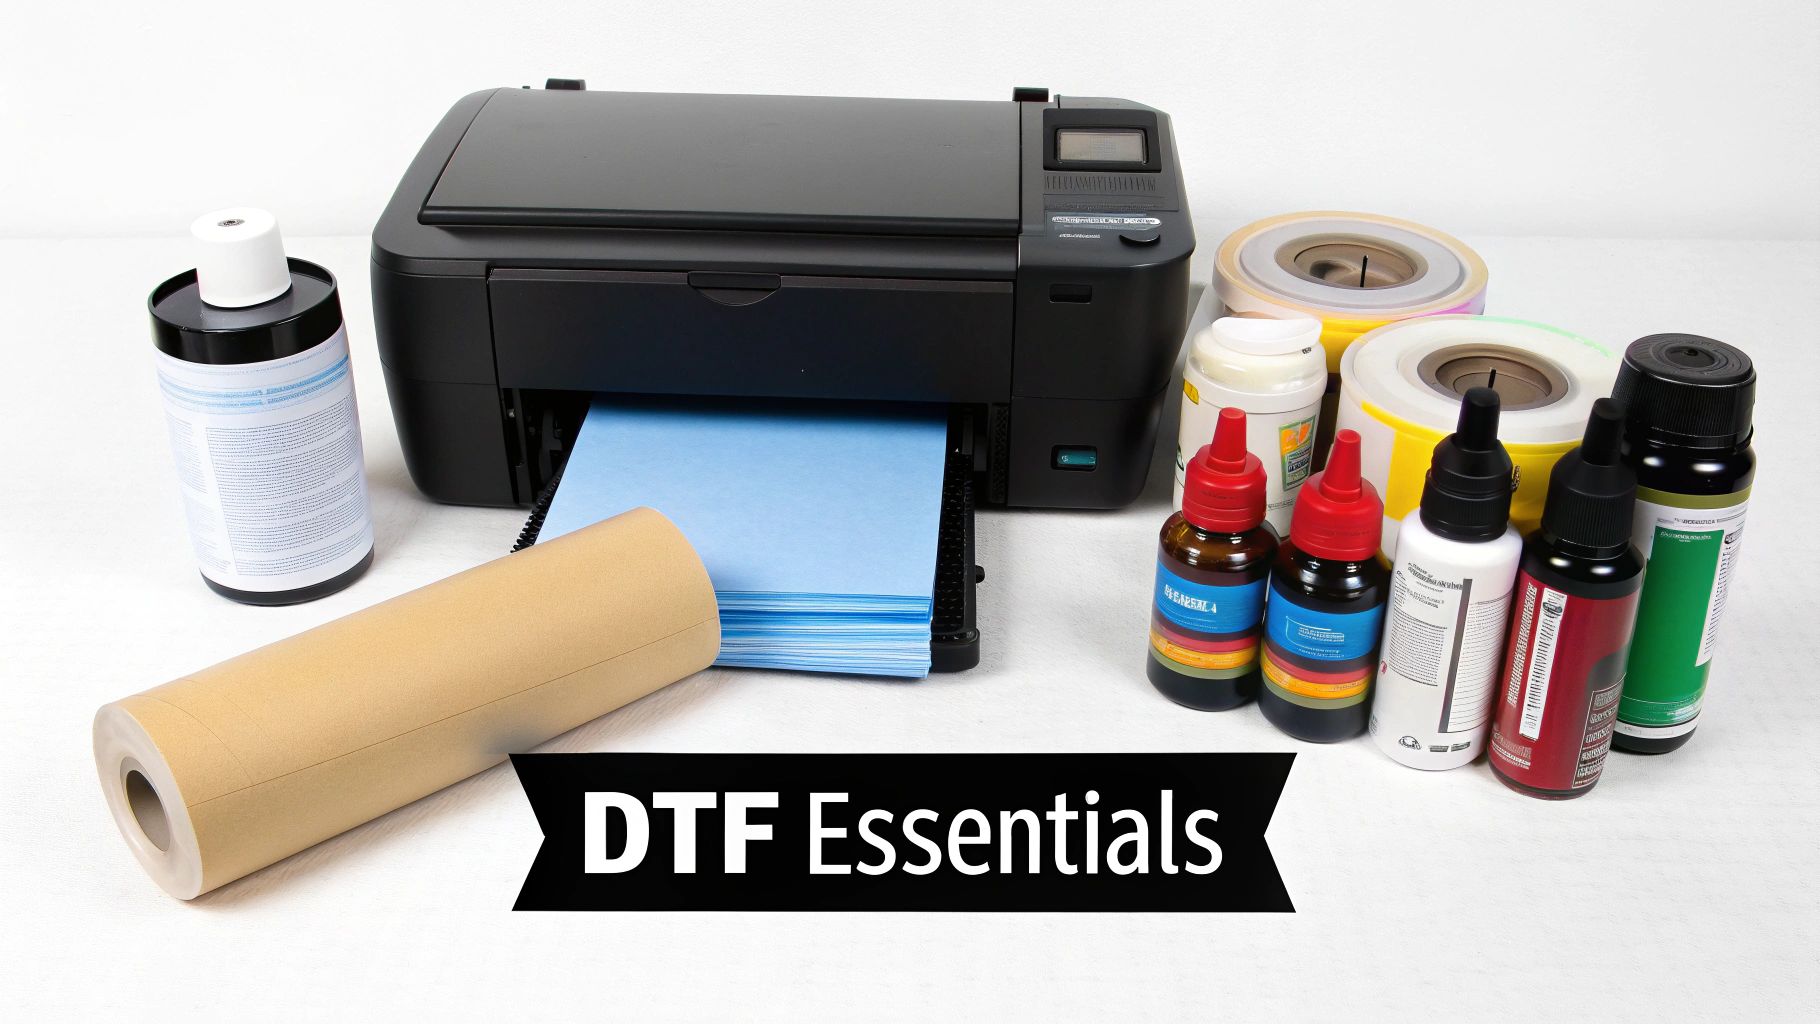
Core Consumables For Every Print
- DTF Pigment Inks: These aren't just any old inks. They're specifically formulated for textiles and have fantastic elasticity. This is what stops the final dtf transfer from cracking when the fabric is stretched—a common headache with other printing methods.
- PET Transfer Film: This is the temporary home for your design. It has a special coating that holds the ink perfectly without letting it soak in, guaranteeing a clean, crisp release when it's pressed onto the garment.
- Hot-Melt Adhesive Powder: This is the magic dust that binds the ink to the fabric. After printing, this fine powder is sprinkled over the wet ink. Once it's cured, it creates an incredibly strong adhesive layer.
Once you’ve got these bits and pieces, you need the right tools to bring it all together.
A common mistake people make is skimping on the heat press. A quality press delivers the consistent temperature and even pressure that a home iron just can't replicate. This is absolutely critical for curing the adhesive properly and ensuring the print lasts wash after wash.
Bringing It All Together: Software and Hardware
The final parts of the puzzle are the software that tells the printer what to do and the hardware that makes the print permanent. RIP (Raster Image Processor) software is a must-have for any professional dtf transfer setup. It's the brain that translates your design file for the printer, expertly managing the all-important white underbase and ensuring your colours are spot-on. Standard printer drivers just can’t do this.
Finally, you need a dependable heat press. This machine applies the precise heat and pressure required to activate the adhesive powder, permanently fusing the design into the fibres of the fabric.
For a deeper dive into choosing the right gear, our guide to selecting a DTF printing machine can help you make a smart, informed decision.
Creative Ideas for Your DTF Projects
Alright, now that you've got the mechanics down, it's time for the fun part. The real magic of a DTF transfer is just how incredibly versatile it is. You can go so far beyond a basic cotton t-shirt and explore a massive range of creative projects.
Let's look at a few real-world examples where DTF is the perfect tool for the job.
Say you want to create a line of custom tote bags for a local market. With DTF, you can press vibrant, multi-coloured graphics onto tough canvas or jute bags, making products that really pop. Because the inks are so opaque, your designs will look just as brilliant on a black or dark blue bag as they would on a plain beige one.
Pushing Beyond Flat Garments
One of the best things about DTF is its knack for decorating items that are usually a nightmare to print on. Take headwear, for instance—things like baseball caps or beanies. The transfer is flexible enough to wrap neatly around curved surfaces, making it ideal for applying a sharp, detailed logo right onto the front panel.
The same idea applies to footwear. Customising canvas shoes or trainers with unique graphics is a huge trend, and a DTF transfer is perfectly suited for it. It's durable enough to handle the scuffs and scrapes shoes go through, and its natural elasticity stops the design from cracking as the fabric flexes with every step.
The key takeaway is that DTF frees you from the limitations of printing only on flat, simple garments. If you can get it under a heat press, you can probably apply a stunning DTF design to it.
This opens up a world of opportunity for creating fully coordinated merchandise lines.
- For Corporate Branding: Apply intricate company logos to everything from polo shirts and jackets to laptop sleeves and lanyards. You get perfect brand consistency across a dozen different materials.
- For Sports Teams: Create durable names, numbers, and crests for polyester jerseys. The stretchable nature of a DTF print is a must-have for sportswear that needs to move with an athlete.
- For Independent Brands: Offer a complete collection, including hoodies, joggers, tote bags, and caps, all featuring the same high-quality, full-colour designs without compromise.
Material Choice is Key
When you're brainstorming ideas, remember that choosing the right fabric is just as important as the design itself. Getting to grips with the fabric GSM meaning can really help you make smarter choices about your base products. A heavier GSM hoodie, for example, gives you a solid, substantial canvas for a large back print, while a lighter fabric is perfect for retail-quality t-shirts.
Ultimately, the sheer adaptability of the DTF transfer process means your creativity is the only real limit. Whether you're customising denim jackets with photorealistic art or adding subtle branding to workwear, this technology gives you a reliable, top-quality solution for almost any project you can dream up.
Achieving the Perfect Press Every Time
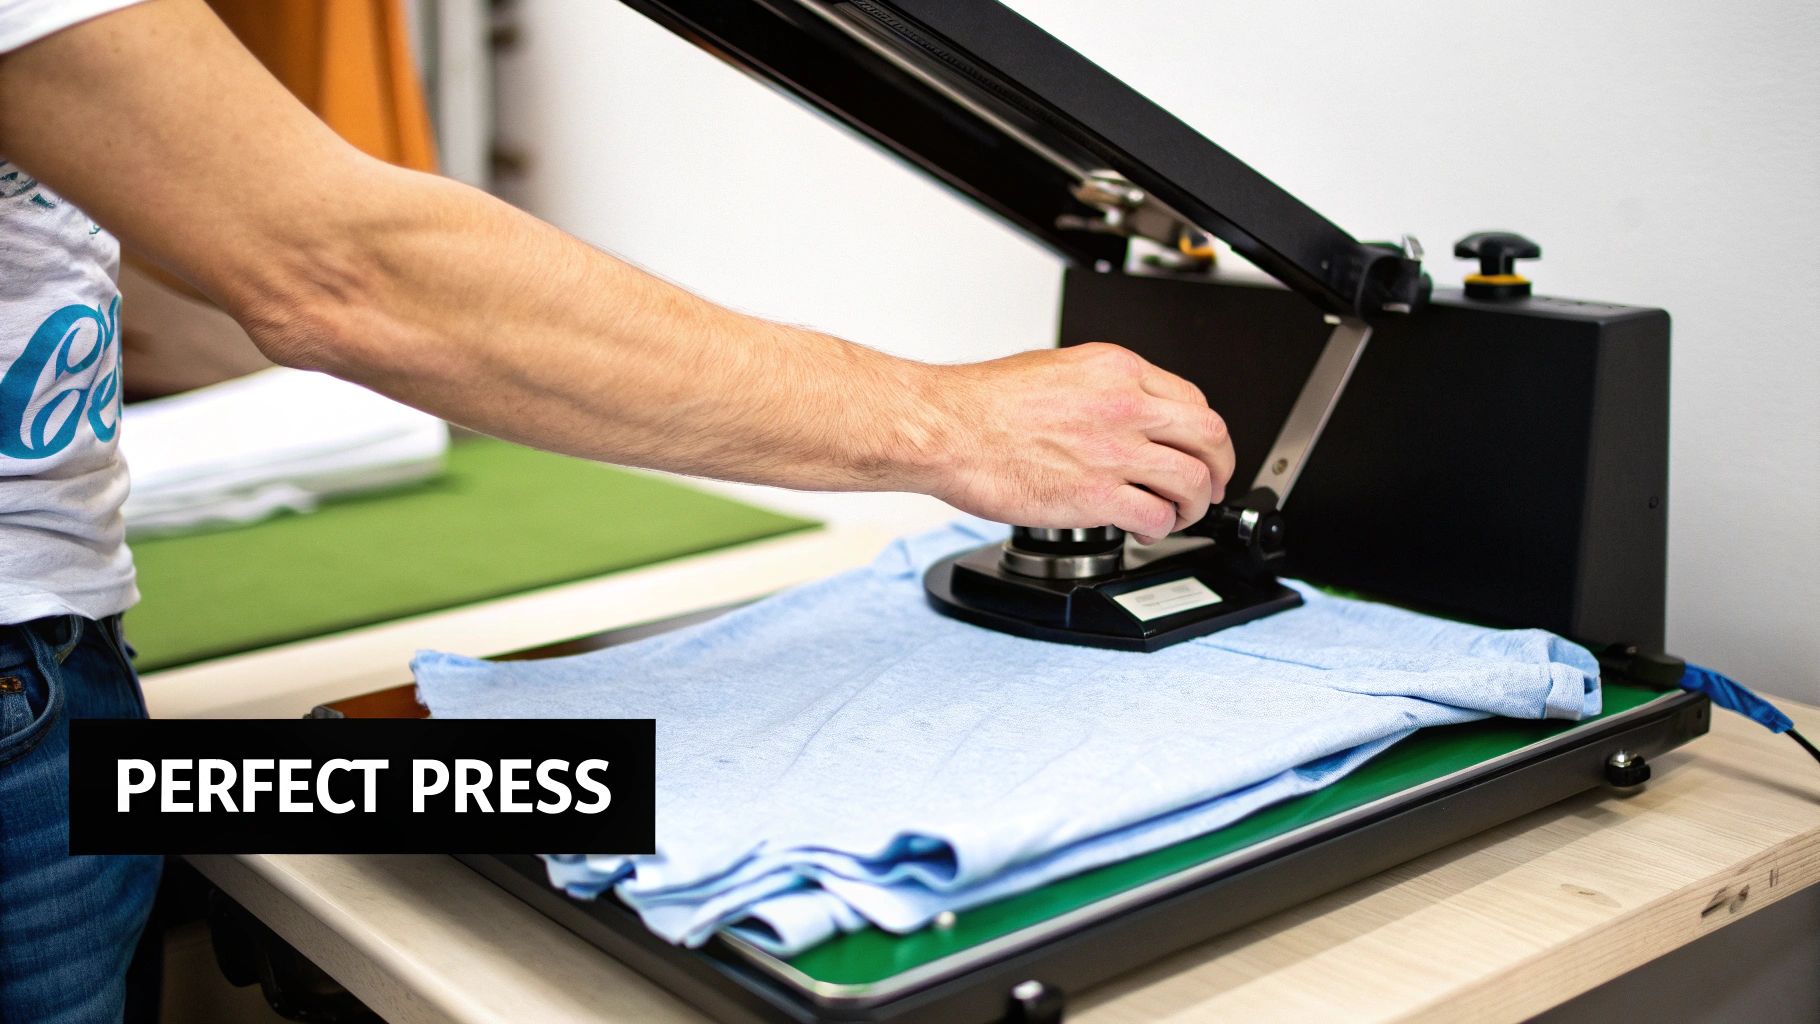
The final press is where the magic really happens, permanently bonding your design to the fabric. While it’s easily the most satisfying part of the process, it’s also where tiny mistakes can really mess up the final quality. Getting it right every single time isn't about luck; it's about following a precise, repeatable process.
Think of your heat press a bit like an oven. Just as a cake needs the right temperature for the right amount of time to bake perfectly, a DTF transfer demands a specific combination of heat and pressure to cure properly. If you start guessing settings or skipping steps, you’ll end up with prints that peel, crack, or fade after just a few washes.
Dialling In Your Heat Press Settings
The three pillars of a perfect press are temperature, time, and pressure. These aren't universal settings, either—they need tweaking based on the material you're pressing. A standard cotton t-shirt needs different settings than a polyester sports top or a thick, cosy hoodie.
- Temperature: Most DTF jobs are done somewhere between 150°C and 165°C. Cotton can handle the higher end of that range, but delicate polyesters need a lower temperature to stop them from scorching.
- Time: A typical press time is around 12-20 seconds. Don't be tempted to think longer is better; too much heat can damage both the fabric and the transfer’s adhesive.
- Pressure: You're looking for firm, even pressure. It needs to be strong enough to properly embed the adhesive into the fabric fibres without completely squashing the design.
For a more detailed breakdown of what different materials need, our comprehensive heat press temperature guide has specific recommendations to get you started.
Mastering the Cold Peel Technique
One of the most critical parts of the whole process is the peel. Almost all DTF transfers require a cold peel, which means you absolutely must wait for the transfer and the garment to cool down completely before you even think about removing the film.
Resisting the urge to peel the film while it's still warm is crucial. A premature peel will pull the ink straight off the garment, ruining the design and forcing you to start over. Patience is everything here.
Once you’ve done the first press, move the garment to a cool, flat surface and just let it rest for at least 30-60 seconds. When it’s cool to the touch, you can gently peel back the film to reveal a vibrant, perfectly bonded design.
As a final step, a quick second press for about 5-7 seconds with a Teflon or parchment sheet over the design will lock it in, improve washability, and give it a softer, more matte finish. It’s a simple finishing touch that makes a massive difference to how long your custom apparel will last.
Got Questions About DTF? We've Got Answers
So, you've got the basics down, but a few practical questions are probably still rattling around in your head. That's completely normal. Getting these sorted is the key to diving in with confidence and sidestepping those rookie mistakes. Let's tackle some of the most common queries we hear.
One of the first things everyone wants to know is about durability. How do these modern prints actually hold up in the real world, especially when you put them side-by-side with a classic like screen printing?
How Durable Are DTF Transfers Compared to Screen Printing?
When they're applied correctly, DTF transfers are incredibly tough. In fact, they often match and sometimes even outlast traditional screen prints. It all comes down to the specialised inks and the powder adhesive, which work together to create a bond with the fabric that’s both strong and flexible.
This elasticity is a huge plus. It means the design can stretch and move with the garment, which helps prevent the cracking you often see with lower-quality prints. A good DTF design will sail through dozens of washes without any serious fading or breaking down. For the best results, always wash your garments inside out on a cool cycle.
Can I Just Use My Home Iron for a DTF Transfer?
In a word: no. We strongly advise against using a home iron for any serious or long-lasting application. You absolutely need a proper heat press, and here's why: it provides two critical things an iron simply can't deliver – consistent temperature and even pressure.
An iron has hot spots and cool spots, and you can't press down evenly across the whole design. This almost always leads to the adhesive curing improperly, giving you a patchy, poor-quality finish. The design will likely start peeling or cracking after just one or two washes.
A heat press is non-negotiable. It’s the only tool that guarantees the adhesive melts and bonds perfectly into the fabric fibres, creating that permanent, durable finish that makes DTF so reliable.
Do I Need Any Special Software for DTF Printing?
Yes, you'll need specialised software to get the job done right. While you can create your artwork in standard programmes like Adobe Photoshop or Illustrator, you can't just hit 'print'. You need what’s called a Raster Image Processor (or RIP) software for the actual printing part.
RIP software is the brains of the operation. It’s designed to manage the ink layers properly, especially that crucial white underbase that makes colours pop on dark fabrics. Your standard printer drivers just aren't built to handle that kind of complex layering. For accurate colours and professional results with your DTF transfer, RIP software is a must-have.
Ready to see your own creative ideas come to life with professional-quality prints? Psyque offers vibrant, durable, and ready-to-press DTF transfers perfect for all your custom apparel projects. Check out our collections and start creating today at https://psyque.co.uk.