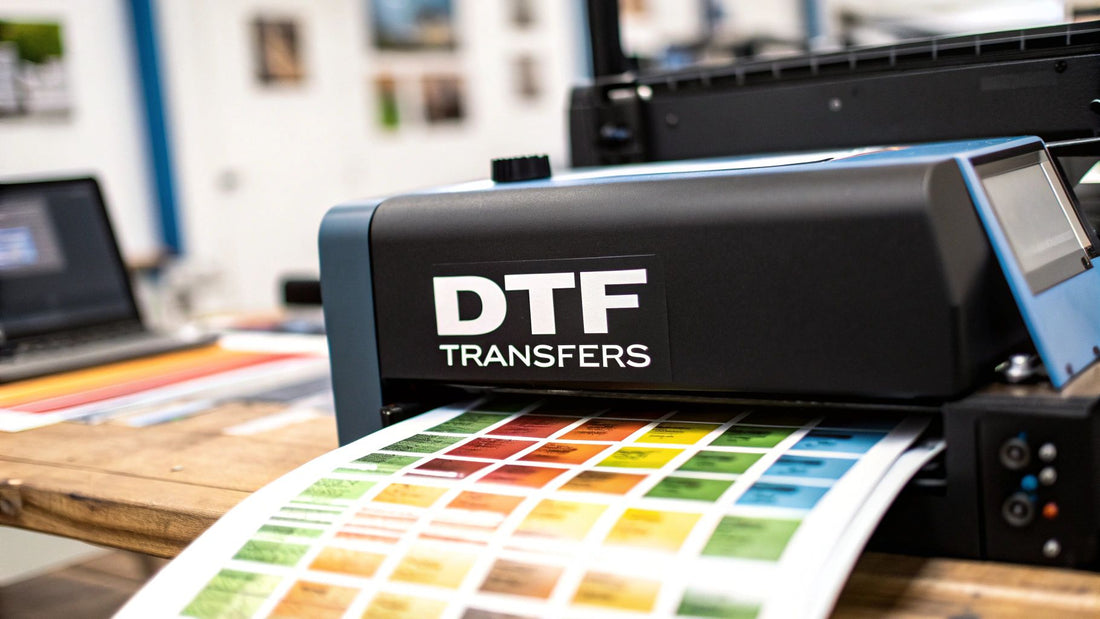
A Practical Guide to DTF Transfers
At its core, DTF transfers are a clever way to get vibrant, full-colour designs onto a special film, which you then press onto fabric using heat. Think of it like a high-tech, permanent sticker for clothing, but one that creates incredibly durable and detailed graphics that feel soft and flexible.
What Are DTF Transfers and Why Are They So Popular?
Ever tried to get a really complex, multi-coloured design onto a dark polyester t-shirt? For a long time, that was a real headache—often expensive, tricky, or just plain impossible. Traditional methods really struggled with certain fabrics or needed complicated setups for intricate artwork. This is exactly the problem DTF transfers were made to fix.
DTF, which stands for Direct-to-Film, neatly fills the gaps left by other garment printing techniques. It brings together an impressive mix of versatility, quality, and affordability that has made it a go-to for everyone from solo creators on Etsy to big-name apparel brands. Its biggest selling point? It works on almost anything.
A Solution for Modern Printing Needs
Unlike some methods that are stuck with just cotton or light-coloured fabrics, DTF is built for variety. It sticks beautifully to a huge range of materials:
- Cotton and Polycotton Blends: The classic choices for t-shirts and hoodies.
- Polyester and Performance Wear: Perfect for sportswear and activewear that other methods can't touch.
- Denim, Leather, and Canvas: Unlocking new possibilities for customising jackets, bags, and unique accessories.
This adaptability means you can put the exact same high-quality design across your entire product line without ever having to switch up your printing process. The result is consistent branding and eye-popping colours, no matter what the garment is made of or what colour it is. If you're curious about how it stacks up against other methods, our guide on printing on t-shirts in the UK gives a great side-by-side comparison.
A DTF transfer isn't just ink on a shirt; it’s a self-contained graphic powerhouse. It includes the colour, a white base layer for vibrancy, and the adhesive all in one package, ready to be applied.
To make things even clearer, here’s a quick rundown of what makes DTF transfers stand out.
DTF Transfers At a Glance
| Feature | Description |
|---|---|
| Vibrant Colours | Capable of producing photo-quality, full-colour prints with incredible detail. |
| Fabric Versatility | Works on cotton, polyester, blends, leather, denim, and more, in any colour. |
| Soft Feel | The final print is thin, flexible, and soft to the touch, moving with the fabric. |
| Durability | Highly resistant to cracking, peeling, and fading, even after many washes. |
| No Pre-Treatment | Unlike DTG, you don't need to pre-treat the garment, saving time and money. |
| Cost-Effective | Ideal for both small batches and large production runs without high setup costs. |
This combination of features explains why so many businesses are making the switch.
The Surge in Popularity
The appeal of DTF transfers certainly hasn't gone unnoticed, especially here in the UK. Recent data shows a massive spike in interest; between 2020 and 2024, searches for DTF printing shot up by an incredible 7420%.
This explosive growth is down to how easy it is to use, the quick turnaround times it allows, and the fantastic finish it delivers on so many different fabrics. It has firmly cemented its place as a leading technology in the British textile industry. This isn't just a fleeting trend—it's a reliable and powerful solution that consistently delivers professional results.
The Evolution of Modern DTF Printing
Direct-to-Film printing didn't just appear overnight. It’s the result of decades of digital printing advancements, slowly but surely refined into the powerful technology we use today. To really get why DTF transfers are so game-changing, it helps to understand their journey from an experimental idea to an industry staple. The story really begins not with t-shirts, but with the wider evolution of inkjet technology itself.
The seeds of DTF were sown in the relentless push to make digital ink stick to new and challenging surfaces. Early pioneers in industrial textile printing laid all the groundwork, trying out new ways to get around the limits of traditional methods. They wanted the incredible detail of digital printing without being stuck with only certain fabrics or colours.
This drive for a more flexible solution was absolutely crucial. For years, the custom apparel world was basically split in two. You had screen printing, which was brilliant for big batches of simple designs but got expensive and complicated with more colours. Then Direct-to-Garment (DTG) printing came along, offering amazing detail but often struggling with polyester and needing a fiddly pre-treatment process.
Finding the Sweet Spot in Printing
DTF popped up as the answer to a key question: what if you could combine the best of both worlds? What if you could have the versatility of a transfer with the full-colour detail of a digital print? The goal was to create a method that was both high-quality and could be used on almost anything. It had to work just as well on a black polyester sports jersey as it did on a white cotton tee.
Although it’s a recent innovation, the history of DTF transfers has already made a massive mark on the UK textile market. It grew from inkjet technology refined back in the 1990s and early 2000s, with companies like Kornit Digital (founded in 2002) creating the first systems for industrial textile printing. By the late 2010s, it had become a mainstream option, and UK producers really started embracing it in the 2020s.
The process now allows the UK apparel industry to achieve incredibly high-resolution prints on all sorts of materials, from cotton and polyester to leather and denim. It has completely modernised British textile printing in less than two decades. You can dive deeper into the journey of DTF printing through the years on wunderlabel.com.
Why This Evolution Matters Today
Understanding this backstory is important because it shows that DTF isn’t just another passing trend. It’s the logical conclusion of years of problem-solving in the garment decoration industry. Every part of the process was designed to overcome a specific hurdle that older techniques just couldn't clear.
DTF technology was born from necessity. It solved the fabric limitation issues of DTG and the colour complexity problems of screen printing, creating a single, unified workflow for a massive range of products.
This evolution has given us a stable, mature technology. The printers are reliable, the inks are vibrant, and the adhesive powders have been perfected for maximum durability. For businesses and creators, this means you’re investing in a proven system that delivers consistent, professional results without the steep learning curve or material restrictions of its predecessors. It’s a huge step forward in making top-quality customisation accessible to everyone.
How The DTF Printing Process Works
To really get why DTF transfers feel and look so good, it helps to pull back the curtain on the clever process that creates them. It might sound technical, but it’s actually a pretty logical flow of steps, and each one is vital for creating a design that’s both vibrant and tough enough to last.
Think of it like baking a cake from a seriously good recipe—every ingredient and every step has to be just right to get that perfect result. The whole journey starts not on a piece of fabric, but with a digital file and a very special film. This is what makes DTF so ridiculously versatile.
Let's walk through exactly how your artwork goes from a file on a computer to a stunning, ready-to-wear print.
Step 1: Preparing and Printing the Design
First things first, your digital design gets prepped. That file is then fired over to a dedicated DTF printer, which isn't loaded with paper, but with a special PET (polyethylene terephthalate) film. The printer gets to work, meticulously laying down the coloured inks—cyan, magenta, yellow, and black—to build your image.
But here’s the clever bit. Straight after the colour goes down, the machine prints a solid layer of bright white ink over the entire design. This white base acts just like a primer you'd use before painting a dark wall. It guarantees your colours will pop with brilliant opacity, even when they’re pressed onto a black or navy shirt. Without it, the design would look weak and washed out.
Step 2: The Magic of Adhesive Powder
Once the design is printed, and while the ink is still wet, the film moves on to the next crucial stage. It gets a generous coating of a fine, granular thermo-adhesive powder. It looks a bit like fine sugar, and it has the neat trick of only sticking to the wet ink, leaving the rest of the film completely clear.
This powder is the secret sauce that gives DTF its incredible sticking power. It’s essentially a hot-melt glue that, when heated up later, will create an incredibly strong bond with the fibres of the fabric. It’s the reason DTF works so well on everything from cotton and polyester to trickier materials like leather.
This infographic breaks down the core stages of the process, from the initial print to the final peel.
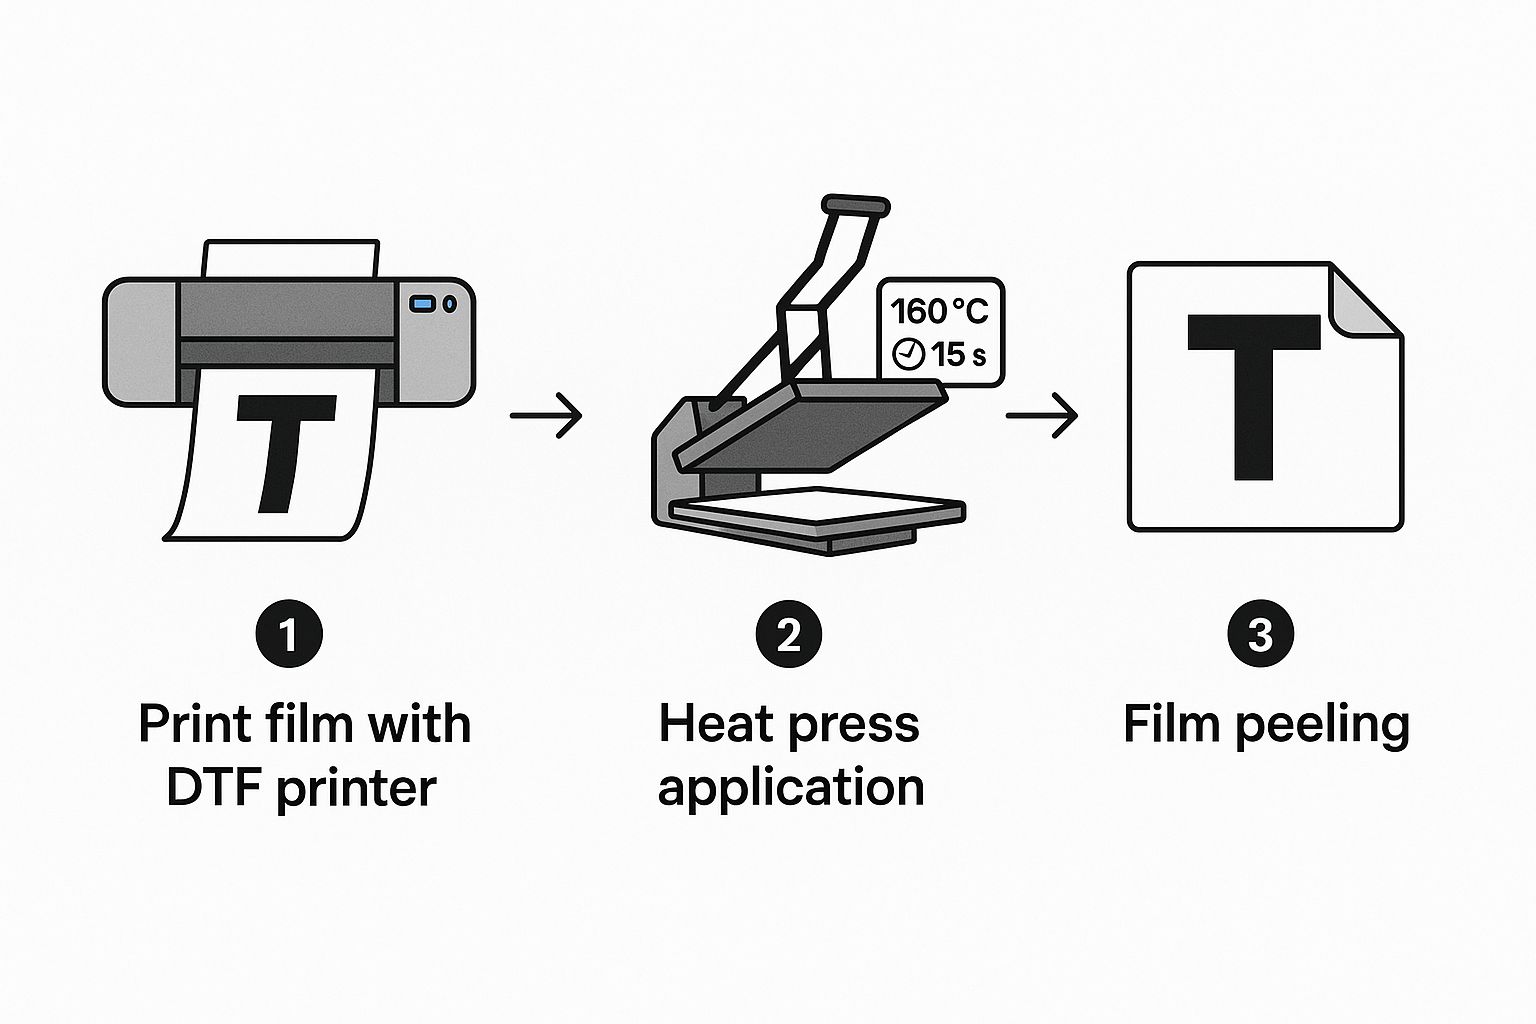
As you can see, each step flows right into the next, making sure the transfer is perfectly prepped for its final destination.
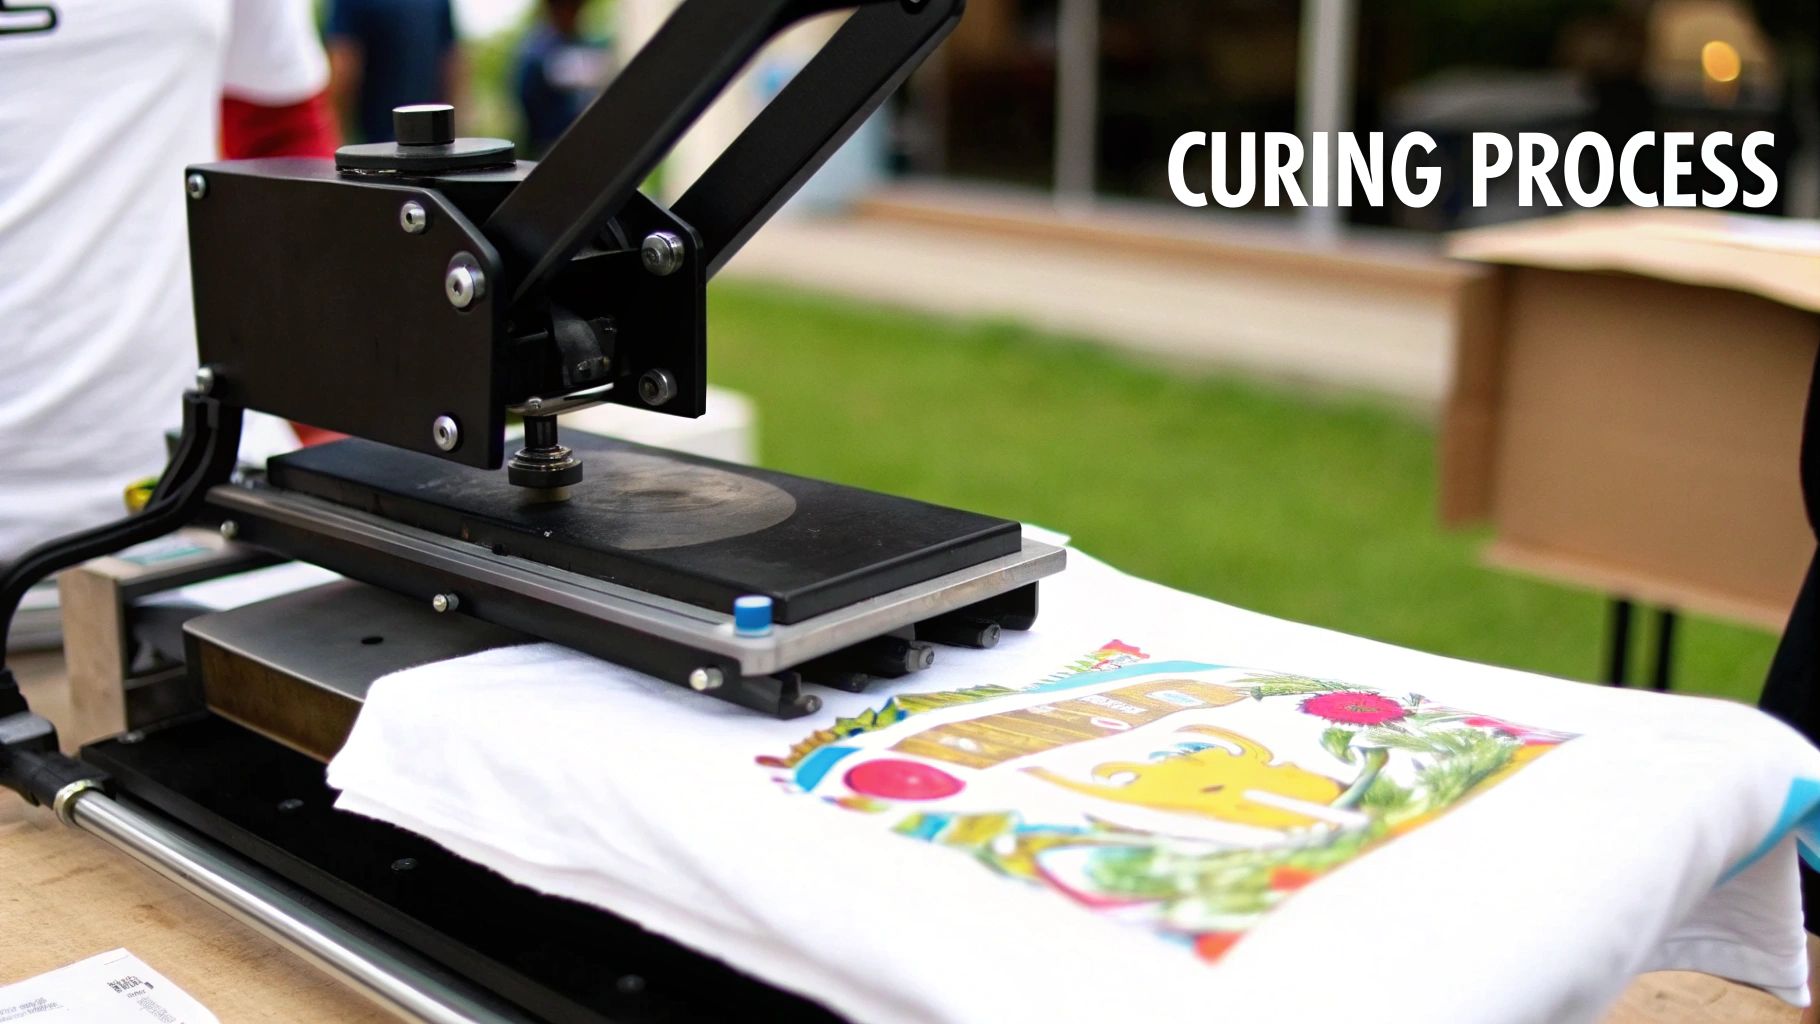
Step 3: Curing the Transfer
With the powder applied, the transfer isn’t quite ready to go. The film is passed through a curing oven or under a heat source, which gently melts the adhesive powder and fuses it to the ink layer. This part of the process happens at a temperature of around 120°C (250°F).
Curing transforms that grainy powder into a smooth, slightly rubbery layer. This is a vital step because it creates a stable, ready-to-press transfer that can be stored for later or used straight away. A perfectly cured transfer will have a clean, even finish on the back.
Step 4: Application with a Heat Press
Now for the fun part—applying the transfer to the garment. The finished DTF transfer is carefully positioned on the t-shirt (or bag, or hoodie), and the whole thing goes into a heat press. The press clamps down, applying precise heat and firm pressure, usually at around 150-165°C (300-330°F) for about 10-15 seconds.
This heat reactivates the cured adhesive, letting it melt deep into the fabric's weave. At the same time, the pressure ensures a complete, even bond across the whole design, fusing the ink and adhesive right into the material. If you want to dive deeper into getting these settings just right, you can find loads of great tips on creating your own personalised t-shirt prints.
This combination of heat and pressure is what separates a professional finish from an amateur one. It ensures the design doesn't just sit on the fabric but becomes part of it, giving it that soft feel and amazing durability.
Once the timer goes off, the garment is removed from the press. Depending on the type of film used (hot or cold peel), the backing sheet is peeled away either immediately or after it has cooled down. What’s left behind is a crisp, vibrant, and seriously durable graphic, ready to be worn and loved.
DTF Transfers Compared to Other Methods
Choosing the right way to decorate a garment can feel a bit like spinning plates. You've got options like screen printing, Direct-to-Garment (DTG), and Heat Transfer Vinyl (HTV), each with its own pros and cons. To really get why DTF transfers have caused such a stir, it helps to see how they measure up against these other methods.
This isn't about finding the single "best" method, but rather the best one for your specific job. Think of it like picking a vehicle. A sports car is great for the motorway, but you wouldn't take it off-roading. Each printing technique is a specialised tool, and knowing when to use which is the key to getting professional results every time without breaking the bank.
Let's dive into the practical differences.
DTF vs Direct to Garment (DTG)
At first glance, DTF and DTG seem like two peas in a pod. Both are digital, so they can handle stunning, full-colour photos with ease. The real difference is how the ink gets onto the fabric. DTG is essentially a giant inkjet printer for clothes, spraying water-based inks directly into the fibres of the garment.
This makes DTG prints feel incredibly soft, almost like part of the fabric itself, especially on light-coloured cotton. But that's also its biggest drawback. DTG gets fussy with polyester and synthetic blends, and printing on dark fabrics means applying a messy, time-consuming pre-treatment layer first.
DTF sidesteps all of this by printing onto a film instead. This simple change makes it a champion of versatility, working beautifully on the very sportswear and blended hoodies that DTG struggles with.
DTF vs Screen Printing
Screen printing is the old guard of the apparel world, a true workhorse known for its incredible durability and great value on big orders. The process involves pushing ink through a mesh screen, one colour at a time. This creates a vibrant, slightly raised print that feels seriously tough.
The catch? All that setup. You need to create a separate screen for every single colour in your design, which is both slow and expensive. This makes screen printing a no-go for small runs or designs with lots of colours and gradients. If you want to get into the weeds, we've explored the differences in more detail when comparing DTF vs Screen Printing for graphic tees.
DTF really shines where screen printing stumbles. There are absolutely no setup costs per colour, making it the perfect choice for small, full-colour jobs. Need just 20 t-shirts with a detailed photograph on them? DTF will be miles more economical than screen printing.
While screen printing is king for huge orders of simple designs (like 500 one-colour event tees), DTF gives you the freedom to do on-demand, multi-colour jobs without that hefty upfront cost.
DTF vs Heat Transfer Vinyl (HTV)
Heat Transfer Vinyl, or HTV, is all about cutting designs from sheets of coloured vinyl and then pressing them onto a garment with a heat press. It's a fantastic choice for simple, bold graphics—think names and numbers on football shirts or single-colour logos. HTV is also your go-to for funky special effects like glitter, holographic, and metallic finishes.
The problem is that HTV gets incredibly fiddly once your design has more than one colour. Each piece has to be cut, "weeded" (which means painstakingly peeling away the excess vinyl), and then layered by hand. Intricate artwork becomes a real headache, if not impossible.
DTF transfers completely eliminate this pain point. The entire design, even if it has 10 different colours, is printed onto a single sheet that’s ready to press. This makes a complex, colourful design just as easy to apply as a simple one-colour logo, which is a massive time-saver.
The Head-to-Head Comparison
To help you visualise which method fits your needs, we've put together a quick comparison table. It breaks down the key attributes of each technique, making it easier to see where each one excels.
DTF vs DTG vs Screen Printing vs Vinyl
| Attribute | DTF Transfers | DTG Printing | Screen Printing | Heat Transfer Vinyl |
|---|---|---|---|---|
| Best For | Multi-colour designs on any fabric, small to medium runs. | Full-colour prints on 100% cotton garments. | Large runs of simple, limited-colour designs. | Simple text, numbers, and bold one-colour logos. |
| Fabric | Cotton, polyester, blends, leather, nylon—virtually anything. | Primarily cotton and some cotton-rich blends. | Most fabrics, but ink may vary. | Cotton, polyester, and blends. |
| Feel | Soft, thin, and flexible, with a slight surface feel. | Extremely soft, as ink soaks into the fibres. | Thicker, slightly rubbery feel, very durable. | Can be thick and stiff depending on the vinyl type. |
| Durability | Excellent; rated for 50+ washes without cracking or fading. | Good, but can fade over time with repeated washing. | Exceptional; often outlasts the garment itself. | Very good, but can crack or peel if applied poorly. |
| Colour | Unlimited colours and gradients with no extra setup. | Unlimited colours and excellent for photos. | Limited; each colour adds significant cost and setup. | Limited to available vinyl colours; layering is complex. |
Ultimately, having DTF in your toolkit gives you incredible flexibility. It bridges the gap left by other methods, allowing you to say "yes" to more jobs, whether they're small, colourful, or on tricky fabrics.
Essential Gear for Your DTF Setup
So, you're ready to get hands-on with DTF transfers? Brilliant. That means putting together the right toolkit. While you can always order pre-made transfers, bringing production in-house gives you total control over every detail of your creations. Think of it as building your own workshop; each piece of kit plays a specific, vital role in turning a digital idea into a wearable piece of art.
Getting started doesn't have to mean remortgaging the house. Setups can be anything from a compact, budget-friendly arrangement for a hobbyist to a full-blown industrial system for a high-volume business. The trick is to understand the core components and invest wisely in the gear that will become the backbone of your printing operation.
Let’s break down the essential equipment and supplies you’ll need to get your DTF ambitions off the ground.
The DTF Printer and RIP Software
The heart of any setup is the DTF printer. This isn't your average office machine; it’s a specialised bit of kit designed to handle pigmented textile inks and print directly onto transparent PET film. It cleverly lays down the coloured ink (CMYK) first, followed by a crucial layer of white ink. That white base is the secret to making your designs pop on dark fabrics.
Printers come in all shapes and sizes, from desktop models perfect for small batches to massive, roll-to-roll industrial machines that can print all day long. When you’re choosing, think about how much you plan to print and the biggest design size you’ll need.
But the printer is only half the story. It needs a partner: Raster Image Processing (RIP) software. This software is the brain of the operation, translating your design file into instructions the printer can actually follow. It controls the ink flow, manages colour profiles, and—most importantly—tells the printer exactly where and how to put down that critical white base layer. Honestly, getting professional results is next to impossible without good RIP software.
The Powder and Curing Station
Once your design is printed on the film, the next step is adding the adhesive that will stick it to the fabric. This is where the hot-melt adhesive powder comes in. While the ink is still wet, the film gets a coating of this fine, granular powder.
To make this process slick and tidy, many setups use a powder shaker unit. This machine automatically coats the film with powder and then shakes off any excess, making sure only the inked areas are covered. It's worlds away from the mess and inconsistency of doing it by hand.
After powdering, the transfer needs to be cured. The film is passed through a curing oven or tunnel dryer, which melts the powder and fuses it into the ink layer. This creates a stable, ready-to-press transfer. For smaller operations, you can use a heat press by hovering it over the film, but a dedicated oven will give you far more consistent results every time.
The All-Important Heat Press
The final, and arguably most critical, piece of equipment is the heat press. This machine is what brings it all together, using a combination of heat and pressure to move the cured design from the film onto your garment. Don't skimp here; investing in a quality press is non-negotiable.
A reliable heat press is the cornerstone of a successful DTF operation. Inconsistent temperature or uneven pressure can ruin an otherwise perfect transfer, leading to poor adhesion and a design that peels after the first wash.
When choosing a heat press, look for one with:
- Accurate temperature controls to avoid scorching delicate fabrics.
- Even pressure distribution right across the entire plate.
- A reliable timer to ensure you get the application time right, every single time.
Mastering your heat press settings is a craft in itself. To help you nail it, check out our in-depth heat press temperature guide for tips on different materials.
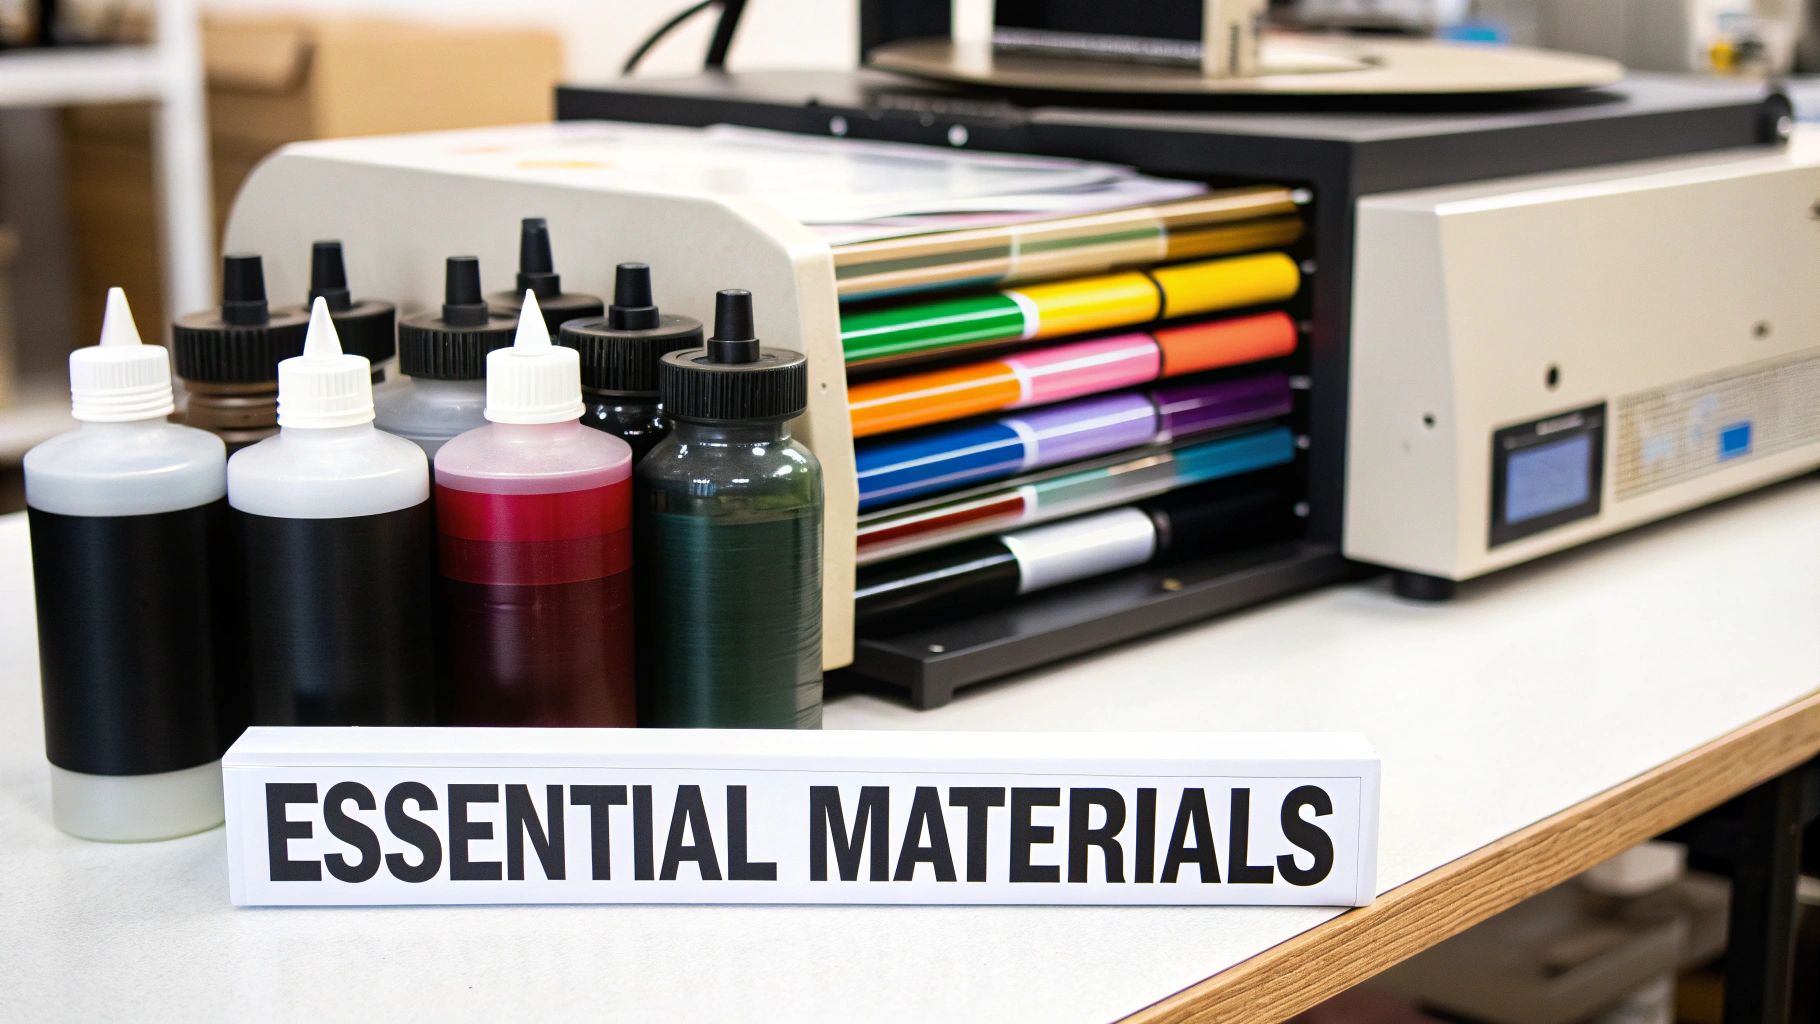
Essential Consumables
On top of the main machinery, you'll need a steady supply of consumables to keep your operation ticking over. These are the bits and pieces you'll use up with every print job.
- DTF Inks: Specialised textile inks in Cyan, Magenta, Yellow, Black, and of course, White.
- DTF Film: Available in sheets or rolls, this is the PET film you’ll be printing on.
- Adhesive Powder: The hot-melt glue that acts as the bridge between your design and the fabric.
The quality of these consumables has a direct impact on your final product. Using high-quality inks means bright, vibrant colours, while premium film and powder give the transfer a soft feel and fantastic durability. It's what makes your DTF transfers stand out from the crowd.
Mastering the Art of Application
Having a perfectly printed DTF transfer is only half the battle; the real magic happens at the heat press. This is the moment your vibrant design becomes a permanent, professional part of the garment. Getting this process right is what separates a flawless, durable print from one that just doesn't last.
Think of it like the final step in a recipe. You can have the best ingredients, but if the cooking time and temperature are off, the result won’t live up to its potential. Proper application of DTF transfers is what gives you that soft feel, incredible durability, and a finish your customers will absolutely love.
Your Pre-Pressing Ritual
Before you even think about placing the transfer, there’s one non-negotiable step: the pre-press. Every garment, no matter how dry it feels, holds a surprising amount of hidden moisture and has tiny wrinkles that can ruin the adhesion.
A quick 3-5 second press irons out these creases and forces that moisture to evaporate, creating a perfectly flat and dry canvas for your design. Skipping this simple step is one of the biggest reasons for application failure, as trapped steam can stop the adhesive from bonding correctly.
Pre-pressing isn't just a suggestion; it's your first line of defence against any application issues. It creates the ideal surface for the adhesive to grab onto the fabric fibres and form a strong, lasting bond.
Finding the Sweet Spot: Time, Temperature, and Pressure
Once your garment is prepped, it's time to dial in your heat press settings. While there are general guidelines out there, the perfect combination of time, temperature, and pressure really depends on the specific fabric you're working with.
- Temperature: Most DTF transfers are designed to be applied somewhere between 150°C and 165°C. Cottons can handle the higher end of this range, while delicate polyesters and blends are much safer at the lower end to avoid any scorching.
- Time: A dwell time of 10-15 seconds is usually all you need. Too little, and the adhesive won't melt properly; too much, and you risk getting a stiff, almost plastic-like feel.
- Pressure: You're looking for firm, even pressure. It should be tight enough that you need a bit of effort to close the press, ensuring the heat is distributed consistently across the entire design.
For those just starting, it's worth noting how much this space has grown. The global market for DTF printing hit USD 2.72 billion in 2024 and is expected to keep climbing, mainly because it's so efficient and produces such high-quality results. This growth is driven by businesses in the UK and beyond who rely on precise application techniques to produce top-tier custom apparel. You can find out more about the booming direct-to-film printing market on thecannatareport.com.
The Crucial Final Peel
After pressing, the final move is to peel away the film. DTF transfers come in two main types—hot peel and cold peel—and it's vital to know which one you have. A hot peel film is designed to be removed immediately, while a cold peel needs you to wait until the transfer is completely cool to the touch.
Peeling a cold peel transfer while it's still hot will almost certainly ruin the design. If you're ever unsure what type you're working with, it's always safer to wait for it to cool down. A smooth, consistent peel is the final confirmation that you’ve done the job right. If you're interested in similar techniques, you might also like our guide to applying printed vinyl heat transfers.
Got Questions About DTF Transfers?
If you're diving into the world of custom apparel, you've probably got a few questions about DTF transfers. It's totally normal. Getting the right info upfront is the key to creating professional-looking gear you can be proud of. Let's run through some of the most common things people ask.
How Long Will My DTF Print Last?
This is easily the biggest question we get, and for good reason! You want your designs to last. The short answer is: a long, long time. With the right care, a quality DTF transfer is incredibly tough.
To get the most out of your print, just follow a few simple rules. Always turn the garment inside out before washing, stick to a cold, gentle cycle, and let it air dry. Tumble dryers are the enemy of custom prints!
When you look after them properly, you can expect your DTF prints to handle 50+ washes without any major cracking, peeling, or fading. The colours will stay punchy for years.
What Fabrics Can I Use? And What's the Catch?
Another popular question is about what materials DTF actually works on. Its versatility is one of its biggest selling points, but are there any limitations?
DTF is a dream on cotton, polyester, and pretty much any blend of the two. It just works. Where you might need to be a little more careful is with unconventional fabrics like treated nylon or waterproof jackets. Sometimes, the special coatings on these materials can mess with the transfer's ability to stick properly, so it's always smart to run a small test first.
What Do They Feel Like? And How Much Do They Cost?
Finally, let's talk about feel and cost. Nobody wants a thick, plasticky design that feels like a sticker. Luckily, DTF transfers feel impressively soft and flexible—much thinner and more comfortable than old-school heat transfer vinyl.
As for the price, it's mostly based on the size of your transfer. Here's the brilliant part: unlike screen printing, the number of colours in your design doesn't affect the cost. This makes DTF a ridiculously cost-effective way to produce stunning, full-colour artwork without a hefty initial investment, especially for smaller runs.
Ready to bring your own vibrant designs to life with professional quality? At Psyque, we specialise in creating premium, ready-to-press DTF transfers that make custom apparel simple. Explore our services and see how we can help your brand stand out by visiting us at https://psyque.co.uk.