
Your Guide to the Best Heat Press for Sublimation
A heat press for sublimation is the workhorse of your entire setup. It’s the machine that brings it all together, using carefully controlled heat and pressure to transfer your brilliant designs onto fabrics and other specially coated items. It's the final, critical step that transforms solid sublimation ink into a gas, permanently fusing it into the polyester fibres of your product to create those stunning, durable images.
Why a Heat Press Is Your Most Important Sublimation Tool
If you're diving into the world of sublimation printing, you're about to discover how to bring incredibly vibrant, permanent designs to life. Right at the heart of this almost magical process sits the heat press. It’s best to think of it not just as another piece of equipment, but as a specialised kiln for your fabrics and products—the tool that turns your creative vision into a tangible, professional-quality reality.
Sublimation is all about science. The whole idea hinges on turning solid ink directly into a gas, completely skipping the liquid phase. This gas then embeds itself deep within the polymer fibres of whatever you're printing on. For this chemical reaction to happen perfectly, you need a perfect trio of ingredients: precise temperature, consistent pressure, and accurate timing. A dedicated heat press for sublimation is engineered to deliver exactly that, every single time.
This infographic shows just how central the heat press is to achieving those vibrant, professional-looking sublimation prints.

As you can see, it’s the combination of intense heat and firm pressure that truly locks the colour into the material. This creates that permanent, professional finish that won't crack, peel, or fade away after a few washes.
The Foundation of Quality Results
Let’s be clear: trying to do sublimation with a standard household iron is a recipe for frustration and wasted materials. An iron just can't hold the high, even temperatures needed (usually around 180-200°C), nor can it apply the uniform pressure required for a flawless transfer. The result? Faded, blotchy, and unprofessional-looking prints that nobody would be happy with.
A heat press is the non-negotiable cornerstone of successful sublimation. It guarantees that every square inch of your design gets the exact same treatment, leading to predictable, repeatable, and sale-worthy results every single time you press.
The demand for customised products is fuelling rapid growth in the UK's dye sublimation market. A huge 46.61% of this market is made up of inks and consumables, which just goes to show how vital it is to pair high-quality materials with reliable equipment to meet customer expectations.
What Makes a Heat Press Different?
Unlike other methods like heat transfer vinyl (HTV), where the design is essentially a layer sitting on top of the fabric, sublimation becomes part of the fabric itself. This is why a proper heat press is so essential to get it right.
- Even Heat Distribution: A good press eliminates "cold spots" that are notorious for causing faded, uneven patches in your design.
- Consistent Pressure: It ensures the ink, once turned to gas, fully penetrates and bonds with the substrate for maximum vibrancy.
- Accurate Controls: Digital timers and thermostats give you complete control, allowing for precise and repeatable settings for different products.
Mastering your equipment is always the first step towards getting exceptional results. To get a better idea of how this applies to specific products, check out our guide on sublimation t-shirt printing. Now that we’ve covered the basics, let’s look at the different types of presses you can get.
Choosing Your Sublimation Heat Press: Clamshell vs Swing-Away
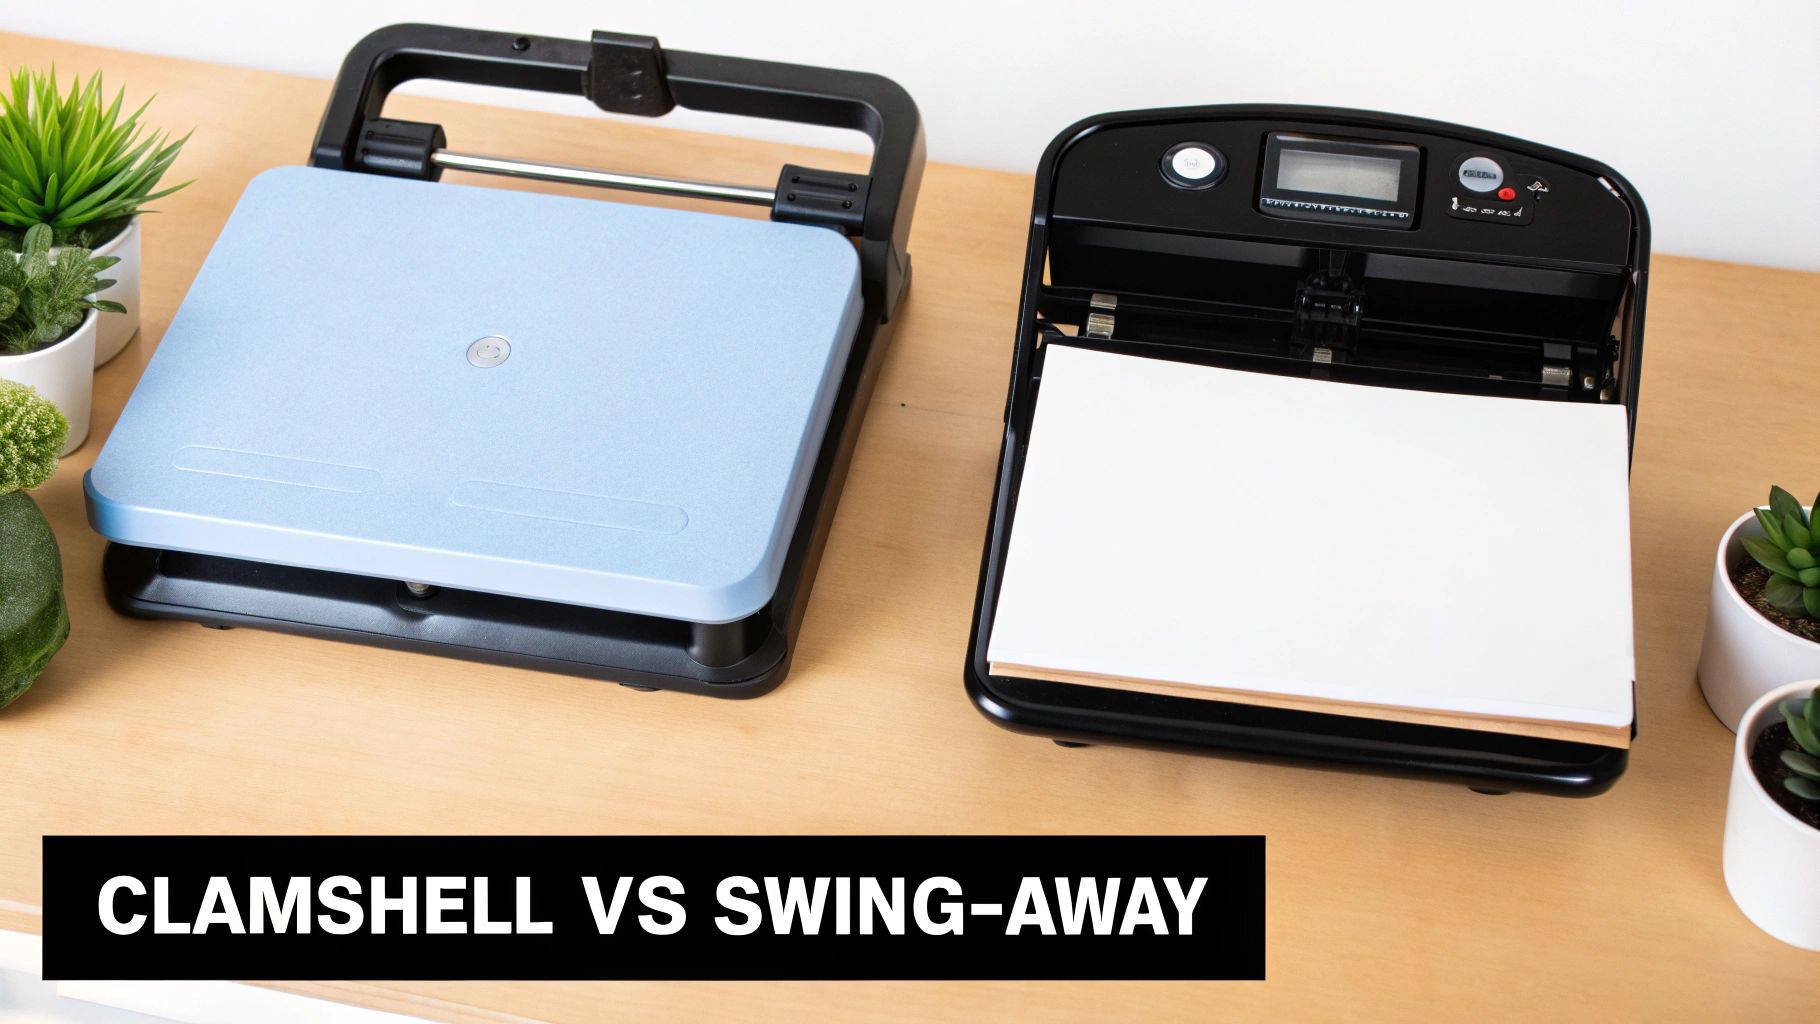
Jumping into the market for a heat press for sublimation can feel a bit overwhelming at first, but thankfully, the choice often boils down to two main designs. Getting to grips with how each one works is the first step in finding the perfect partner for your creative projects—and your workspace. The two heavy hitters are the Clamshell and the Swing-Away.
You can think of them like two different kinds of ovens. One opens straight up, like a toastie maker, while the other swings open like a cupboard door. They both get the job done, but their design really dictates what they’re best at and how you'll work with them day-to-day.
It’s worth noting that the global demand for these machines is on the rise, thanks to the explosion of e-commerce and the DIY crafting community, especially here in the UK. As the tech gets better and more affordable, they’re becoming a must-have for home businesses, not just massive print shops. You can find more detail on this market growth at datainsightsmarket.com.
The Compact Clamshell Press
The clamshell press is often the first machine a new creator buys, and for good reason. Its name gives the game away: the top platen (the hot bit) lifts directly up from the bottom one, hinging at the back just like a clam’s shell.
This design is a real winner when it comes to saving space. If you're working out of a small studio, a spare room, or just a cluttered workshop, its vertical opening means it needs a much smaller footprint to operate than a swing-away model. It’s also a bit quicker to use, since opening and closing is just one simple, direct movement.
Clamshell presses are brilliant for pressing thin, flat items. They are the workhorse for things like:
- T-shirts and Apparel: Perfect for knocking out designs on polyester garments quickly.
- Tote Bags: Easily handles fabric bags and other flat textiles.
- Mouse Pads: Ideal for small, flat items like polyester-coated mouse pads.
The only real downside is the tight workspace. Because the hot platen is always hovering directly above the bottom one, it can be a little fiddly arranging your transfer paper and blank. You also have to be more careful not to accidentally brush your knuckles against a very hot surface.
The Versatile Swing-Away Press
The swing-away press offers a completely different way of working. Instead of lifting up, the top platen swings out horizontally to the side, moving completely away from the bottom platen.
This gives you totally unobstructed access to your workspace. You get a clear, top-down view to perfectly line up your sublimation paper on your item, without a scorching hot platen looming over your hands. This clear access is a massive boost for both safety and precision.
A swing-away design is the clear winner when you're working with thicker or awkwardly shaped items. Being able to move the heat source completely out of the way is crucial for preventing prints from shifting and ensuring you get even pressure across the whole surface.
The trade-off for all this versatility? Space. A swing-away press needs nearly double the operational area of a clamshell to allow for the swinging motion. It's also a touch slower to operate because of the two-step open-and-swing action. These presses are fantastic for a much wider range of products, especially thicker things like ceramic tiles, wooden plaques, and custom awards. If you're after a deeper dive, you might find our guide on choosing a UK heat press machine helpful.
Heat Press Type Comparison for Sublimation Projects
Choosing between a clamshell and a swing-away press really comes down to what you plan to make and how much room you have. To make it easier, here’s a quick side-by-side look at the two main contenders.
| Press Type | Best For | Pros | Cons |
|---|---|---|---|
| Clamshell | Thin, flat items like t-shirts, tote bags, and mouse pads. Ideal for small workspaces. | Space-efficient, fast operation, generally more affordable. | Limited workspace, higher risk of burns, not suitable for thick items. |
| Swing-Away | A wide variety of items, including thicker substrates like tiles, plaques, and slate. | Unobstructed access to the work area, safer to use, provides even pressure on thicker items. | Requires significantly more operational space, slightly slower workflow. |
Ultimately, the best press is the one that fits your workflow. A clamshell is a fantastic, budget-friendly starting point for apparel, while a swing-away offers the flexibility to expand your product range later on.
Speciality Presses for Specific Products
Beyond these two all-rounders, you'll also find speciality presses built for one specific job. A mug press, for instance, has a curved heating element that wraps snugly around cylindrical mugs and tumblers. Likewise, a hat press features a curved bottom platen that perfectly matches the shape of a cap's front panel. While they aren't as versatile, these machines deliver consistently perfect results for their niche products.
The Critical Features That Define a Great Heat Press
Once you’ve decided between a clamshell or a swing-away, it’s time to get into what really separates a great heat press for sublimation from an average one. It’s all about the technical specs and features. These aren’t just fancy bullet points on a sales page; they directly control the quality, consistency, and speed of your work.
Getting your head around these features means you can see past the marketing fluff and choose a machine that’s going to be a reliable workhorse for your business or hobby.
Think of it like a chef's oven. Sure, any old oven gets hot, but a high-end convection oven circulates that heat perfectly for an even bake every single time. That’s exactly what a great heat press does—it makes sure every print comes out looking flawless.
Unwavering Heat Distribution Across the Platen
If there’s one thing you absolutely cannot compromise on, it’s consistent temperature across the entire heating platen. This is the single most important feature. In cheaper models, you'll often find the heating elements are spaced too far apart, which creates "cold spots" where the temperature is much lower than what you’ve set.
Even a drop of 5-10°C in one area can completely ruin a sublimation transfer. What you get is a patchy, blotchy mess with uneven colours. It’s frustrating. When the ink doesn't get enough heat, it can’t turn into a gas and bond properly with your item, leaving you with a faded, amateur-looking product.
A top-tier heat press uses thicker platens and a really dense network of internal heating coils. This is how they guarantee edge-to-edge temperature accuracy, making sure a design in the corner gets the exact same heat as one right in the middle.
Precise Digital Time and Temperature Controls
Whether you're making one bespoke mug or a hundred t-shirts for a local team, repeatability is everything. You need to be able to get the exact same result time and time again, and that’s where precise digital controls become essential. Forget about old-school analogue dials; they’re just not accurate enough and make it almost impossible to replicate your settings perfectly.
You should be looking for a machine with a clear, easy-to-read digital LCD screen. This lets you dial in the exact temperature and time you need.
- Temperature Accuracy: A good digital thermostat is always working, actively monitoring and adjusting the heat to keep it within a tiny range (usually +/- 1-2°C) of your target.
- Countdown Timer: An built-in digital timer with an alarm is a lifesaver. It means you’ll never over- or under-press an item again. No more guesswork, and no more scorched fabric or faded prints.
- Programmable Presets: Some of the more advanced models let you save your settings for different materials. This is a massive time-saver, letting you switch from pressing polyester shirts to ceramic coasters at the push of a button.
These features are the foundation for consistent, professional work. To get a better feel for how these settings affect different products, it's worth learning more about the equipment behind a quality t-shirt print machine and seeing these controls in action.
Consistent and Easily Adjustable Pressure
Pressure is heat’s silent partner in the sublimation dance. It’s what makes sure the sublimation paper is held in firm, even contact with your blank. If the pressure isn’t right, the ink gas can escape, leading to blurry edges, ghosting, and a generally fuzzy-looking design.
A high-quality heat press needs to deliver on pressure. Here’s what to look for:
- A Central Pressure Adjustment Knob: It should be easy to get to and turn, letting you fine-tune the pressure for whatever you’re working on. You want it to feel sturdy and robust, not flimsy.
- Even Pressure Distribution: The press's frame and lever system are crucial here. They need to be built to distribute that clamping force evenly. A weak frame will actually flex under pressure, causing the centre to press harder than the edges.
- Versatility for Different Substrates: You need the ability to go from light pressure for a delicate fabric to firm pressure for something hard like a ceramic tile. A great press gives you a wide adjustment range to handle anything you throw at it.
Ultimately, the best heat press for sublimation is one that gives you rock-solid control over the three pillars of the process: temperature, time, and pressure. When you invest in a machine with these critical features, it’ll pay for itself quickly through less wasted material, consistent quality, and professional-grade products you can be proud of.
How to Calibrate Your New Press for Flawless First Prints
Unboxing a new heat press for sublimation is always a brilliant moment. But before you start churning out amazing prints, there’s a crucial first step: calibration. Getting this right is the difference between pro-level, vibrant results and a pile of frustrating, costly mistakes. Think of it as the pre-flight check for your business.
If you jump the gun and skip these steps, you’re setting yourself up for inconsistent colours, faded patches, and a lot of wasted materials. Taking a little time now to set up and test your machine means that from your very first press, you’re working with a tool you can actually trust. Let’s get it ready for action.
Choosing the Right Workspace
Before you even think about plugging it in, let’s talk about location. Where you put your heat press really matters. This isn’t just another small appliance; it's a serious bit of kit that gets incredibly hot, so stability and safety have to be your top priorities.
The perfect spot needs three things:
- A Sturdy, Level Surface: Your press needs to sit on a workbench or table that can handle its weight without a single wobble. Any movement can throw off your pressure and ruin a print.
- Plenty of Room: You need enough space to move around the machine safely, especially with a swing-away model. Make sure the hot platen has a clear path and won’t hit anything when you open it.
- Good Ventilation: When that heat hits the sublimation paper, it can release fumes. A well-ventilated room, or at least working near an open window, is a must for staying safe and comfortable.
Performing an Initial Burn-Off
Once your press is in its new home, the very first thing to do is an initial "burn-off." New machines often come with a light coating of oils from the factory. If you don't get rid of them, they can transfer onto your first few items and cause some really weird stains or discolouration.
It's dead simple to do:
- Set the temperature to around 180°C and the timer for 15-20 minutes.
- Just leave the press open while it heats up and goes through the cycle.
- You might notice a faint smell – that’s completely normal. It’s just the coatings burning away.
This quick, one-off step ensures your heating platen is perfectly clean and ready for pristine transfers, saving you from any nasty surprises on your first proper print.
Verifying Temperature Accuracy
Honestly, this might be the most critical part of the whole setup. The temperature on your press’s digital display isn’t always the true temperature of the platen surface. A difference of even 5-10°C can completely change how your colours turn out.
Don’t just trust the display—verify it. An inexpensive infrared thermometer (or IR temp gun) is an essential tool for any serious sublimation creator. It gives you the real-world data you need for consistent results.
To check your platen, set your target temperature and let the press fully heat up. Use your IR thermometer to take readings from multiple spots: the centre, all four corners, and along the edges. This will quickly show you if you have any "cold spots" and let you adjust your settings to match what’s actually happening on the surface. For a deeper dive into finding the sweet spot, our detailed heat press temperature guide has some great insights.
Dialling In the Perfect Pressure
Finally, you need to get a feel for the pressure settings. The right amount of pressure makes sure the sublimation paper gets perfect, even contact with your blank. This allows the ink to turn to gas and transfer fully without any blurring. Different items need completely different pressure levels.
- Light Pressure: Perfect for thin fabrics and clothing where you want to avoid leaving press marks.
- Medium Pressure: Your go-to starting point for most things, like polyester t-shirts and mouse pads.
- Firm Pressure: Absolutely essential for hard items like ceramic mugs, tiles, and metal panels that won't compress.
Before you even heat the press, put your blank item on the bottom platen and clamp it shut. Start adjusting the pressure knob until it feels right when you lock it down. You want it to be snug, but not so tight that you're wrestling with it or risking cracking something fragile like a mug. Get some practice in while it’s cold to get a real feel for the different settings.
Your Step-By-Step Sublimation Pressing Workflow
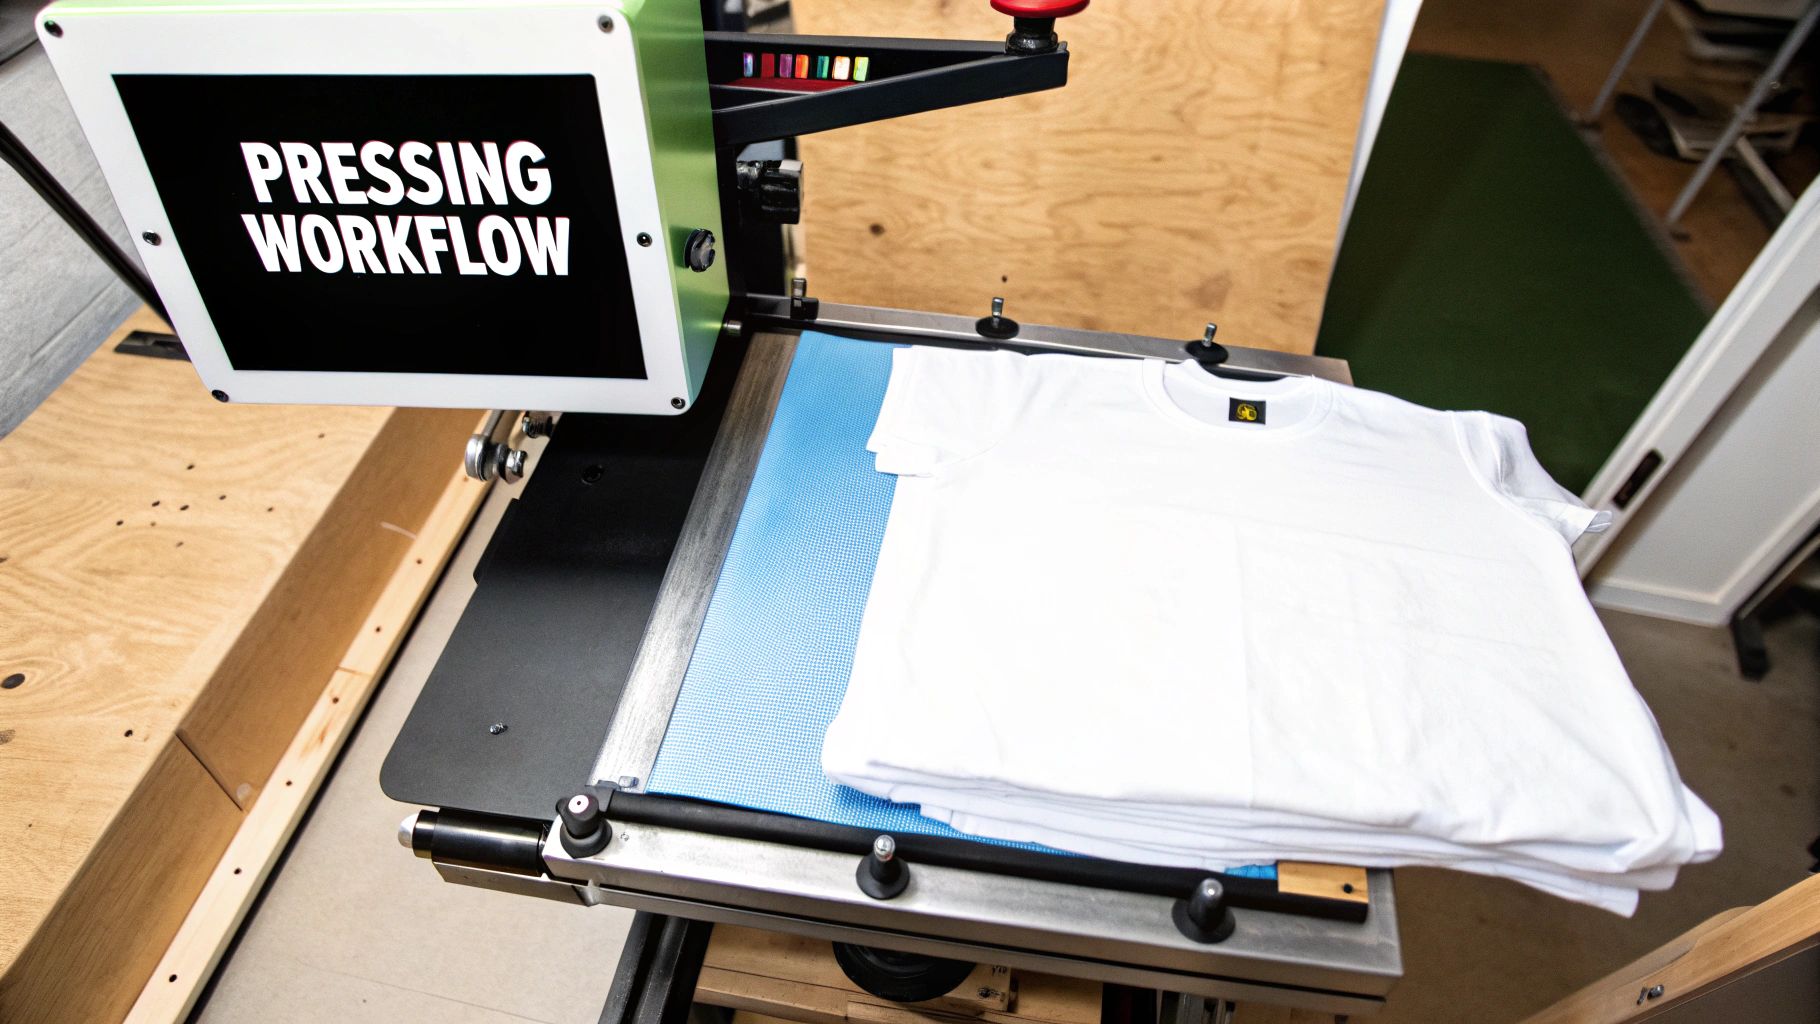
With your press dialled in and ready to go, it's time for the fun part—turning a digital idea into a tangible, vibrant product. Think of this workflow as your recipe for success. By following a consistent method every time, you’ll build confidence, slash mistakes, and produce brilliant, sale-worthy items again and again.
This structured approach takes the guesswork out of the equation, freeing you up to focus on the creative side of things. Let's walk through the entire journey, from prepping your artwork to that satisfying final peel.
Step 1: Prepare Your Artwork and Print
The quality of your final piece starts long before you even switch the press on; it begins with your digital design. Always make sure your artwork is created at a high resolution—300 DPI (dots per inch) is the industry standard. This prevents any dreaded pixelation or blurriness when it’s printed.
Get your tape measure out and size your design to fit the blank perfectly. When you’re ready to print, use good-quality sublimation paper and ink, and double-check your printer settings are optimised for sublimation. This usually means choosing the highest quality print setting and ensuring any colour profiles are applied correctly. A proper sublimation printer will also automatically mirror the image for you—a crucial step for the design to appear the right way around after pressing.
Always let your printed transfer dry completely before you press it. Handling wet ink is a surefire way to get smudges, and those smudges will become a permanent, frustrating part of your final product. Patience here pays off.
Step 2: Get Your Sublimation Blank Ready
Prepping your blank item properly is non-negotiable for a professional finish. First up, grab a lint roller and go over the surface of any fabric, like a t-shirt or tote bag. Even a tiny, invisible speck of dust or lint will absorb the sublimation ink and show up as a permanent blue or black fleck on your finished item.
Next, and this is a big one, you need to pre-press your blank. Just place the item in your heat press for sublimation for about 5-10 seconds. This quick step does two vital things: it gets rid of any moisture trapped in the material and smooths out wrinkles, creating the perfect flat canvas for the ink to transfer onto. To learn more about different transfer methods, you can check out our guide on heat transfer printing.
Step 3: Align and Secure the Transfer
Once your blank is prepped and ready, it’s all about placement. Carefully position your printed sublimation transfer face-down onto the blank, getting it exactly where you want the final design to be.
Now, take a few small pieces of heat-resistant tape and use them to secure the paper firmly in place. Don't skip this! This is what prevents the paper from shifting or lifting when you open or close the press, which is the number one cause of "ghosting"—that blurry, shadowed effect that can ruin an otherwise perfect print.
Step 4: Press Your Design
With everything secured, it’s time to build your "sublimation sandwich". Lay a sheet of protective paper (uncoated butcher paper or parchment paper works great) on the bottom platen. Place your item, with the transfer taped on, on top of that. Finally, cover it with another sheet of protective paper.
This layering is your safety net. It stops any ink from bleeding through the garment or blowing out from the edges of the paper and staining your heat platen.
- Close the Press: Lock the press down firmly to start the countdown.
- Wait Patiently: Let the press do its magic. Don't be tempted to peek before the timer goes off.
- Open and Reveal: As soon as the timer beeps, open the press. Pop on some heat-resistant gloves, carefully remove the item, and peel off the transfer paper in one smooth, confident motion to reveal your awesome new creation.
Recommended Settings for Common Sublimation Blanks
Getting your time, temperature, and pressure right is the secret to perfect sublimation. While every heat press and blank can vary slightly, this table gives you a brilliant starting point for some of the most popular items.
Always remember to do a test press if you're working with a new product or a new piece of equipment!
| Item | Temperature (°C) | Time (Seconds) | Pressure |
|---|---|---|---|
| Polyester T-Shirts (100%) | 195 - 205 | 45 - 60 | Medium |
| Ceramic Mugs | 190 - 200 | 180 - 240 | Firm |
| Polyester Mousepads | 190 - 200 | 50 - 60 | Medium |
| Aluminium Photo Panels | 195 - 205 | 60 - 75 | Medium-Firm |
| Polyester Coated Keyrings | 185 - 195 | 60 - 70 | Medium |
| Sublimation Phone Cases | 190 - 200 | 45 - 55 | Medium |
These settings are a guide to get you in the right ballpark. Your own experience and testing will help you fine-tune these numbers for consistently flawless results. Happy pressing
Keeping Your Heat Press in Tip-Top Shape
Your heat press is the heart of your sublimation operation, the real workhorse. If you want it to churn out thousands of top-quality prints without a hitch, a little regular TLC is non-negotiable. This isn't about becoming a master technician; it's just simple, smart upkeep to protect your investment and avoid those soul-crushing print fails.
Think of it like servicing your car. A few basic checks and cleans now will stop small annoyances from turning into major headaches and costly downtime later. Follow these simple steps, and you’ll keep your machine running like a dream for years to come.
Routine Cleaning and Inspection
Once you’re done for the day and the press has completely cooled down, get into the habit of giving the top platen a quick wipe. It’s easy for a bit of sublimation ink to "blow out" from the edges of the paper, leaving a ghostly residue behind.
Just use a soft, non-abrasive cloth to gently clean the non-stick surface. For any stubborn ink spots, a proper heat press platen cleaner is your best bet. Never, ever use harsh chemicals or abrasive pads, as you can easily strip the vital non-stick coating. Damage that, and you're looking at uneven heat and ruined prints.
A clean platen is a happy platen. Any leftover ink, dust, or grime can transfer straight onto your next blank, wrecking an otherwise perfect print and wasting your time and money.
Essential Safety and Function Checks
Beyond a quick clean, it pays to give your press a quick mechanical once-over. Make it a habit to check the power cord and plug for any signs of fraying or damage – a worn cable is a serious safety hazard you don't want to ignore.
While you're at it, have a look at the pressure arm and hinge. It should open and close smoothly, without any grinding or sticking. If it feels a bit stiff, check your user manual for advice on lubrication. Keeping the mechanism moving freely prevents unnecessary wear and tear on the moving parts.
- Check the Electrics: Give the power cord a regular look-over for any signs of wear.
- Test the Pressure Arm: Make sure the handle moves and locks in place without a fight.
- Look for Wear and Tear: Keep an eye out for any loose bolts or signs of metal fatigue.
This kind of proactive care is more important than ever. The sublimation world is constantly evolving, with automation and smarter tech making it easier for businesses of all sizes in the UK to meet the growing demand for high-quality personalised products. Keeping your heat press for sublimation in prime condition means you’re always ready for what’s next. You can get a better sense of where the industry is heading by exploring the dye-sublimation printing market report on researchandmarkets.com.
Common Questions About Sublimation Heat Presses
Even when you've got your setup dialled in, questions are bound to pop up. It happens to everyone. This final section tackles some of the most frequent queries we hear from creators, with clear, straightforward answers to help you troubleshoot and really get to grips with the sublimation process.
Think of this as your go-to guide for those lingering doubts, helping you feel confident every single time you fire up your press.
Can I Just Use a Regular Iron for Sublimation?
In a word: no. A standard household iron is completely wrong for sublimation, and it comes down to two big reasons. Firstly, it can’t get anywhere near hot enough or hold the consistent 180-200°C temperature you need. Secondly, it can't apply the firm, even pressure required across your whole design.
Trying to use an iron will only lead to disappointment—think splotchy, faded, and totally inconsistent transfers. Sublimation is a chemical process that needs the precise control that only a dedicated heat press can deliver to turn that solid ink into a gas that bonds permanently with your material.
Why Do My Prints Look Faded or Blurry?
Faded or blurry prints are almost always a sign that your settings are off or that moisture has crept into the equation. The problem usually boils down to one of three things: the temperature is too low, you aren't pressing for long enough, or you don't have enough pressure for the specific blank you're using.
Moisture is the other great enemy of a crisp print. Get into the habit of pre-pressing your garments for 5-10 seconds to zap away any hidden humidity. That blurry effect, often called 'ghosting', can also happen if your transfer paper moves even slightly when you open the press. A bit of heat-resistant tape is your best friend here—use it to secure the paper and stop it from shifting.
A perfect print is a balancing act between time, temperature, and pressure. If one element is off, the final result will suffer. Always start with the recommended settings for your specific blank and adjust from there.
And for those of you thinking about turning this passion into a business, you might also be wondering how to start an e-commerce store to showcase your creations.
What Materials Can I Actually Sublimate On?
This is a fundamental rule you need to get your head around: sublimation ink only bonds with polymers. What that means in practice is you can only print on materials made from polyester or items that have a special polymer coating.
- For Apparel: For the most eye-popping, vibrant colours, you need 100% polyester fabric. You can get away with poly-blends (ideally 65% polyester or more), but the final print will have a more faded, retro look. It’s a complete non-starter on 100% cotton.
- For Hard Goods: Things like mugs, phone cases, keyrings, and metal panels must be sold specifically as "sublimation blanks." This just means they come ready with that essential polymer coating needed to accept the ink.
How Do I Stop Ink Bleeding Through My Garment?
Ah, the dreaded ink bleed-through. It can ruin the back of a shirt or, worse, stain your heat platen for good. Thankfully, it's incredibly easy to prevent with a bit of protective paper. Simply place a sheet of uncoated butcher paper or a Teflon sheet inside the garment before you press it.
It’s also smart to place another protective sheet on top of your sublimation paper before closing the press. This simple step acts as a barrier, catching any ink "blowout" that could otherwise transfer onto your next project. Make it a habit to use a fresh sheet for every single press to avoid any colour contamination.
At Psyque, we specialise in bringing vibrant, durable designs to life using professional printing techniques. Explore our collections and discover the quality for yourself at https://psyque.co.uk.