
Printing Heat Transfer A Practical Guide for Pro Results
Printing heat transfer is a fantastic way to get designs onto clothing using heat and pressure. The basic idea is simple: you print a design onto a special film, then press it onto the fabric. It’s a versatile and high-quality alternative to old-school methods like screen printing, especially when you’re dealing with complex, multi-coloured graphics.
What Is Printing Heat Transfer
At its heart, printing heat transfer is about moving an image from one surface to another. Think of it as a professional-grade iron-on, but with far superior durability and detail. In this guide, we're going to zero in on a hugely popular and effective method called Direct-to-Film (DTF) printing.
DTF has been a real game-changer, especially for small businesses and creative people working from home. Traditional screen printing is great, but it requires a separate screen for every single colour, which gets pricey fast if you're only doing a small batch. DTF lets you print vibrant, full-colour designs in one go, making it perfect for one-off custom jobs or limited edition runs.
The DTF Advantage
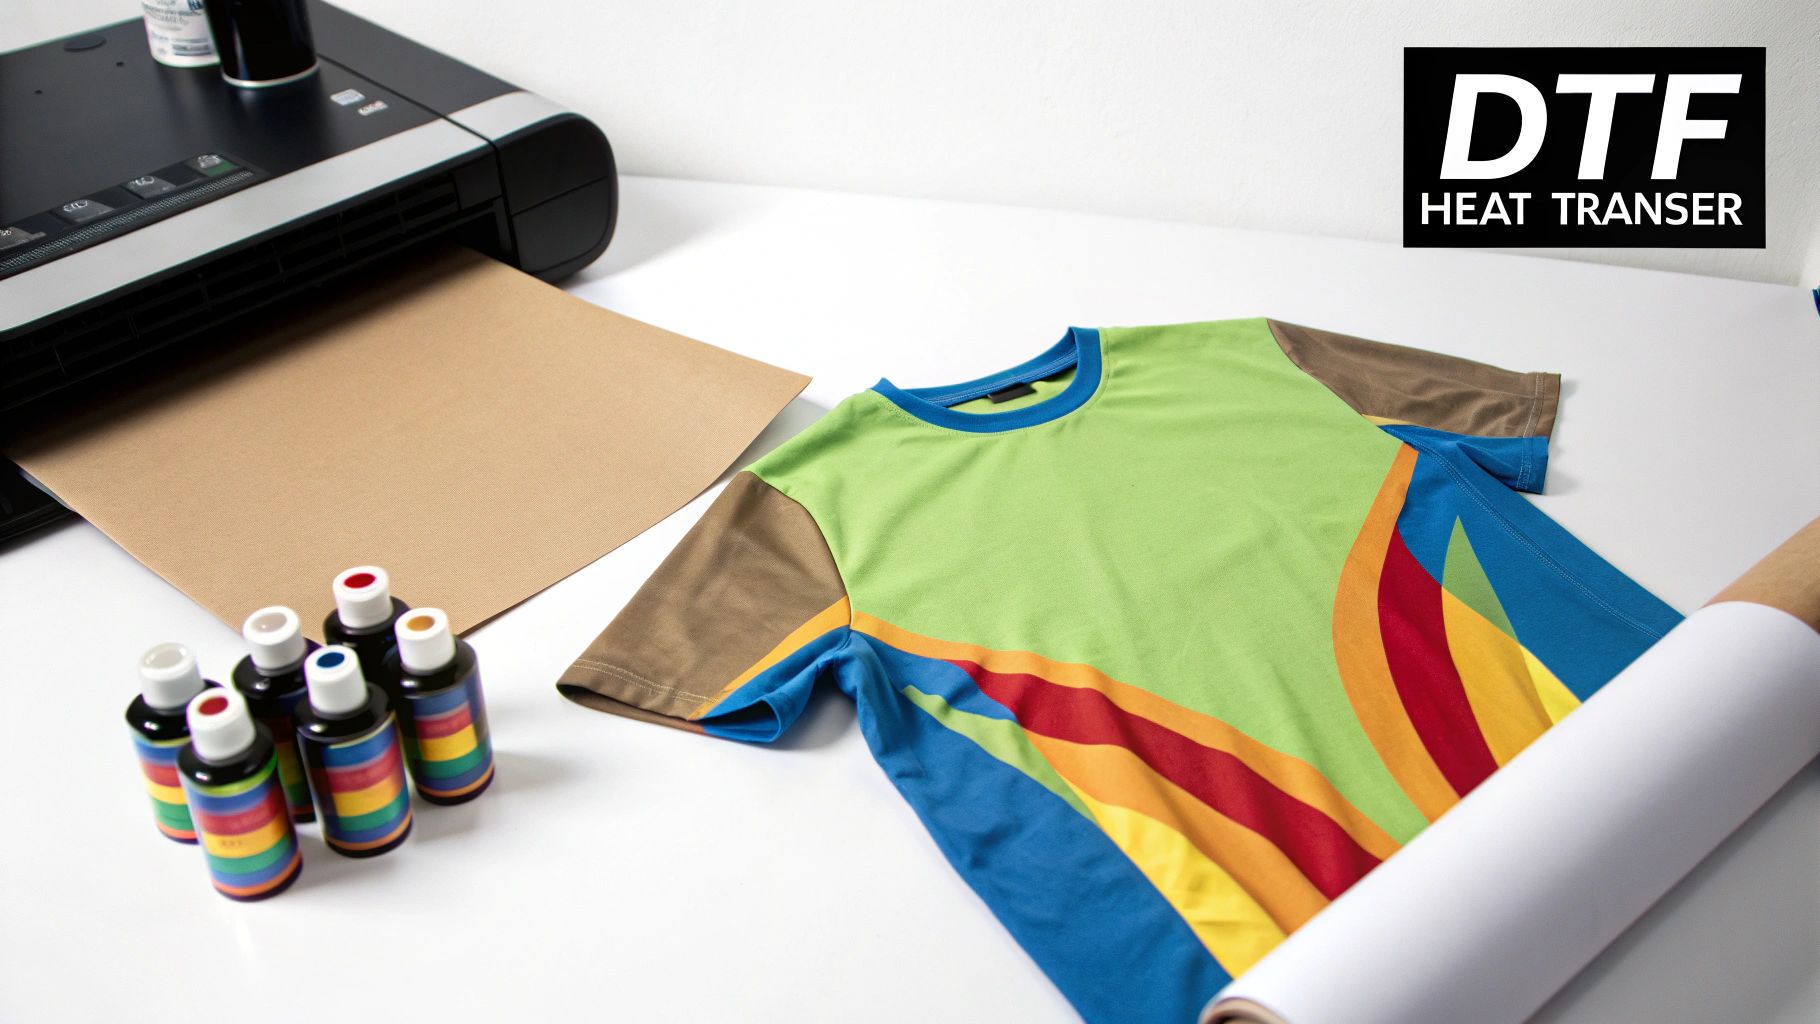
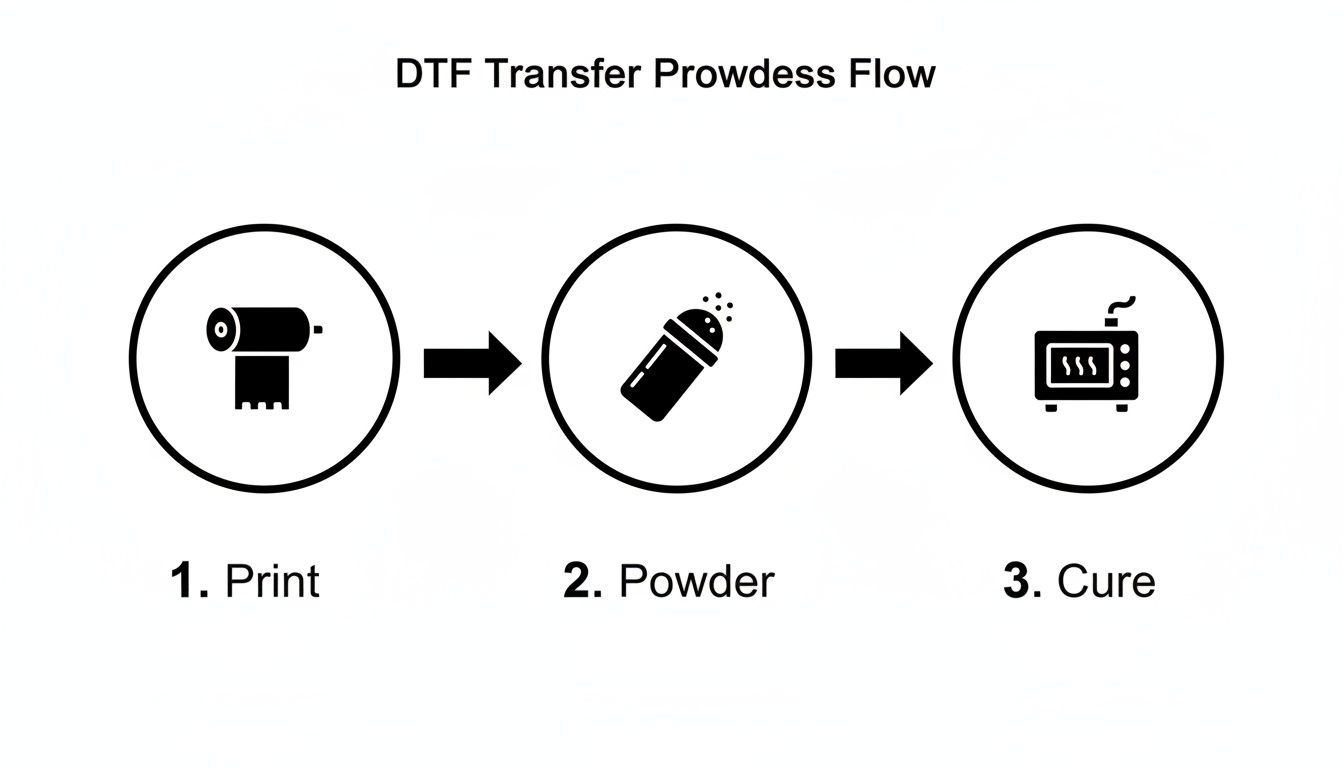
The magic of DTF is all in its workflow. First, your design is printed onto a specialised PET film using water-based textile inks. A crucial part of this step is the white ink layer that goes down first. This white base is what makes your design pop with bright, opaque colours on any garment, whether it's a black cotton tee or a fluorescent poly safety vest.
Once printed, a fine thermoplastic powder—essentially a hot-melt glue—is sprinkled over the wet ink. The film then goes through a curing process where heat melts the powder into a smooth, even adhesive layer. This finished transfer can be stored for later or pressed onto a garment right away. When you apply the right combination of heat and pressure with a heat press, the design permanently bonds to the fabric.
What you're left with is a print that feels much softer and more flexible than older methods like heat transfer vinyl. Because the ink becomes part of the fabric's weave, DTF prints have excellent stretch and can handle dozens of washes without cracking or peeling.
Why It Matters for Your Projects
For anyone looking to create custom apparel, getting to grips with the printing heat transfer process opens up a massive world of possibilities. It’s the secret behind many of the detailed, photo-realistic graphics you see on clothes in high-street shops. If you want to go even deeper, it's worth exploring the fundamentals of heat transfer printing to see how the different methods stack up.
This technique really shines where others might struggle:
- Versatility: DTF works brilliantly on a huge range of fabrics. Cotton, polyester, blends, you name it—materials that can be tricky for other printing styles are no problem here.
- Detail: It flawlessly reproduces tiny details, small text, and complex colour gradients that would be a nightmare to attempt with cut vinyl.
- Efficiency: Forget about the painstaking process of weeding (peeling away the unwanted bits of vinyl). This alone dramatically speeds up production time for intricate designs.
Setting Up Your Heat Transfer Workspace
So, you're ready to get into heat transfer printing. It's an exciting venture, but a truly great print begins long before you hit the 'start' button. The secret to smooth, professional results is a dedicated and organised workspace. It’s not just about owning the right gear; it’s about setting it up in a way that makes sense, saving you time and preventing headaches down the line.
Think of it like setting up a kitchen. You wouldn't put your chopping board on the other side of the room from your knives. The same logic applies here. A well-planned space means you’re not fumbling for supplies or tripping over leads mid-job, letting you focus on what really matters: creating fantastic prints.
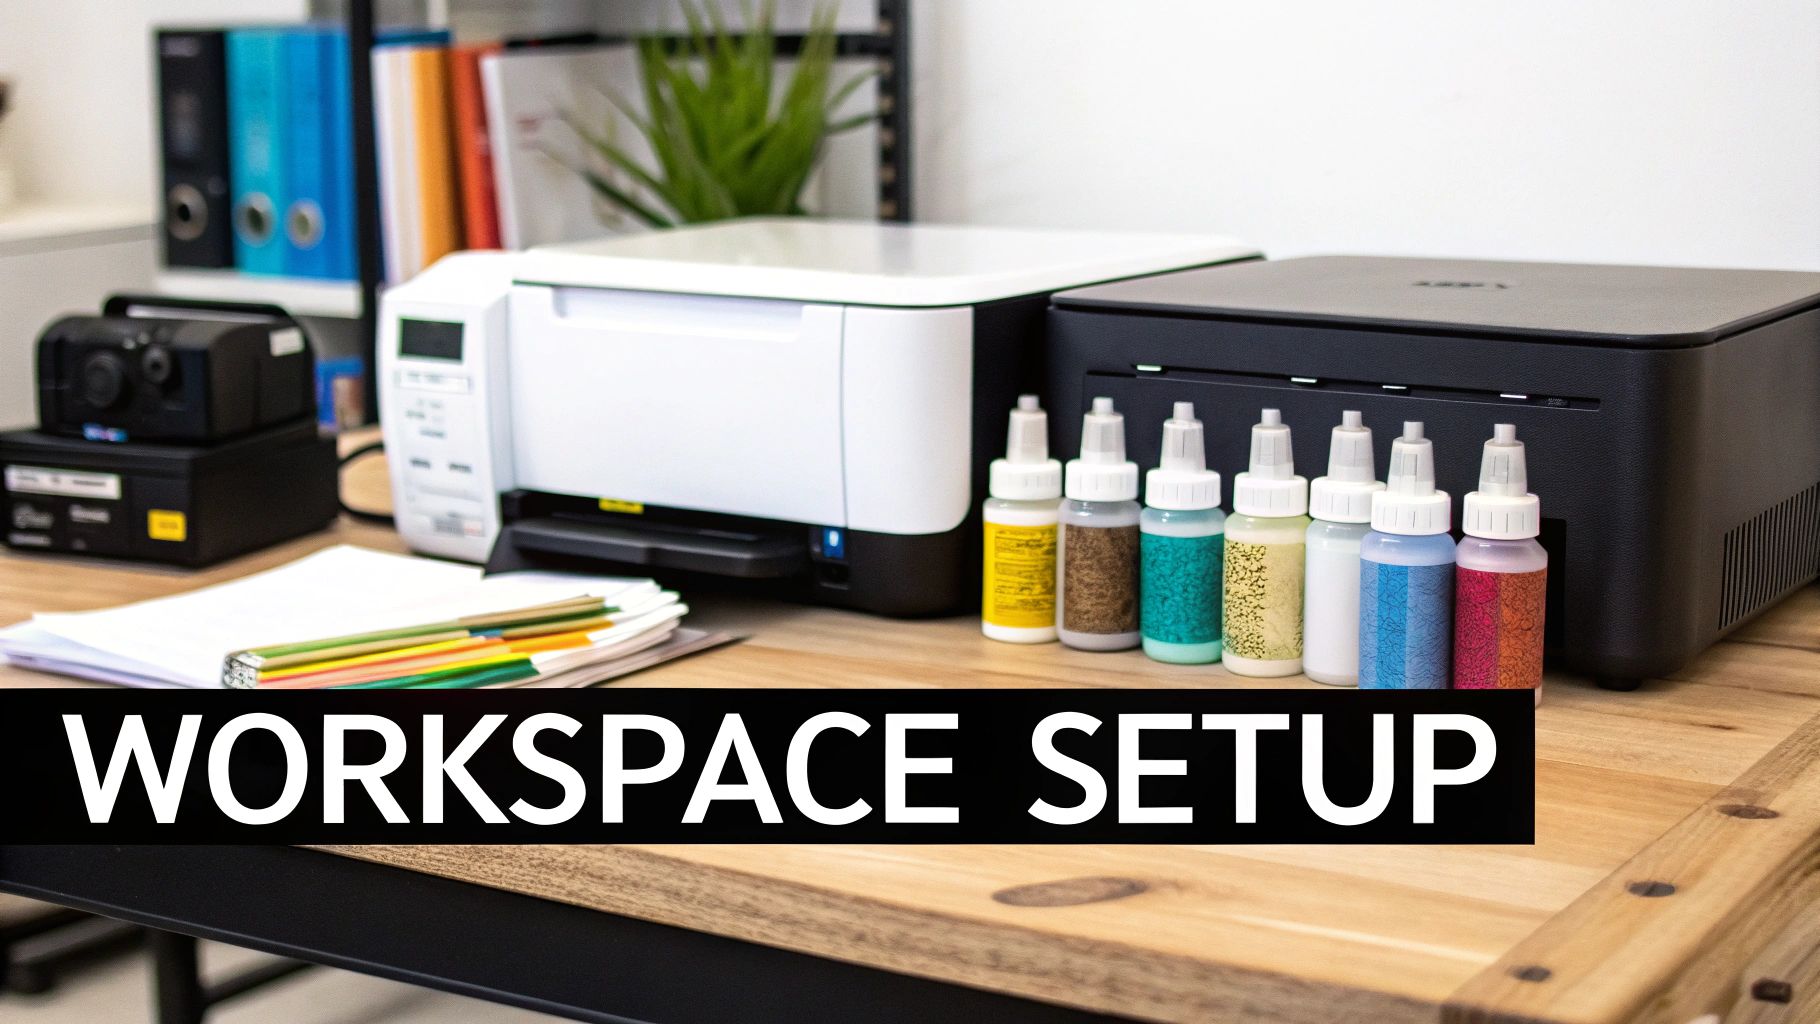
Core Equipment for Your DTF Setup
The absolute heart of any modern heat transfer operation is the DTF printer. Let's be clear, this isn't your average office inkjet. These machines are built from the ground up to handle proper textile inks, especially that crucial white ink layer that makes colours pop on dark fabrics. A dedicated DTF printer is non-negotiable if you want consistent, vibrant results.
Next up is your powdering and curing station. Often, this is a combined unit called a shaker-dryer, and it's a game-changer. It automatically handles two vital steps: applying a perfectly even coat of adhesive powder to the wet ink and then melting it to cure the transfer. If you're on a tighter budget, you can do this manually with a tray of powder and a separate curing oven, but an all-in-one unit seriously boosts your speed and consistency.
Finally, you have the heat press. This is where the magic happens and your design becomes one with the garment. Honestly, this machine is just as important as your printer. A quality press delivers consistent temperature and even pressure across the whole plate—essentials for a durable print that won't peel or crack after the first wash.
Your heat press is not the place to cut corners. A cheap, inconsistent press can completely ruin a perfectly printed transfer, wasting time, materials, and costing you customers. It's a smart investment.
Essential Consumables and Supplies
Alongside your main hardware, you'll need a good stock of the bits and pieces you'll use up with every print run.
- PET Film: This is the special film you print onto. Look for a quality film that's anti-static and designed for either hot or cold peel—this choice often comes down to personal preference and the inks you're using.
- DTF Inks: You'll need a set of CMYK (Cyan, Magenta, Yellow, Black) and, of course, white textile inks. Always stick to inks specifically formulated for your printer model to avoid clogged print heads and to keep your colours accurate.
- Adhesive Powder: This fine, thermoplastic powder is the "glue" that bonds your design to the fabric. It comes in different grades (fine, medium, coarse) depending on the fabric and the finish you're after.
Organising Your Space for Efficiency
Once you've got all your gear, laying it out logically is the final piece of the puzzle. A smart setup minimises how much you have to move around and maximises your output. Give your printer enough breathing room for easy access to inks and for routine maintenance. The shaker-dryer should sit right after the printer, creating a natural flow from print to powder to cure.
Your heat press needs its own dedicated spot with plenty of table space for laying out garments before pressing and stacking them once they're done. This kind of professional setup is exactly what the growing garment customisation market demands. The appetite for heat presses and supplies like heat transfer vinyl is booming here in the UK, which shows just how much this industry is growing for both pros and hobbyists.
In fact, the global market for heat transfer vinyl was valued at around USD 371.4 million in 2024 and is projected to hit USD 552 million by 2034, with Europe being a major growth area. You can learn more about the expanding HTV market and its drivers on Zion Market Research. It just goes to show that investing in a solid workspace is a smart move in a very healthy industry.
Preparing Your Designs for Perfect Prints
Before any ink even touches the film, your journey to a brilliant print starts on the computer. Honestly, a top-quality finished product is impossible without a perfectly prepared digital file. Getting this bit right is where you’ll prevent most of the common printing headaches, saving yourself a load of time, money, and wasted materials later on.
Think of it this way: skipping these digital steps is like building a house on a shaky foundation. The end result is bound to have problems. What you see on your screen needs to accurately translate to the finished garment, and that all comes down to proper prep.
Resolution: The Foundation of a Sharp Print
If there's one thing you can't afford to get wrong, it's resolution. Measured in Dots Per Inch (DPI), this is the absolute key to a crisp, professional-looking print. For any kind of heat transfer, the industry standard is a non-negotiable 300 DPI. This guarantees your design has enough pixel data to print clearly, without any of that dreaded blurriness or jagged edges.
Trying to print a low-resolution image, like a 72 DPI graphic you’ve saved from a website, will always end in a pixelated, amateurish mess. It’s vital to start your design process with the correct canvas settings from the very beginning. You can't just scale up a small image and increase the DPI later; the quality has already been lost for good.
Choosing Your Colour Mode and File Type
Next up, let's talk about colour. Your computer screen displays everything in RGB (Red, Green, Blue), but professional printers operate in CMYK (Cyan, Magenta, Yellow, Black). If you design in CMYK mode from the get-go, you'll get a much more accurate preview of how the colours will actually look when printed. This simple step helps you avoid nasty surprises when you see the final product.
If you're new to this, getting your head around how CMYK vs RGB for print can impact your final product is a critical piece of the puzzle for any budding designer.
When you're ready to save, you've got two main choices for file types:
- Vector Files (.AI, .EPS, .SVG): These are the gold standard for logos, text, and graphics with solid colours. Because they're built with maths rather than pixels, you can scale them to any size imaginable without losing a shred of quality.
- Raster Files (.PNG, .PSD, .TIFF): Made up of pixels, these are perfect for photographs or illustrations with complex details and gradients. If you’re using a raster file, just make sure it has a transparent background and is saved at 300 DPI at the exact size you want it printed.
A classic rookie error is submitting a design with a white background when it should be transparent. With DTF printing, any background colour will be printed. Transparency is essential unless that white box is actually part of your design.
The Role of RIP Software in DTF
For Direct-to-Film (DTF) printing specifically, there's another piece of kit that's absolutely essential: a Raster Image Processor, or RIP software. Think of this powerful tool as the translator between your design file and the DTF printer. Its most crucial job is managing the ink layers, especially that all-important white base.
The RIP software intelligently analyses your design and automatically generates the white ink underbase that gets printed first. This is what makes your colours pop on dark or brightly coloured garments. It also gives you pinpoint control over things like ink saturation, colour profiles, and choke settings (which slightly shrink the white base so no white ink peeks out from behind your design).
Put simply, trying to get professional DTF prints without RIP software is nearly impossible. It’s the brain of the whole operation, making sure every single droplet of ink lands exactly where it needs to for a perfect result.
Applying Powder and Curing Your Transfers
So, your design has just rolled out of the printer, the ink still wet and glistening on the PET film. This is where the real magic happens. It’s the make-or-break stage that turns that delicate, wet print into a tough, press-ready transfer that’s built to last. It all comes down to two key steps: applying the adhesive powder and curing it just right.
This is what gives your final print its incredible durability. That fine, white thermoplastic powder is a powerful hot-melt adhesive. It’s the glue that permanently bonds the ink to the fabric’s fibres. Skip this, and your masterpiece will wash down the drain.
Getting a Perfect, Even Powder Coat
The mission here is to get a completely even layer of powder across every bit of wet ink. The good news is the powder only sticks to the ink, so cleaning up any excess is a doddle. If you’re just starting out, you can do this by hand. Just dip the film into a tray of powder and give it a gentle shake and tap to make sure it’s fully coated.
But if you’re aiming for a flawless, professional finish every single time, an automated powder shaker is the business. These machines gently vibrate the film, coating it perfectly and shaking off any stray powder. Using a shaker is the best way to avoid clumps or bare patches, which are notorious for causing parts of your design to peel off after pressing.
Once it's coated, you have to be ruthless about getting rid of any loose powder. A good, sharp flick of the film usually does the trick, or a quick blast from an air compressor if you have one.
Here's a pro-tip you can't ignore: always check the back of the film. Any sneaky powder particles left clinging to the non-printed areas can melt onto your heat press, or worse, transfer onto your garment as little unwanted glue spots. Be meticulous here.
The Curing Process: Melting the Magic
With the powder applied perfectly, it's time to cure it. Curing is simply the process of melting the powder so it forms a smooth, solid layer of adhesive over the ink. This is what makes the transfer durable and ready to be pressed onto a garment.
You’ve got a couple of solid options for getting this done:
- Dedicated Curing Ovens: This is the gold standard. They’re often built right into a shaker-dryer unit and give you consistent, controlled heat. You get a perfect, even cure across the entire transfer, usually at a temperature between 100-120°C.
- Heat Press Hovering: No oven? No problem. You can use your heat press. Just lower the top platen so it hovers an inch or two above the film without touching it. The radiant heat will melt the powder. You'll need to keep a close eye on it to make sure you don't scorch the film.
You’ll know the transfer is perfectly cured when the loose, sugary texture melts down into a glossy, slightly bumpy surface. It’s often described as an "orange peel" texture. That visual cue is your confirmation that the powder has melted correctly and bonded with the ink.
Of course, if you want to skip this whole part of the process, you can always look into professionally made DTF transfers that are ready to press and jump straight to the heat press.
Troubleshooting Common Curing Headaches
Getting the cure right is absolutely vital for a long-lasting print. One of the most common mistakes is under-curing. If the powder isn’t fully melted, the transfer just won’t stick properly and will probably crack or peel after a wash or two. On the flip side, over-curing can burn the adhesive or warp the film, ruining its ability to bond.
This stage really highlights the precision that goes into modern heat transfer printing. The technology shares its roots with the thermal-transfer processes used across UK logistics and retail for printing rock-solid labels and barcodes. Driven by the boom in e-commerce, the global thermal printing market was valued at around USD 49.3 billion in 2024 and is expected to hit USD 66.4 billion by 2030. You can read more about the thermal printing market's expansion on Grand View Research. This industrial heritage is a great reminder of why getting technical steps like curing absolutely perfect is key to creating a reliable, high-quality product.
Mastering Your Heat Press Application
With your cured transfer in hand, you're at the final—and most satisfying—stage of the process. This is where your digital design becomes a real, wearable piece of art. Getting this right is all about mastering three key variables: temperature, time, and pressure.
Think of it like a recipe. Too much heat can scorch the fabric, not enough time leads to a weak bond, and the wrong pressure creates an uneven finish. Each fabric has its own unique recipe for success, so guessing is not a great strategy.
Dialling In Your Core Settings
Before you press your first proper garment, I always recommend doing a quick test run on a scrap piece of the same material. It’s the only way to be certain your settings are perfectly calibrated for that specific fabric. A good heat press distributes heat evenly across the platen, which is absolutely essential for a professional-looking result.
The demand for this kind of precision is growing. Fuelled by the fashion and sportswear sectors, the UK's heat transfer film market is expected to grow by around 9.6% annually through 2035. This trend towards personalised, small-batch printing shows just how valuable mastering your heat press technique is.
This workflow, from digital file to cured transfer, sets the stage for a flawless final press. Every step counts.
Hot Peel Versus Cold Peel Films
When you're buying PET film, you'll come across two main types: hot peel and cold peel. The name tells you exactly what to do after you open the press.
-
Hot Peel: You peel the film off immediately, while everything is still piping hot. It's a fast and efficient method, often leaving a slightly glossier finish. Great for when you're knocking out a big order and speed is key.
-
Cold Peel: You have to wait for the garment and transfer to cool down completely before you touch that film. It takes a bit more patience, but the result is usually a softer, more matte finish that a lot of people prefer. I find it’s more forgiving with really fine details, too.
There's no right or wrong answer here; it all comes down to the workflow you prefer and the final look you're after. Personally, I lean towards cold peel for any design with intricate text, just to make sure every tiny piece stays exactly where it should.
The Power of the Second Press
Here’s a little pro tip that makes a huge difference: the second press. Once you’ve peeled the film away, cover the design with a sheet of parchment or Teflon paper and press it again for just 5-10 seconds.
This quick second press does two brilliant things. First, it pushes the ink deeper into the fabric's fibres, which makes it much more durable in the wash. Second, it gets rid of that plastic-like shine from the adhesive, giving the design a softer, more screen-printed feel. It's a small step that adds a serious touch of quality.
A Quick Reference for Common Fabrics
Nailing your settings for different materials is crucial. To help you get started, we've put together a handy guide. You can explore more options in our comprehensive heat press temperature guide for even more fabric types.
Here’s a quick-reference table with my go-to starting points for the most common fabrics you'll encounter.
Recommended Heat Press Settings by Fabric Type
| Fabric Type | Temperature (°C) | Press Time (Seconds) | Pressure Level | Peel Type (Hot/Cold) |
|---|---|---|---|---|
| 100% Cotton | 160-170°C | 15-20 | Medium-Firm | Cold |
| 100% Polyester | 140-150°C | 10-12 | Medium | Cold |
| 50/50 Cotton/Poly Blends | 150-160°C | 12-15 | Medium | Cold |
| Tri-Blends | 145-155°C | 10-15 | Medium | Cold |
| Spandex/Lycra | 135-145°C | 8-10 | Light-Medium | Cold |
Remember, these are starting points. Your specific heat press, transfer film, and inks might need slight adjustments, which is exactly why testing first is so important.
With a little practice, you'll quickly develop an instinct for what your prints need to look perfect, every single time.
Common Heat Transfer Printing Questions
As you get into the swing of heat transfer printing, you’re bound to have questions. That’s a good sign—it means you’re really thinking about the craft. We’ve pulled together some of the most common queries we hear from beginners and seasoned pros to give you clear, practical answers that will help you nail the process.
What Is the Difference Between DTF and HTV?
It's one of the first things people ask, and for a very good reason. While both Direct-to-Film (DTF) and Heat Transfer Vinyl (HTV) end up on a garment via a heat press, how they get there and what they feel like are worlds apart.
Think of HTV as a digital craft knife. You cut your design from a sheet of pre-coloured vinyl, and then you have to painstakingly remove all the bits you don't want. This is known as weeding. Once that’s done, you press the solid vinyl shape onto the fabric. It’s brilliant for simple, blocky designs—think single-colour logos, or names and numbers on the back of a football shirt.
DTF, on the other hand, is a proper printing process. You print your entire multi-coloured design directly onto a special film, cover it in an adhesive powder, and cure it. The best part? There is no weeding, no matter how intricate your design gets. This makes it light-years ahead for detailed, photographic images or anything with gradients and a wide range of colours.
The biggest difference you'll feel is the texture. HTV sits on top of the fabric and can feel a bit stiff, almost like a plastic sticker. A well-done DTF transfer actually sinks into the fabric's fibres, giving you a much softer, more flexible finish that stretches right along with the garment.
How Should I Wash Garments with Heat Transfers?
You’ve just created a fantastic print; now you have to make sure it lasts. Looking after it properly is non-negotiable if you want to get the most life out of your work. A few simple rules can be the difference between a design that looks great for years and one that starts cracking after just a couple of washes.
Here are the golden rules for washing any heat transfer garment:
- Give it a day: Always wait at least 24-48 hours after pressing before it goes anywhere near a washing machine. This gives the adhesive time to fully cure and properly bond with the fabric.
- Turn it inside out: This is the single most important thing you can do. Turning the garment inside out protects the print from getting scraped and bashed by other clothes, zips, and buttons.
- Keep it cool: Hot water is the enemy. Wash on a cool cycle (30°C or less) and use a mild detergent. Steer clear of bleach and harsh fabric softeners completely.
- Air dry, always: The intense heat from a tumble dryer can melt the adhesive, causing the print to crack or peel off. Your best bet is to hang it up to air dry. If you absolutely have to iron it, do it inside out and never, ever put the iron directly on the transfer.
Why Are My Transfers Cracking or Peeling?
It’s incredibly frustrating when you see your hard work start to crack or peel, but don't worry—it’s nearly always preventable. The problem can almost always be traced back to one of three things: the curing process, your heat press settings, or the quality of your materials.
An under-cured transfer is the number one culprit. If that adhesive powder isn't fully melted into a texture that looks like an "orange peel," it just won’t have the sticking power to bond permanently. Double-check your curing time and temperature to make sure you’re getting a complete melt.
Incorrect heat press settings are just as common. Too little heat, not enough time, or weak pressure means the adhesive never gets properly activated. Every fabric has its own recipe for success, so always follow the guidelines and do a test press on some scrap material first.
Finally, while it's tempting to go for cheaper supplies, low-quality films, inks, or powders can set you up for failure from the start, leading to poor adhesion and zero durability.
Can I Use a Standard Printer for DTF?
Let's make this simple: absolutely not. You cannot use a standard home or office inkjet printer for DTF printing. It just won't work.
DTF printing demands a very specific setup. A real DTF printer is built to handle special textile inks, which are completely different from the ink you use for paper. Most importantly, these printers have a dedicated channel just for white ink, which is essential for creating a solid base layer on coloured garments so your design pops.
On top of that, you need specialised RIP software to control everything—the ink flow, the white underbase, and the final colour accuracy. The driver on your desktop printer has no idea how to handle any of that. Trying to feed DTF film through it will only end in a smudged, useless mess and very likely a clogged-up printer. To see how different methods really stack up, check out our guide on DTF vs screen printing for graphic tees.
Ready to bring your own custom designs to life with professional quality? At Psyque, we use state-of-the-art DTF technology to create vibrant, durable prints that last. Explore our collections or get in touch for your own custom project at https://psyque.co.uk.