
Top Vinyl Printer for Shirts in the UK | Get Creative Today
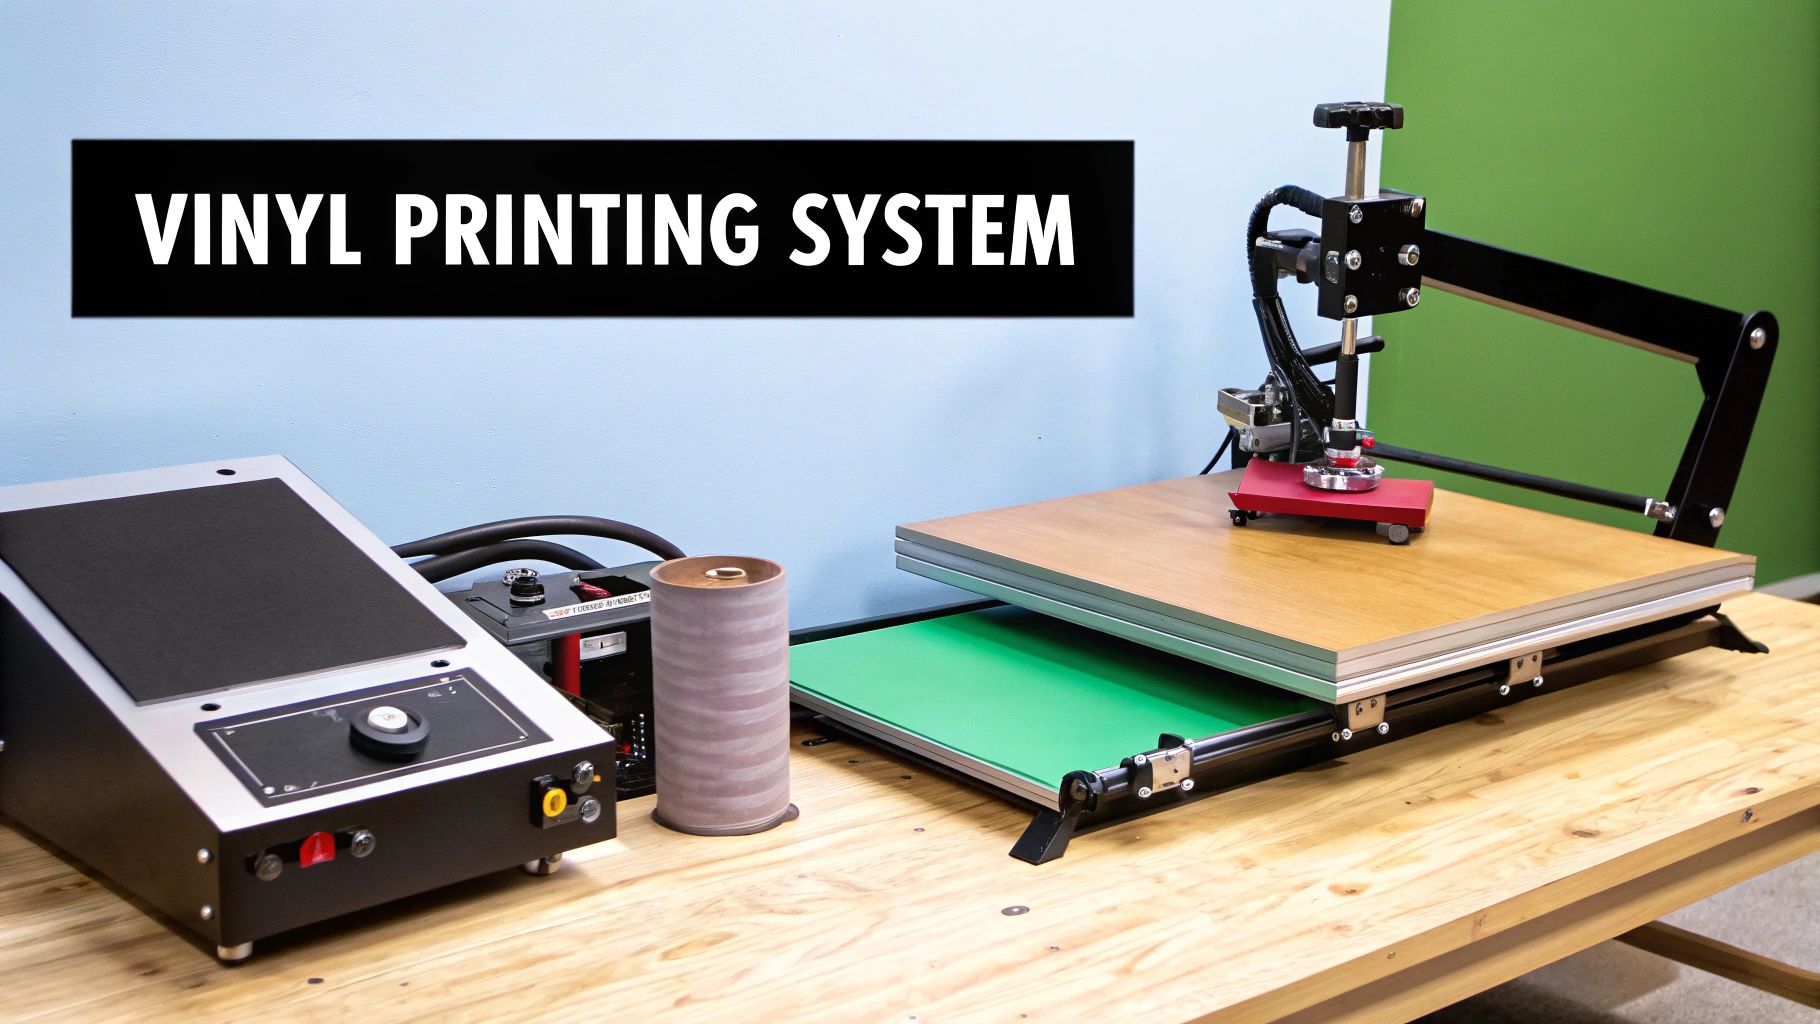
When you hear someone talk about a "vinyl printer for shirts," what they're usually picturing is a complete creative setup, not just a single machine. It’s less about printing ink and more about a two-part system that relies on a vinyl cutter to carve out designs and a heat press to bring them to life on fabric. Think of it as a mini production station for your custom apparel ideas.
Demystifying the Vinyl Printing Process
Let's clear up a common point of confusion right away. Unlike the desktop printer on your desk that sprays ink onto paper, customising clothes with vinyl is a totally different ball game. It’s more like creating a high-tech, incredibly durable sticker that literally fuses with the fabric to become part of the shirt.
So, the phrase "vinyl printer for shirts" can be a little misleading. For single-colour designs, the real hero of the story is the vinyl cutter. This clever machine takes a digital file from your computer and uses a tiny, ultra-precise blade to cut your design from a sheet of Heat Transfer Vinyl (HTV). This stuff comes in a dizzying array of colours and finishes, from simple matte and glossy effects to eye-catching glitter and even fuzzy flock textures.
The Two-Step Workflow
The real magic happens in two simple stages. First, the cutter does its thing, meticulously carving your design into the vinyl. Once you've peeled away the excess material (a strangely satisfying process called "weeding"), you're left with your design perfectly arranged on a clear sticky-back sheet.
That’s when the second piece of essential kit comes into play: the heat press. This machine is what provides the consistent, even pressure and high temperature needed to permanently bond the vinyl design to the t-shirt's fibres. It’s this powerful combination that ensures your design looks sharp, professional, and can handle wash after wash without cracking or peeling.
The core concept is wonderfully simple: The cutter creates the shape, and the heat press makes it permanent. This exact method is the backbone of countless small businesses and creative hobbies across the UK, offering a foolproof way to produce crisp, vibrant designs on demand.
From Digital File to Finished Garment
So, what does this actually look like in practice? It’s a straightforward journey that takes an idea from your screen and turns it into something you can wear. The essential steps are:
- Design Creation: You create or finalise your graphic in design software.
- Cutting: The vinyl cutter precisely carves the design from a sheet of HTV.
- Weeding: You manually peel away all the unwanted vinyl, leaving just your design behind.
- Application: Using specific time, temperature, and pressure settings, the heat press applies the vinyl to the shirt.
This process gives you total creative control over bold, single-colour graphics, logos, and lettering. If you're wondering about creating more complex, multi-coloured images, you can learn more about the amazing possibilities of printed vinyl heat transfer and how it blows the creative doors wide open. Getting to grips with this foundational cutting and pressing process is the perfect first step toward making top-quality custom apparel, whether it's for fun or for a flourishing business.
Choosing Your Setup: Print and Cut vs Separate Machines
When you're ready to get into vinyl printing for shirts, you’ll hit your first major fork in the road. It’s a decision that really shapes how you'll work. Do you go for separate machines—one for printing, one for cutting—or do you go all-in on an integrated 'print and cut' system? Each route has its own perks and is better suited to different kinds of projects and business plans.
It's a bit like setting up a home audio system. You could grab an all-in-one soundbar—it’s slick, saves space, and gets the job done. Or, you could build your own setup with a separate amplifier, speakers, and a subwoofer. Each component is specialised to do its job perfectly. Both will play music, but the final sound and the potential for tweaking it are worlds apart.
The same idea applies here. Getting your head around the pros and cons of each setup is the first step to making a smart choice for your T-shirt ambitions.
The Power of Separate Machines
For most people dipping their toes into the world of vinyl shirt making, the separate machine setup is the way to go. This just means pairing a dedicated vinyl cutter with a standalone heat press. This modular approach is hugely popular, especially for beginners and small businesses here in the UK, and for good reason.
First off, it’s much kinder on your wallet. You can get started with a quality hobbyist cutter and a solid heat press without a massive upfront cost. This setup is the absolute champion for working with standard Heat Transfer Vinyl (HTV), which you buy in pre-coloured sheets.
This workflow is perfect for:
- Bold text and lettering: Think custom names, punchy slogans, and quotes.
- Single-colour logos: Great for branding workwear, team kits, or merchandise.
- Simple graphic shapes: Ideal for producing crisp, clean designs with sharp, defined edges.
With this method, you aren't actually printing any ink. The cutter does all the work, carving your design out of a sheet of coloured vinyl. This technique gives you incredibly durable results with vibrant, solid colours that pop on any garment.
The All-in-One Print and Cut Solution
Now, if you're dreaming of creating complex, multi-coloured masterpieces, the integrated 'print and cut' machine is a different beast altogether. These powerhouse devices roll two jobs into one smooth operation. First, they act as a high-end inkjet printer, laying down special eco-solvent inks to create full-colour, photo-quality designs on printable HTV.
Once the design is printed, the machine switches gears. It uses a built-in optical eye to read registration marks and then precisely cuts around the printed image. This completely gets rid of the tricky and often bulky process of layering multiple colours of standard vinyl.
An integrated system is like having a professional graphics studio in a box. It opens the door to creating intricate, full-colour transfers that would be impossible with standard cutting, making it a fantastic tool for detailed branding and artistic apparel.
This all-in-one route is the ticket for photorealistic images, smooth gradients, and designs packed with countless colours. But that kind of power comes with a bigger price tag. Print and cut machines are a serious financial investment and have a steeper learning curve than a simple cutter. You'll also need to factor in the ongoing costs of specialised inks and printable media.
If you want to explore this world further, our complete guide to choosing a t-shirt transfer printer is a great place to see how these different technologies stack up. Ultimately, deciding which path is right for you is all about balancing your creative vision with your budget.
Critical Features to Compare Before You Buy
Picking the right machine for your t-shirt business is a huge decision. It's tempting to just look at the price, but the real value is in the features that will shape your day-to-day workflow and the quality of your finished shirts. Getting this choice right from the start saves a lot of headaches and wasted money later on.
And trust me, you want to get it right. The UK’s custom t-shirt scene is absolutely booming. Projections show the market soaring from around USD 310.48 million in 2023 to an expected USD 526.78 million by 2032. That's a massive opportunity, and the right vinyl cutter is your ticket in. You can get the full scoop on this growth in the UK custom t-shirt printing market research.
So, where do you start? When you’re comparing models, you need to zero in on the three features that matter most: Cutting Width, Speed & Force, and Software Compatibility.

Nailing these three areas will help you build a checklist to find a machine that fits your budget, your projects, and where you want to take your business.
Cutting Width and Material Efficiency
The cutting width is exactly what it sounds like—it sets the maximum size of a design you can cut in one pass. A basic 12-inch width is perfectly fine if you're just starting out or making things for fun. But if you’re running a small business, a wider machine of 24 inches or more is a game-changer.
Here's why a wider format makes a difference:
- Go big with your designs: It’s essential for creating those popular oversized graphics on adult tees and hoodies.
- Waste less vinyl: You can squeeze multiple smaller designs onto a single sheet of vinyl—a technique called "nesting"—which drastically cuts down on material waste.
- Take on more projects: A wider cutter isn't just for shirts. It opens the door to creating banners, signs, and other profitable items.
Think of it like this: a 12-inch cutter is your standard home baking tray, good for a batch of biscuits. A 24-inch cutter is the commercial-sized sheet that lets you bake in volume, saving you time, energy, and ingredients.
Speed and Force Customisation
Two of the most crucial settings on any vinyl cutter are cutting speed and blade force. Speed controls how fast the blade zips around, while force determines how hard it presses into the material. The right balance is everything if you want clean, crisp cuts every time.
For instance, standard heat transfer vinyl (HTV) doesn't need much force. But what happens when you want to use thicker, more exciting materials like glitter, flock, or metallic vinyls? You'll need a machine that can apply a lot more pressure to slice through cleanly without snagging or tearing the material.
Having fine-tuned control over speed and force is what gives you creative freedom. It's the difference between being stuck with basic vinyls and being able to explore unique textures that make your designs truly pop.
Software Compatibility and Ecosystem
The machine itself is only one part of the equation. The software that runs it is just as important. In the world of hobby and small business cutters, the two big names you'll hear constantly are Cricut Design Space and Silhouette Studio.
- Cricut Design Space: This one is known for being incredibly user-friendly and intuitive, which makes it a fantastic starting point for beginners. The catch is that it's cloud-based, so you need an internet connection to use it.
- Silhouette Studio: This is a more powerful, desktop-based software that offers some seriously advanced design features. It has a bit of a learning curve, but it gives you far more creative control if you like designing from scratch.
Your choice here really defines your entire workflow. The best advice? Download the free versions of both and have a play around. See which one feels more natural and powerful for what you want to achieve before you commit to buying the hardware.
Vinyl Cutter Feature Comparison for Shirt Printing
Choosing a vinyl cutter often comes down to balancing your current needs with your future ambitions. Whether you’re just starting out or ready to scale up, this table breaks down what you can expect at different levels.
| Feature | Entry-Level (Hobbyist) | Mid-Range (Small Business) | Professional (High Volume) |
|---|---|---|---|
| Typical Cutting Width | 12-15 inches | 15-24 inches | 24-60+ inches |
| Max Cutting Speed | Lower speeds, suitable for simple designs | Moderate speeds with good acceleration for efficiency | Very high speeds for mass production |
| Max Cutting Force | 210-300g, suitable for standard HTV and vinyl | 300-500g, handles thicker materials like glitter and flock | 600g+, cuts tough materials like sandblast mask and twill |
| Software | Proprietary, cloud-based software (e.g., Cricut) | Advanced proprietary or 3rd-party compatibility (e.g., Silhouette Studio) | Professional design software plugins (e.g., Adobe Illustrator) |
| Best For | Personal projects, Etsy shops, low-volume orders | Growing businesses, handling varied materials, moderate volume | Full-scale print shops, large runs, diverse product offerings |
Ultimately, the best machine is the one that empowers you without overwhelming you. An entry-level cutter is perfect for testing the waters, while a professional machine is an investment in serious growth.
Of course, a vinyl cutter is just one way to decorate a shirt. Other methods, like DTF (Direct to Film), are brilliant for producing vibrant, full-colour designs that feel soft on the fabric. If that sounds interesting, you can learn more in our guide to the DTF printing machine and see how it stacks up.
A Look at the Top Vinyl Cutter Brands in the UK
Choosing a vinyl cutter can feel a lot like buying a car. You've got your reliable daily drivers perfect for beginners, performance models for those craving more control, and industrial workhorses built for heavy-duty production. In the UK, a few key brands really dominate the scene, and each one is built for a different kind of creator.
Figuring out who these brands are actually for is the secret to finding the perfect match for your t-shirt printing ambitions. We'll break down the main players, from the hobbyist-friendly powerhouses to the professional-grade machines that keep commercial print shops humming.
For Hobbyists and Startups: Cricut and Silhouette
For anyone just dipping their toes into making custom shirts with a vinyl printer, two names pop up time and time again: Cricut and Silhouette. These brands have absolutely nailed the art of making powerful tech feel simple, turning what used to be a complex process into something you can master from your kitchen table.
Cricut: The User-Friendly Innovator
Think of Cricut as the Apple of the craft cutter world. Its biggest win is its polished ecosystem and incredibly easy-to-use software, Cricut Design Space. Everything is designed to work together without a hitch, making it the go-to for anyone who just wants to get creating with minimal fuss.
- Who it’s for: The beginner, the hobbyist, or the Etsy seller who wants a straightforward, out-of-the-box experience without a massive learning curve.
- Key Strengths: Exceptionally simple software, a huge range of compatible materials and tools, and a massive community for support and inspiration.
- Things to consider: It’s a bit of a walled garden; you have to use their Design Space software, which needs an internet connection to work.
Machines like the popular Cricut Maker series are brilliant for producing high-quality shirt designs, but where they truly shine is in making the entire process feel completely effortless.
Silhouette: The Customisable Powerhouse
If Cricut is the easy-to-use smartphone, then Silhouette is the custom-built PC. It gives you a lot more control and creative freedom, mainly through its powerful desktop software, Silhouette Studio. This software packs in more advanced design features without needing to be online, which is a huge plus for creators who want to really push the boundaries.
- Who it’s for: The creator who enjoys tinkering, wants granular control over their designs and cut settings, and loves the freedom of offline, desktop-based software.
- Key Strengths: Advanced software features (even in the free version), no reliance on the cloud, and the flexibility to work with a wider range of third-party tools.
- Things to consider: The software has a steeper learning curve than Cricut’s, which can feel a bit daunting for total beginners.
A machine like the Silhouette Cameo really empowers users who want their design skills to grow right alongside their printing business.
For Scaling Businesses: Graphtec and Roland
When your side hustle starts turning into a high-volume business, your equipment needs change. Suddenly, speed, precision, and relentless durability aren't just nice-to-haves; they're essential. This is where the professional-grade brands like Graphtec and Roland step in, offering the industrial muscle needed for serious production.
These machines are a massive step up in both performance and price. They aren’t just built to cut vinyl; they’re built to do it for hours on end, day after day, with unwavering accuracy. For any business where time is money and quality is everything, that’s a game-changer.
Graphtec: The Precision Workhorse
In the professional sign-making and apparel world, Graphtec is a name that means reliability and pinpoint accuracy. Their cutters are engineered for pure performance, using powerful servomotors that deliver faster, quieter, and far more precise cuts than the stepper motors you find in hobby machines.
A Graphtec cutter is an investment in pure efficiency. It can handle huge rolls of vinyl and slice through intricate designs at speeds that leave consumer models in the dust, making it perfect for businesses pumping out dozens or even hundreds of shirt orders every day.
Roland: The Industry Standard for Quality
Roland is another giant in the professional printing game, famous for its legendary build quality and incredible performance. You'll find Roland machines in commercial print shops that demand the absolute best in reliability and output. Many of their models even offer integrated print and cut functions, letting you handle full-colour designs on printable vinyl all in one go.
For a business looking to scale up and offer a massive range of custom apparel, a Roland machine provides the power and versatility to tackle any demand. The higher initial cost is easily justified by their incredible lifespan, production speed, and the professional quality they deliver every single time. It ensures your vinyl printer for shirts setup can handle any job you throw at it.
Your Step by Step Guide to Making a Vinyl Shirt
Step 1: Finalise and Mirror Your Design
Before you even think about cutting, your journey begins on the computer. Get your design finalised in your software, making sure every line is exactly how you want it. Once you’re happy, there’s one golden rule you can’t forget: mirror your design.
Flipping the image horizontally is non-negotiable for heat transfer vinyl. It will look backwards on your screen, which is precisely what you want. When you press it onto the fabric, it’ll appear the right way around. Trust us, skipping this step is a classic beginner's mistake that leads to a lot of wasted vinyl.
Step 2: Load and Cut Your Vinyl
With your design mirrored and ready, it’s time to prep the vinyl. Place your sheet of heat transfer vinyl (HTV) onto your cutting mat with the shiny side facing down. That shiny bit is the clear carrier sheet that holds everything together. The duller side, which is the heat-activated adhesive, should be facing up, ready for the blade.
Load the mat into your vinyl cutter and double-check your material settings in the software. Whether you're using standard HTV, a glitter finish, or a soft flock, choosing the right setting is key. Hit 'cut', and the machine will get to work, precisely tracing your design onto the vinyl layer while leaving the carrier sheet untouched.
Step 3: Weed Your Design
This is probably the most satisfying part of the whole process. Weeding is where you peel away all the excess vinyl that isn't part of your final graphic, making your design come to life.
Using a weeding tool (it looks a bit like a dentist’s pick), you’ll carefully lift away the negative space. Don’t forget the tiny bits inside letters like ‘o’, ‘p’, and ‘a’! For really complex designs, a well-lit workspace is your best friend. Start from a corner and peel back slowly, using your tool to keep any small pieces of the design from lifting off the carrier sheet.
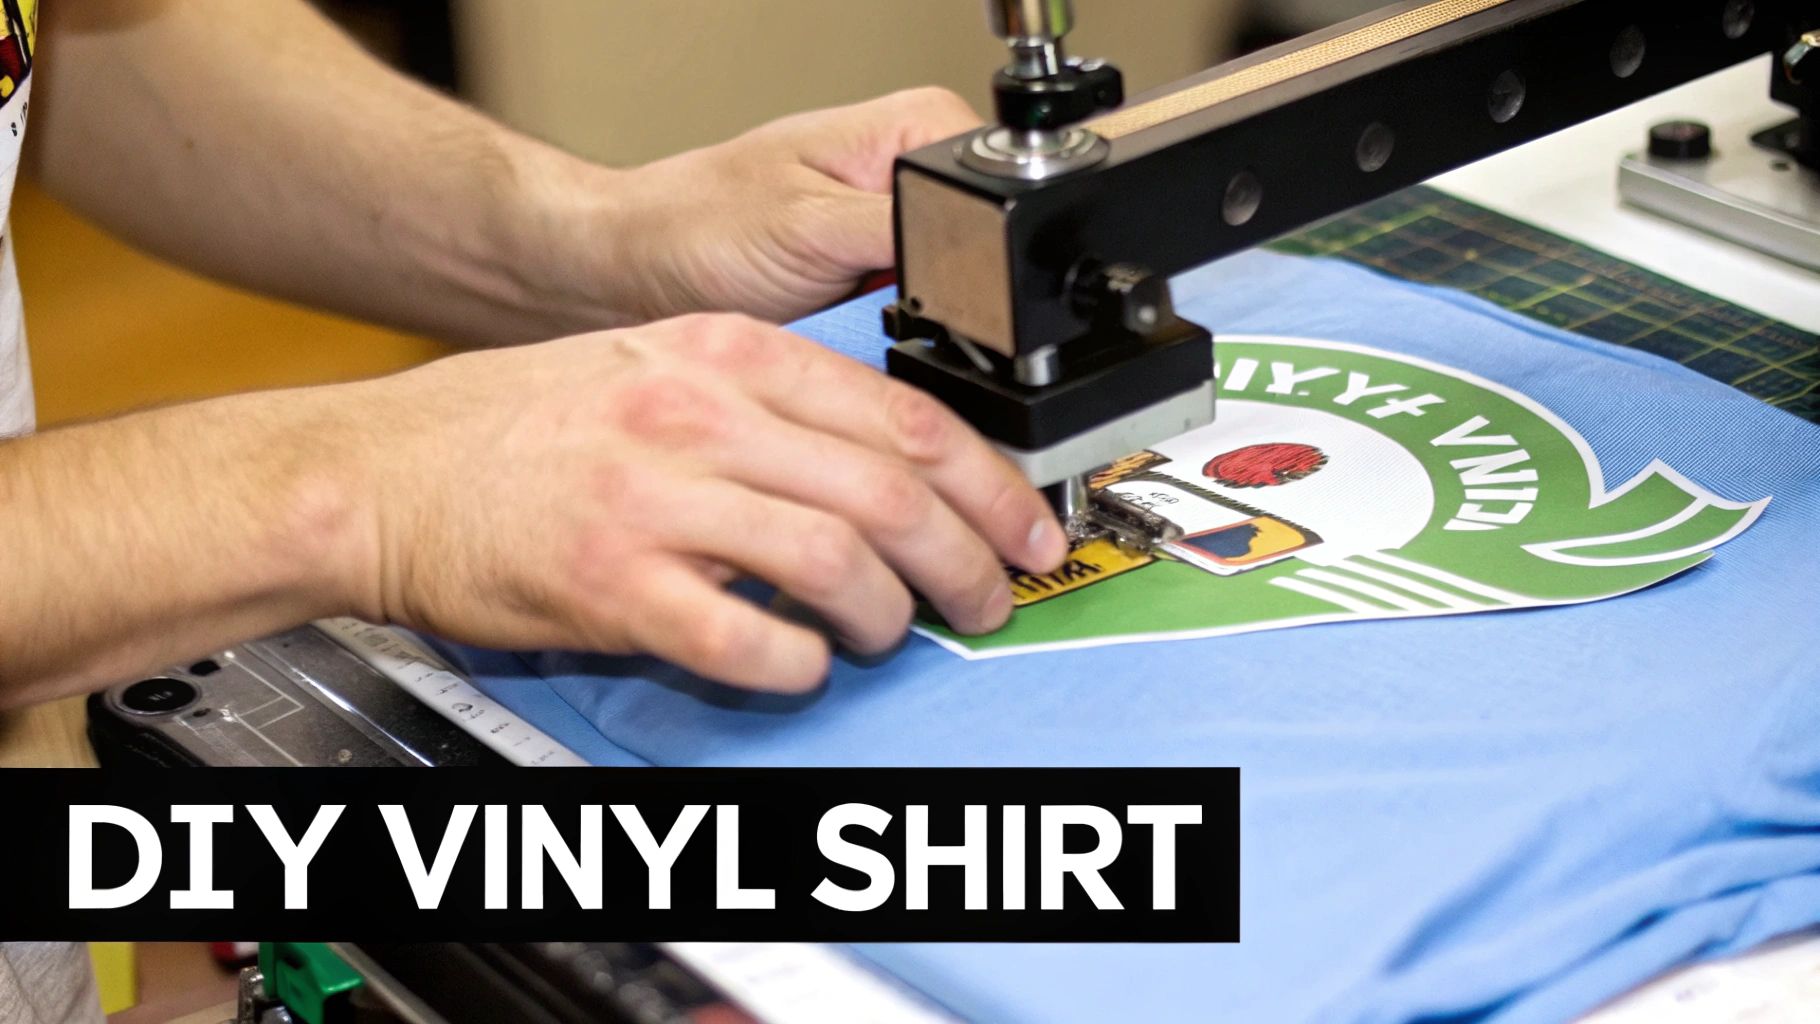
Step 4: Position and Press
Now for the magic. Start by giving your T-shirt a quick 5-10 second "pre-press" on your heat press. This simple step removes moisture and smooths out any wrinkles, giving you a perfect canvas for your design.
Next, carefully place your weeded design onto the T-shirt. The sticky carrier sheet helps hold it in position, so you can get it just right. For a truly professional finish, use a ruler or a T-square guide to make sure it's perfectly centred. Once you’re happy with the placement, cover it with a Teflon sheet or a piece of parchment paper to protect the fabric from the direct heat.
Pro Tip: Not all vinyl is the same when it comes to the final reveal. Hot peel vinyl means you can pull the carrier sheet off immediately after pressing. Cold peel vinyls, on the other hand, require you to wait until it's completely cooled down. Always check your vinyl’s instructions to avoid a last-minute disaster.
Finally, clamp down the heat press. Make sure you're using the manufacturer’s recommended settings for temperature, time, and pressure, as these are crucial for a bond that will last wash after wash. When the timer goes off, open the press, peel according to your vinyl type, and admire your brand-new custom shirt!
Once you've got the hang of this, you might start thinking about selling your creations. Learning how to create an online store is a great next step to turn your craft into a side hustle. The demand is definitely there—the UK apparel market is expected to hit around USD 2.42 billion by 2025. You can dig into more insights on the growing UK t-shirt market on Statista.com. If you're curious about other methods, check out our guide on t-shirt printing for personalised garments.
How to Maintain Your T-Shirt Printing Equipment

Your equipment is the heart of your entire printing operation, and honestly, proper care isn't optional if you want to deliver consistent, professional results. It's best to think of maintenance not as a chore, but as preventative medicine for your business. Just a few minutes of regular attention can save you from hours of frustration and some seriously costly repairs down the line.
Just like a car needs its oil changing to run smoothly, your vinyl cutter and heat press need routine checks to perform at their peak. Neglecting them is a fast track to poor-quality shirts, wasted materials, and eventually, a dead machine.
Caring for Your Vinyl Cutter
Your vinyl cutter is a precision instrument. Keeping it finely tuned is absolutely essential for getting those crisp, clean cuts that make a design pop. Even small issues here can quickly ruin an entire project, so paying attention to a few key components will make a massive difference to your workflow.
A simple checklist can keep your machine in top shape:
- Replace Your Blade Regularly: A dull blade is the number one cause of poor cuts, snagged vinyl, and weeding nightmares. Replace it at the first sign of tearing or jagged edges to maintain that professional quality.
- Clean the Rollers: The rollers grip and guide the vinyl through the machine. Just wipe them down with a soft, lint-free cloth to remove any dust and debris that might cause the vinyl to slip or track incorrectly.
- Inspect the Cutting Strip: This thin strip protects your blade and ensures clean cuts. If it gets heavily grooved or damaged, replace it immediately. It’s a small part that prevents big problems.
Heat Press Maintenance Essentials
Your heat press is the final, crucial step in creating a durable, long-lasting garment. You need to be sure it's delivering even heat and consistent pressure every single time.
Just a small amount of residue or an uneven platen can compromise the bond between the vinyl and the fabric. That’s what leads to those dreaded peeling designs after just a few washes. Consistent maintenance is really the key to happy, repeat customers.
To keep your press in prime condition, regularly clean the heat platen with a soft cloth to remove any adhesive residue or stray fibres. You can also do a quick pressure test: place four small squares of paper at each corner and clamp it down. If all four pull out with the same resistance, your pressure is nice and balanced. Our guide on choosing a UK heat press machine offers more tips on what to look for in a reliable model.
The custom apparel world is booming. By 2025, the global market is forecasted to hit USD 6.84 billion, climbing all the way to USD 11.93 billion by 2030. Keeping your vinyl printer and press in top form ensures you can produce quality products to meet this rising demand. You can find out more about the expanding custom T-shirt market on MordorIntelligence.com.
Common Questions About Vinyl Shirt Printing
Diving into the world of vinyl shirt creation? You've probably got a few questions buzzing around. It's completely normal, especially when you're just starting out. Getting some clear, straightforward answers is the best way to build your confidence and make sure you're putting your time and money in the right places. Let’s clear up some of the most common queries.
Do I Need a Special Ink Printer for Vinyl Shirts?
For most projects, the answer is a simple no. If you’re using standard Heat Transfer Vinyl (HTV), your essential tools are a vinyl cutter to shape your designs from pre-coloured sheets and a heat press to bond them to the fabric. There's no ink involved in this workflow at all.
The only time you’d need a specialised eco-solvent printer is if you decide to work with printable HTV. This is a different type of material that lets you print full-colour, detailed images (like photos) directly onto the vinyl before you cut and press it. For anyone new to the game and focusing on text, logos, and solid-colour graphics, a cutter and a heat press are all you need to get going.
How Durable Are Vinyl Shirts?
When you use good-quality HTV and apply it correctly, the finished design is incredibly tough. You can expect it to handle 50+ washes without any trouble—no cracking, peeling, or fading. It’s a genuinely professional and long-lasting finish.
Think of it this way: screen printing ink soaks into the fabric, while HTV creates a sharp, durable bond on top of it. For bold graphics, company logos, and custom names on smaller runs, vinyl offers fantastic resilience that customers really appreciate.
What Is the Starting Cost for This Setup in the UK?
Your initial investment really comes down to what you want to achieve.
- For Hobbyists: You can get a brilliant setup for personal projects with a machine like a Cricut or Silhouette and a decent heat press, starting from around £400 to £600.
- For Small Businesses: If you're planning to sell your creations and need to handle more volume, stepping up to a wider cutter and a more robust press will likely set you back between £1,000 and £2,500.
Don't forget to budget for your first batch of supplies, too—things like vinyl sheets, blank t-shirts, and weeding tools. And if you're thinking of turning this into a proper business, finding customers is key. Figuring out a practical marketing strategy for small businesses early on can make all the difference.
At Psyque, we specialise in bringing even the most complex, full-colour designs to life with our professional DTF printing services. Explore our collections or get in touch for a bespoke order at https://psyque.co.uk.