
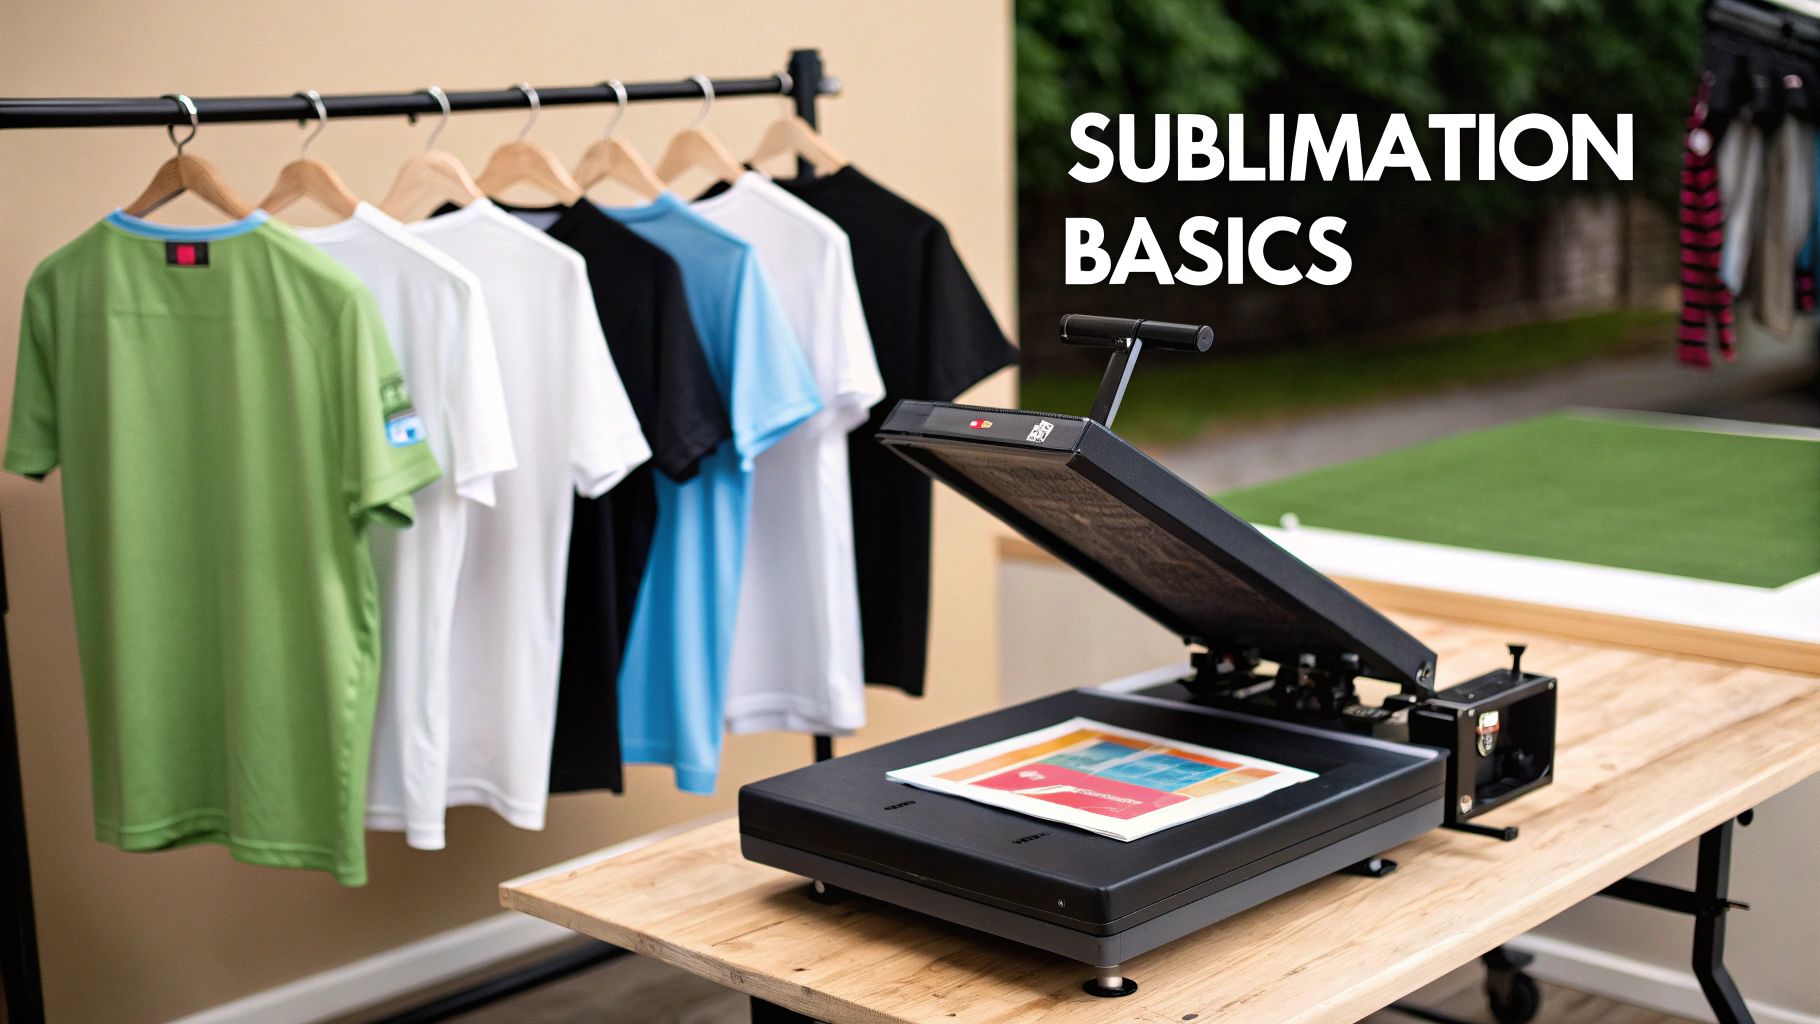
Ultimate Heat Press Sublimation Guide For Vivid Transfers
Heat press sublimation works by transforming solid ink into gas and embedding it deep within polyester fibres for vivid, durable graphics. The outcome? Colours that shrug off fading and a print you can’t feel under your fingertips, because it’s part of the fabric itself.
Key Concepts Behind Heat Press Sublimation
Every sublimation print starts as a mirrored design on specialised paper, using inks formulated to vapourise under heat. Once you lock in the right temperature and pressure, those ink vapours fuse with the polymer coating on your substrate.
Picture a small apparel startup in a garage-studio, dialing in settings for football jerseys made from different polyester blends. They tweak temperature, pressure and dwell time until each transfer looks flawless—and customers keep coming back.
Temperature Pressure And Dwell Time Fundamentals
- 195–205°C at medium pressure for lightweight jerseys—this keeps the fabric feeling soft.
- 190–200°C with around 4–5 bar of pressure when you’re working on thicker polyester hoodies.
- 180°C and a longer dwell of 60–90 seconds for delicate sportswear, preventing scorch marks and ensuring crisp lines.
Advanced platen designs help maintain uniform heat across the entire surface, cutting down on rejects when you’re running small batches.
Eco-Friendly Inks And Waste Reduction
Switching to water-based sublimation inks isn’t just marketing—it genuinely lowers chemical discharge and supports greener production.
Pair those eco-conscious inks with low-viscosity formulations and high-precision printheads to minimise overspray and ink wastage, all while maintaining razor-sharp detail.
In 2024, the UK dye-sublimation printing market hit USD 1,178.8 million, reflecting strong demand in textiles and promotional merchandise. For a deeper dive into regional trends, check out this Grand View Research report.
“You get richer colours when ink fully impregnates the fabric rather than just sitting on the surface,” says a seasoned printer.
Choosing The Right Heat Press Machine
Clamshell designs are perfect for flat t-shirts and tote bags, but a swing-away press gives you that extra margin of safety when handling thicker substrates like mugs or wood boards.
Look for digital temperature controls and calibrated pressure gauges—these features save you from guesswork and deliver reliable results, run after run.
Small Studio Workflow Example
Imagine you’re running a home studio with an 8×10 inch platen. Set it to 200°C, press for 50 seconds and voilà—you’re cranking out a customised jersey every minute without your press overheating.
Switch between hot-peel and cold-peel techniques depending on the blend. Cold peels often give sharper edges on light garments, while hot peels speed up your throughput.
Modern presses even offer quick-swap platens, slashing changeover time by up to 30% in micro-run scenarios.
Key Takeaways
- Gas Phase Bonding locks colour into polyester fibres for wash-resistant, long-lasting prints.
- Controlled Heat Zones and precise pressure settings ensure even coverage on every design.
- Eco-Friendly Inks and smarter platen workflows cut waste and boost overall efficiency.
Ready to get started? For a comprehensive, step-by-step guide—plus printable templates—head over to our in-depth tutorial on Dye Sublimation T-Shirt Printing.
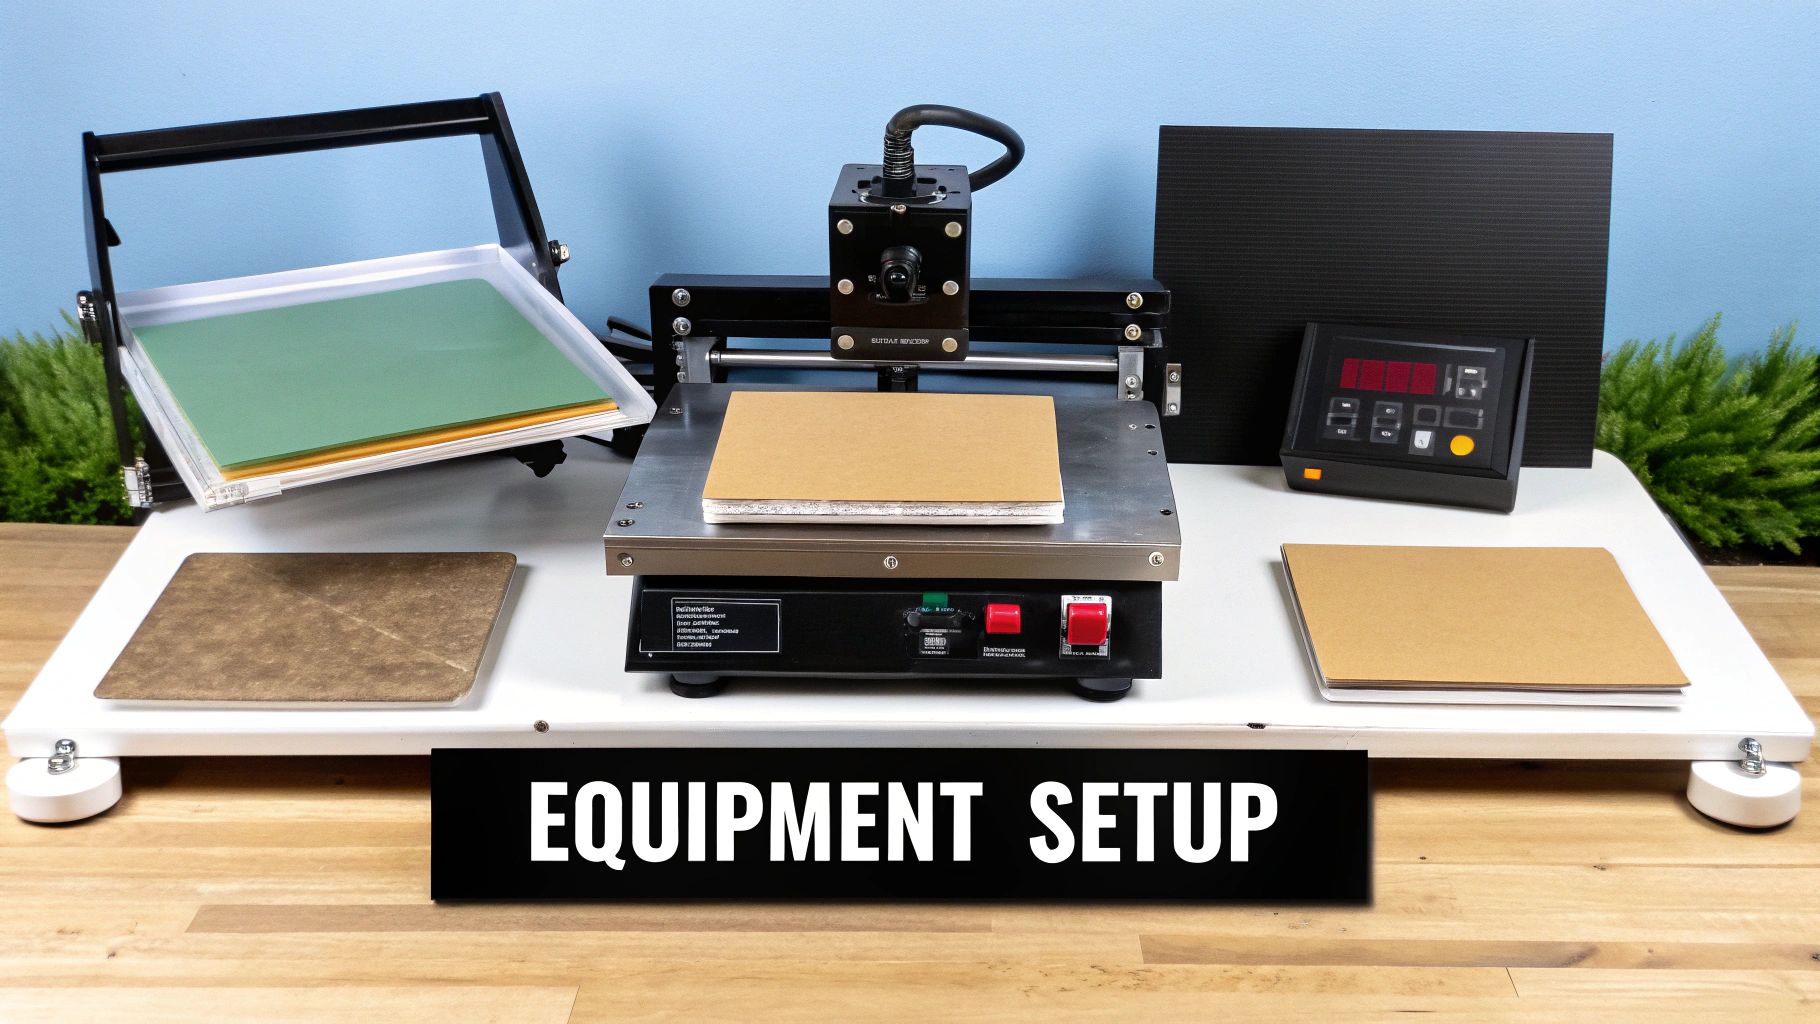
Setting Up Equipment And Choosing Supplies
Picking the right heat press can make or break your sublimation workflow. Get it right, and you’ll hit consistent results from day one.
Whether you’re cranking out small batches of coasters or tackling hoodies and banners, the machine you choose defines your throughput and versatility.
- Clamshell Press: Ideal for flat garments and quick turnarounds—closes from top to bottom in seconds.
- Swing-Away Press: Perfect for thicker substrates—the platen swings clear so you can load bulky items without stress.
- Platen Size: Match your artwork dimensions. Small platens suit mugs and coasters; larger ones handle hoodies, flags and banners with ease.
Ink chemistry matters as much as your press choice. Opt for formulations boasting exceptional wash-fastness to keep colours popping after 50+ washes. And don’t overlook paper weight: 300gsm sheets stand up to canvas substrates, while 120gsm stocks glide through polyester blends without adding bulk.
Essential Extras For Consistency
A few extras in your toolkit will save headaches down the line. Teflon sheets guard your platens and distribute heat evenly across every transfer.
- Heat-Resistant Tape secures your design edges, stopping shifts under pressure—and it won’t leave sticky residue.
- Calibration Tools like infrared thermometers and pressure test strips ensure you’re hitting the right heat and force every time.
A finely tuned setup slices trial-and-error time in half and slashes wasted substrates.
The image below shows a digital control panel that nails temperature, time and pressure with precision.
Notice the even heat distribution across the macro platen and preset dwell times between 45 and 60 seconds.
In the UK print scene, automatic heat presses can cut user error by up to 30%, running at 400–450°F for 45–60 seconds to guarantee sharp, vibrant transfers every time. Learn more in the Data Insights Market report on heat press machines.
For a dive into machine features and workflow tips, see our heat press for sublimation guide.
One seasoned T-shirt maker I know swapped to a 12×15 inch platen with mid-weight paper—she trimmed over 15 minutes off her daily setup just by matching platen to design size.
| Platen Option | Dimensions | Ideal Use |
|---|---|---|
| Small | 5×5 inch | Coasters, keyrings |
| Medium | 12×15 inch | T-shirts, mouse mats |
| Large | 30×38 inch | Hoodies, banners |
Refer to this table when planning batches and lining up your designs.
Digital readouts are a must—analogue dials drift and sabotage consistency over time. An auto-open feature also helps prevent scorching by lifting the platen the instant your cycle ends.
Keep isopropyl alcohol and a lint roller within arm’s reach. A stray fibre or oil spot can leave ghost images, so spot-clean every substrate before pressing.
Power And Ventilation Needs
Most heat presses draw around 1,500W, so double-check your workshop circuit to avoid blown fuses.
Good airflow is non-negotiable. Sublimation inks release ozone and volatile compounds when heated, so an extraction fan or open window will keep your space fresh and safe.
Invest in a heavy-duty power strip with built-in surge protection. It guards your press and peripherals against unexpected spikes, cutting the risk of downtime and costly damage.
- Run preheat trials on scrap material to confirm your settings before committing to live jobs.
- Keep a logbook of your temperature, pressure and dwell-time combos for quick reference.
- Alternate large-volume jobs across multiple platens to prevent hotspot wear.
- Label each paper and ink batch so you can track ageing and dodge colour shifts.
Preparing Substrates And Aligning Designs
Nothing kills colour vibrancy like a dusty or oily surface. Getting your substrate spotless ensures every press comes out sharp—no ghosting, no surprises.
A quick wash and careful alignment might add minutes to your prep, but they save hours (and material) down the line.
Pre-Wash Tips
Washing polyester blends before you press is non-negotiable. It strips away factory finishes that repel ink and can cut rejects by up to 30%.
- Choose a gentle detergent. Skip fabric softeners to keep the polyester’s ink-friendly coating intact.
- Rinse twice—soap residues are a common culprit in dull transfers.
- Dry on low heat or hang in a clean, dust-free spot.
Dust And Oil Removal
Even invisible dust specks or skin oils show up as blemishes once the ink flows. A quick once-over eliminates these tiny villains in under a minute per garment.
- Roll a lint roller with firm pressure along seams and high-contact zones.
- Wipe flat areas with isopropyl alcohol wipes, then let air-dry completely.
Aligning T-Shirts And Fabrics
Getting your design centred transforms a good print into a great one. Folding guides and low-tack tape are your best friends here.
- Fold the tee vertically to find its centre and press it flat on the platen.
- Measure equal distances from the collar to each side of your transfer paper.
- Secure the paper’s corners with low-tack tape to stop any slipping during the heat cycle.
This simple routine helped one print shop slash reworks by 20% last quarter. For deeper insights on paper handling and substrate prep, check out our guide on T-shirt printing papers.
Stabilising Stretchy Fabrics
When you’re working with spandex or Lycra blends, movement is the enemy of crisp edges. A scrap backing sheet and multiple tape strips can lock everything in place.
- Tuck a scrap of fabric behind the transfer zone to support the fibres.
- Use several short strips of low-tack tape instead of one long piece for better grip.
- Pre-stretch the fabric slightly—this prevents puckering when the heat hits.
One small sportswear brand saw a 70% drop in ghosting by adopting this hack—essential for high-speed runs.
Aligning Banners And Flags
Large-format work demands a different strategy. A laser line or chalk marks give you a visual guide, while weighty clips maintain tension along folds.
- Project a straight laser line along your platen edge for a foolproof reference.
- Mark banner corners with chalk or heat-resistant pens.
- Use customised wooden jigs to keep flag dimensions consistent.
A banner shop I know cut prep time by 40% using these tips. Always run a test piece on waste material first.
Interestingly, the UK commands a 12.1% share of the European sublimation paper market, with medium-weight papers leading at 52.7%—optimised for presses at 190 °C. Learn more about these findings from the Future Market Insights report.
Preventing Ghost Images
Leftover ink vapour can reappear as ghosty shadows on cool areas. A routine platen clean and quick peel test catch issues before they cost you runs.
- Wipe the platen with isopropyl alcohol after every press.
- Inspect edges and corners weekly for ink build-up.
“A hot peel on half-pressed samples reveals ghosting before a full run.”
– Workshop Technician
One studio boosted its first-pass yield by 25% simply by adding these checks to their monthly maintenance.
Hard Goods And Mug Wraps
Mugs, tumblers and other hard items need wraparound precision. Cling-film and a simple table template can take the guesswork out of registration.
- Wrap the printed design in cling-film, overlapping at the seal.
- Slide or rotate your template to confirm full coverage before you heat.
- Trap the film under the platen only after you’ve verified the fit.
A craft-fair vendor once averted 15 consecutive misprints using this method—real savings in time and materials.
| Tool | Ideal Use | Key Benefit |
|---|---|---|
| Cling-film | Hard goods wraps | Full 360° coverage control |
| Low-tack tape | Fabric edges | Easy repositioning |
After everything’s locked in place, you’re ready for the heat-press settings you’ve dialled in.
Quick Alignment Workflow
A streamlined alignment routine can save precious minutes on every job. Keep your guides organised and your phone ready.
- Print a full-scale mock-up on budget paper to preview placement.
- Clip or magnet-fix guides to your platen edges for instant reference.
- Snap a quick smartphone photo of your setup—you’ll replicate it flawlessly next time.
By standardising this workflow, you can shave around 10% off setup time across diverse substrates. Tuck a laminated cheat sheet beside your press for fast reference.
Executing Transfers And Optimizing Parameters
Consistency in sublimation isn’t luck—it’s the result of precise settings and diligent record-keeping. In one print shop I worked with, small, data-driven tweaks slashed setup time by 15% over a single month.
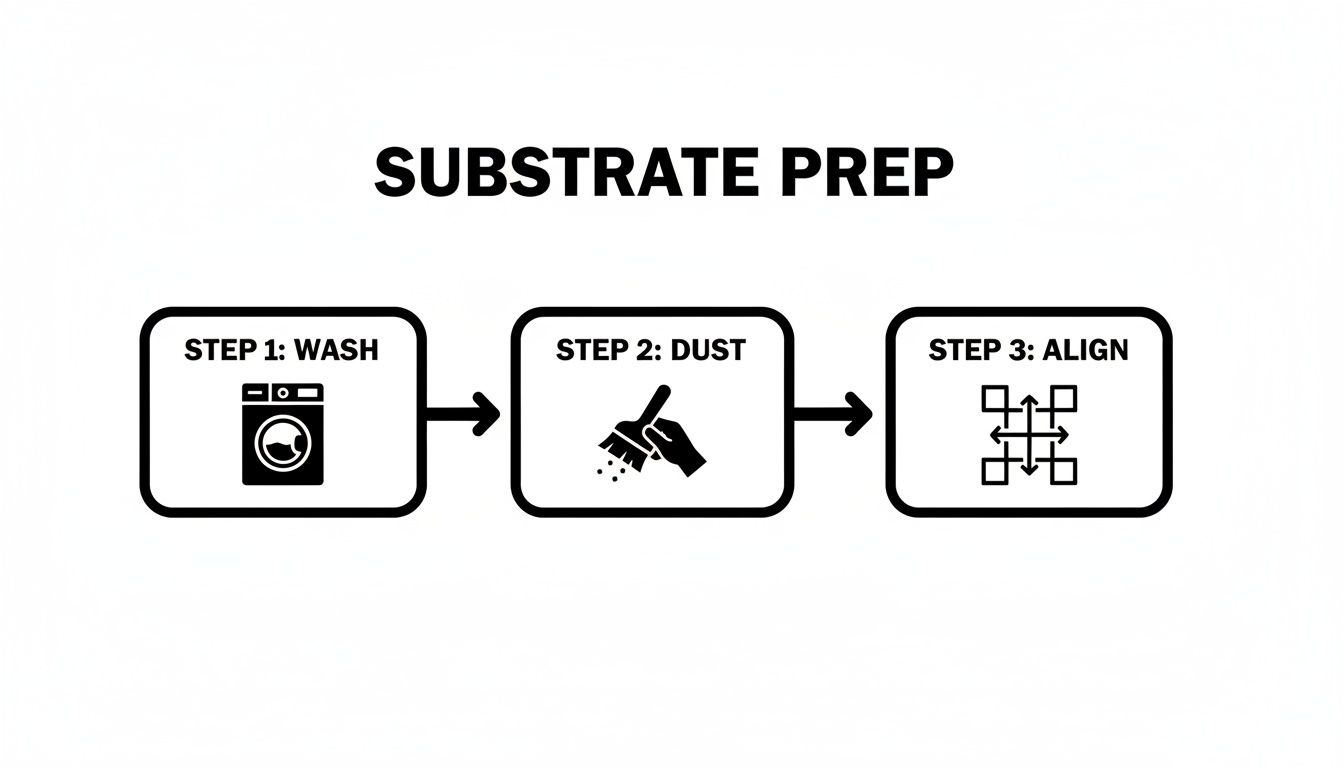
That simple flowchart underlines three non-negotiable steps: washing, dust removal and accurate alignment. Skip any of those, and ghosting will creep in.
Matching Settings To Materials
Every substrate draws heat and pressure differently. Here’s a quick reference to keep you on track:
Heat Press Settings For Common Substrates
| Material | Temperature | Pressure | Time |
|---|---|---|---|
| Lightweight T Shirt | 200°C | Medium (3–4 bar) | 50 s |
| Polyester Hoodie | 195°C | High (5–6 bar) | 60 s |
| Hardboard | 190°C | Medium (4 bar) | 70 s |
| Ceramic Mug Wrap | 185°C | Light (2–3 bar) | 90 s |
These figures are your starting point. Always run a short trial on your actual press to fine-tune for platen quirks.
Peel Methods And Test Runs
Choosing between a hot peel and a cold peel can make all the difference to image clarity and production speed.
• Cold peel sharpens fine details on pale fabrics.
• Hot peel speeds up throughput on bulkier, darker garments.
I recommend pressing small swatches on leftover scraps first. Track each result—temperature, pressure, peel style—in a simple spreadsheet. That way, you’ll know exactly which combination works before committing to the final run.
Dive deeper with our Heat Press Temperature Guide
“Standardising settings and logging runs boosted this studio’s yield by over 20%.”
Maintaining Consistent Transfers
• Wipe down platens with isopropyl alcohol after every session.
• Check pressure calibration strips once a month.
• Rotate platens in high-volume runs to even out wear.
• Archive logs and swatches digitally for quick lookup.
These small routines cut unexpected rejects and keep your press humming day in, day out.
Optimising Workflow Efficiency
It’s surprising how minor adjustments can add up to big gains over time:
• Preheat the platen while loading garments to shave seconds off each cycle.
• Label each platen by material type for faster changeovers.
• Invest in quick-swap platens if you’re juggling fabrics and hard goods.
• Review your logbook monthly to uncover new efficiency wins.
One micro-studio I consulted with trimmed press cycles by 12% in just three months thanks to this approach.
Quality checks should also be baked into your routine. Before every job, run wash tests, inspect edges and stress-test samples. A simple multi-point checklist ensures nothing slips through the cracks.
Consistency scales your business. Stay vigilant, revisit your records regularly, adjust pressure by 0.5 bar when you spot blurring—and keep an eye on workshop humidity to prevent transfer hiccups.
Finishing Transfers And Troubleshooting Issues
When a transfer comes off the heat press, the way you cool and handle it shapes the final look. Peel too soon or too late and you’ll notice colour shifts or soft edges. A quick 5 to 10 minutes rest on the rack helps designs settle before you move on.
“Routine maintenance of your heat press sublimation platens prevents up to 70% of common transfer defects.”
Cooldown And Peeling Methods
Every substrate reacts differently once you lift the platen. Darker polyester fabrics love a hot peel—strike while the iron’s at peak temperature for bold, vibrant hues. Lighter synthetics, on the other hand, hold crisp lines best if you wait until they’ve cooled.
In my studio, I always run a small swatch test on scrap material. It’s the quickest way to dial in the ideal peel timing.
- Slide in a sheet of parchment paper when peeling hot to save your prints.
- Keep heat-resistant gloves nearby to dodge accidental burns.
- Jot your favourite peel delay into the press’s control panel for consistency.
Protective Coating And Platen Care
When you’re working on mugs, aluminium panels or tiles, a clear polyester spray adds a shield against scuffs and UV fade. Back in the workshop, we wipe down the platen with isopropyl alcohol after every 10 jobs—no stubborn residue allowed.
Safety First:
- Always unplug the press before any cleaning.
- Wait until the platen drops below 50°C before spraying a protective coat.
- Store Teflon sheets flat (never folded) to avoid creases.
Troubleshooting Common Transfer Issues
Notice pale borders? That’s almost always low pressure or an uneven heat footprint. Cranking up the force by 0.5 bar usually brings edges back to life. Ghost images? They happen when old ink lingers on the platen. A sacrificial release sheet beneath your garment catches that phantom print before it ruins your day.
Uneven transfers often point to a warped platen—grab a straightedge and tighten those mounting screws as necessary.
A small print shop in Bristol recalibrated its pressure sensor last quarter and slashed rejects by 80% overnight. They also kicked off a monthly maintenance log to catch deviations before they spiral out of control.
| Issue Type | Likely Cause | Quick Fix |
|---|---|---|
| Faded Edges | Low Pressure | Increase by 0.5 bar |
| Ghost Images | Ink Residue On Platen | Use sacrificial release sheet |
| Uneven Transfers | Warped Platen | Realign and tighten platen screws |
| Smudged Details | Peel Too Hot | Switch to cold peel and test again |
“A well-calibrated sensor and cleaning routine can save hours of wasted materials,” notes a Bristol operator.
Regular Checks:
- Inspect platen flatness weekly with a feeler gauge.
- Log temperature and pressure settings for each job.
- Replace Teflon sheets after 1000 cycles.
Burn Prevention And Workspace Safety
Handling reds and blues at high heat demands vigilance. Always wear heat-resistant gloves when the platen is hot. Keep your work area clear to avoid trips or accidental contact with heated surfaces. And make sure a suitable fire extinguisher is within arm’s reach.
Long Term Press Care
Every quarter, give your press a deep clean and tune-up. Soak Teflon sheets overnight in warm, soapy water to dissolve ink build-up. While they dry, peek at wiring and heating elements—swap out any frayed cables or loose connectors immediately.
Sensor Calibration Tips
Sensor drift can sneak up on you if you’re not checking regularly. Once a month, verify platen temperature with a certified calibration rod or infrared gun. If you spot readings outside ±2°C, fit a new sensor. Keeping a calibration log helps you spot small changes before they escalate.
A quick weekly test print can head off issues long before they derail production. With these routines in place, every heat-press sublimation run will be smoother, faster and more reliable.
Comparing Sublimation And DTF For Commercial Success
Heat press sublimation shines when you need eco-friendly, water-efficient transfers on polyester at scale. Direct-to-Film printing, by contrast, behaves like vinyl, clinging smoothly to cotton blends or mixed fibres. Ultimately, your choice will steer both material compatibility and production footprint.
Key Cost And Efficiency Metrics
On paper, bulk sublimation drops to about £0.50 per tee. DTF, once you factor in film and adhesive powder, sits closer to £0.65 a print. Yet on mixed fabrics, DTF often pulls ahead with faster press cycles.
- Cost Per Print: sublimation leads on polyester; DTF takes the crown on cotton.
- Wash Resistance: sublimated designs last beyond 50 washes; DTF holds firm for up to 30 cycles.
- Colour Gamut: sublimation hits roughly 90% of Pantone; DTF covers around 85%.
“We opted for DTF on blended tees to reduce rejects from polyester content,” says a boutique print house.
Sublimation Versus DTF Comparison
Below is a side-by-side glance at how these two processes stack up across key factors:
Sublimation Versus DTF Comparison
| Criteria | Sublimation | DTF |
|---|---|---|
| Cost Per Unit | £0.50 on polyester | £0.65 on mixed fabrics |
| Substrate Range | Polyester blends only | Cotton blends and synthetics |
| Wash Durability | Up to 50 washes | Up to 30 washes |
| Setup Complexity | Low (simple heat press) | Moderate (powder prep) |
This snapshot should help you weigh each method against your daily run sizes and fabric mix.
This screenshot details film placement and powder application before pressing, highlighting powder density and alignment tips.
Environmental And Workflow Considerations
Many print shops praise sublimation for its water-based inks and minimal media waste. DTF’s adhesive layer, however, bonds effortlessly to cotton and blends without extra coatings. Maintenance routines differ too: DTF heads need weekly powder cleanings, while sublimation presses usually require monthly platen wipes.
- Eco Impact: sublimation trims water use by up to 30%.
- Clean-Up: DTF demands regular powder removal; sublimation keeps things tidier.
- Speed: DTF cycles can be about 20% faster on mixed textiles.
You might be interested in learning more about DTF printing in our detailed guide on Direct-to-Film Technology.
Making The Right Decision
If your orders centre on polyester and batch sizes are large, sublimation often delivers the highest ROI thanks to low ink consumption and swift runs. On the other hand, when you’re juggling cotton blends or mixed fibres in smaller quantities, DTF’s straightforward prep and press steps cut down waste and turnaround times.
A few trial runs can reveal how wash durability, adhesion and colour consistency perform on your actual blanks before you commit. In practice, many operations blend both: they print team kits with sublimation and switch to DTF for cosy cotton hoodies, all under one roof.
Map out your sales channels and customer demands against each technology’s strengths. That way, whether you’re running a boutique studio or a large fulfilment centre, you’ll secure consistent quality, controlled costs and happier clients.
Frequently Asked Questions
We’ve pulled together the questions that pop up most often when dye-sublimating with a heat press. Think of these tips as your shortcut to smoother runs and fewer headaches.
Ideal Temperature Range For Fabrics
For most polyester pieces, I set the press between 190°C and 205°C to nail that rich, even colour.
Delicate blends respond better around 180°C, which keeps fibres from scorching.
I always trial a scrap first, adjusting by 5°C until the transfer sits perfectly.
Substrate Compatibility Tips
In my experience, polyester is the gold standard for dye-sublimation. When cotton or mixed fabrics enter the mix, switching to DTF ensures the ink actually sticks. For mugs and bottles, clamps plus cling-film keep everything snug. Wood panels? A Teflon sheet between the platen and print does wonders.
- Polyester: exclusive for sublimation
- Cotton/blends: use DTF transfers
- Ceramics & glass: heat clamps + cling-film
- Wood: protect with Teflon sheets
Preventing Ghosting
Ghosting shows up when ink vapour cools at different rates across the surface. A quick wipe of the platen after each press removes any lingering residue. I also slide in a sacrificial release sheet under every transfer—this simple habit cut ghost images by 80% at our Manchester studio.
Regular platen cleaning and quick peel tests catch issues early.
When To Use DTF Instead Of Sublimation
DTF really shines on dark or cotton-rich garments where sublimation simply won’t adhere. If you’ve got small runs of mixed-fibre tees, DTF saves time, cuts waste and keeps your costs down. It’s all about picking the right tool for the job.
Troubleshooting Uneven Transfers
Blotchy patches usually point to a warped platen or uneven pressure. I run a straightedge across the surface to verify flatness, then tweak pressure in 0.5 bar steps until coverage looks spot on. Press a test swatch each time to confirm.
- Inspect platen edges weekly
- Tighten mounting bolts if they’ve loosened
- Keep a log of adjustments and results
Peel Method Choices
Choosing hot peel will fire through bulk orders faster, though you might see slight blurring on very fine details. Cold peel, on the other hand, locks in crisp lines and brightness—a favourite for light fabrics and small batches. I always note peel times next to each sample to refine my approach.
If you’re keen to explore deeper heat-press techniques or compare sublimation head-to-head with DTF, check out our full guides online.