
Print and Transfer Paper: The Best Guide for Flawless Custom Designs
Ever wanted to create a one-of-a-kind t-shirt for an event, a personalised tote bag as a gift, or some branded gear for your small business? The big question is always the same: how do you get that brilliant design from your computer screen onto a piece of fabric?
That's exactly where print and transfer paper comes in. It's the key that unlocks DIY customisation for everyone, from weekend hobbyists to budding entrepreneurs. Think of it as a temporary tattoo for your t-shirt; it’s the bridge that carries your creative ideas from a screen to something you can actually wear.
Your Gateway to Custom Apparel
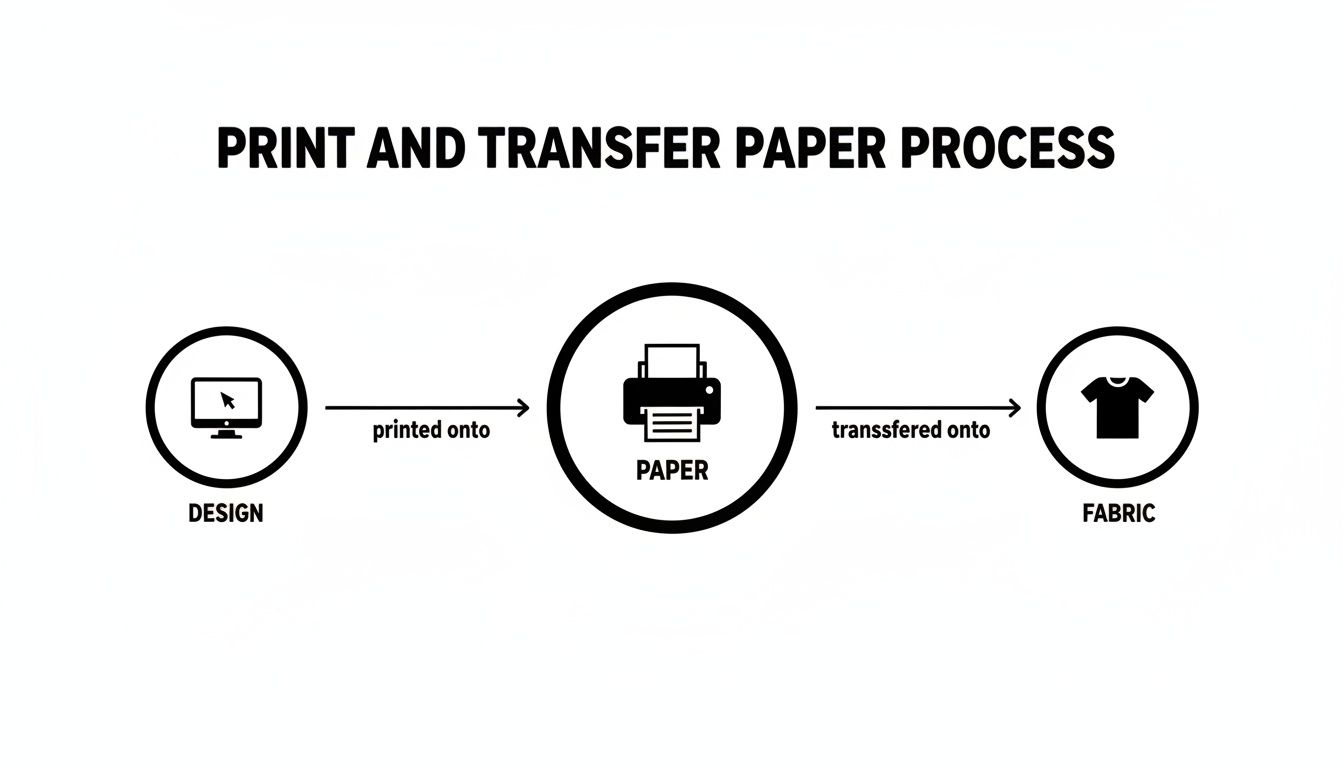
At its heart, the process is pretty straightforward. You print your design onto this special paper, position it on your garment, and then apply a good dose of heat and pressure. The heat gets to work on the paper's coating, releasing the ink and bonding it permanently to the fabric's fibres. It's a bit of everyday magic that turns a plain piece of clothing into a personal statement.
This simple process is what makes custom apparel creation possible right from your desktop.
The Different Families of Transfer Paper
Now, while the basic idea is simple, "print and transfer paper" isn't just one single product. It’s actually an umbrella term for several distinct technologies, and each one has its own unique strengths, quirks, and best uses. Getting your head around these different families is the first step to choosing the right method for your project.
The main categories you're likely to come across are:
- Inkjet/Laser Heat Transfer Paper (HTP): This is the most common starting point for beginners. It's designed to work with the standard printers most of us already have at home or in the office.
- Sublimation Paper: This one's fascinating. The process involves turning solid ink directly into a gas, which then dyes the fabric itself. The result is a design you can't even feel.
- Direct-to-Film (DTF) Transfers: A newer, more professional method where the design is printed onto a special film. This creates a durable and flexible graphic that can be pressed onto almost any type of fabric. Our guide on print heat transfers dives deeper into this very popular technique.
Each type of paper is engineered for a specific kind of ink, printer, and fabric. The magic isn't just in the paper itself, but in the synergy between the technology and the material you're printing on.
Grasping this fundamental idea—that the paper is just a carrier built for a specific transfer journey—is crucial. It’s the reason why one method leaves a soft finish while another feels like it's sitting on top of the fabric. It also explains why some transfers are perfect for cotton, while others will only work on polyester.
Before we get into all the technical details, just remember this: you're essentially choosing a vehicle to carry your design safely to its final destination. Your job is to pick the right one for the job.
Comparing the Different Types of Transfer Paper
Diving into the world of print and transfer paper can feel a bit like learning a new language. You've got DTF, sublimation, heat transfer paper, and even vinyl all vying for your attention. Each one offers a completely different way to get a design from your screen onto a t-shirt, and understanding how they work is the key to picking the right tool for the job.
At a high level, the process looks pretty similar for most of them: design, print, press. Simple enough, right?
But the magic is in the details. The specific technology used at each step is what determines the final look, feel, and how long your print will last. Let's break down exactly what makes each method tick.
Inkjet and Laser Heat Transfer Paper (HTP)
Think of standard heat transfer paper as your gateway into custom apparel. It’s designed to work with the everyday inkjet or laser printers you probably already have at home or in the office, which is why it’s a massive hit with hobbyists and anyone just starting out.
The process is pretty straightforward. You print your design onto a special sheet of HTP—mirrored for light-coloured garments, or right-reading onto opaque paper for darks. This paper is essentially a carrier for a very thin polymer film that holds the ink. When you press it with heat, that film lifts off the paper and sticks to the top of the fabric.
Key Takeaway: HTP creates a tangible layer that sits on top of the fabric. The feel can range from a soft, flexible film to something a bit stiffer and more obvious, especially with the papers made for dark garments.
This accessibility is its greatest strength. You can knock out a one-off t-shirt for an event or a personalised gift without investing in a load of expensive gear. The trade-off, however, is often durability. If not applied perfectly, that top layer can be prone to cracking or peeling after a few spins in the washing machine.
Sublimation Paper
This is where things get really clever. Unlike HTP, sublimation doesn't just stick a layer on top of the fabric. Instead, it uses a special dye-sublimation ink that does something amazing under heat: it turns from a solid straight into a gas, skipping the liquid phase entirely.
This gas then works its way into the polyester fibres of the garment and solidifies, permanently dyeing the material itself. You need a dedicated sublimation printer for this, and it only really works on polyester or high-polyester blend fabrics. The result is a print you literally cannot feel—it has zero ‘hand’ because the design is part of the fabric now.
- Vibrancy and Durability: The colours are incredibly bright, and the design is as permanent as the garment. It will not crack, peel, or fade. Ever.
- Fabric Limitation: The big catch is that it only works on light-coloured, polyester-based materials. Because it dyes the fibres, it's invisible on dark fabrics and won't bond with natural fibres like cotton.
Heat Transfer Vinyl (HTV)
While not technically a 'print and transfer paper', HTV is a massive player in the same space. It comes in coloured sheets or rolls with a heat-activated adhesive on the back. You use a vinyl cutter to cut your design from the sheet, then you 'weed' away all the bits you don't need, leaving your design on its clear carrier.
From there, you just place it on the garment and heat-press it. The adhesive kicks in and bonds the vinyl to the fabric. HTV is the king of simple text, bold logos, and solid-colour graphics. It creates a distinct, durable layer and comes in an amazing range of finishes, from glitter and holographic to flocked and metallic. It's not your go-to for photos or complex, multi-coloured designs, though.
Direct-to-Film (DTF) Transfers
DTF is the relative newcomer that takes the best bits from all the other methods. It gives you the full-colour, photographic detail of HTP but with durability and versatility that rivals professional screen printing. The process involves printing your design onto a special PET film using water-based textile inks.
The game-changer is that a layer of white ink is printed first, creating a solid base. This simple step allows DTF transfers to be applied to fabrics of any colour, including black. Once printed, a fine adhesive powder is sprinkled over the wet ink and cured with heat, creating a self-contained, ready-to-press transfer. When you press it, only the ink and adhesive move to the garment, leaving behind an incredibly soft, flexible, and tough design.
This technology has really taken the textile industry by storm. The UK, for instance, has a huge textile trade, exporting over USD 11.97 billion worth of finished textiles and clothing in 2020. This kind of market needs high-quality, versatile decoration methods, and DTF has stepped up to fill that role perfectly. For a deeper dive, you can check out the full textile transfer paper market report from Future Market Insights.
And if you're keen to get your own artwork ready for this method, we've put together a guide on how to get my design on a t-shirt.
Transfer Paper Technology at a Glance
Feeling a bit overwhelmed? It's a lot to take in. Here’s a quick table to help you see how these four technologies stack up against each other side-by-side.
| Technology | Printing Process | Best For | Feel on Fabric |
|---|---|---|---|
| Inkjet/Laser HTP | Prints onto a polymer film carrier using a standard desktop printer. | Beginners, one-off projects, cotton fabrics. | A noticeable film layer on top of the fabric. |
| Sublimation | Solid dye turns to gas and permanently dyes polyester fibres. | Vibrant, full-colour designs on light polyester. | Zero feel; the design is infused into the fabric. |
| Heat Transfer Vinyl | Cuts solid colour sheets of vinyl that are then heat-applied. | Bold, single-colour graphics, text, and logos. | A distinct, often thicker, layer on the fabric. |
| Direct-to-Film (DTF) | Prints onto a film, then transfers only the ink and adhesive. | Detailed, full-colour designs on any fabric or colour. | A very soft, flexible, and thin layer. |
As you can see, each method has its moment to shine. The best choice really boils down to what you're trying to create, the fabric you're using, and the look and feel you're aiming for.
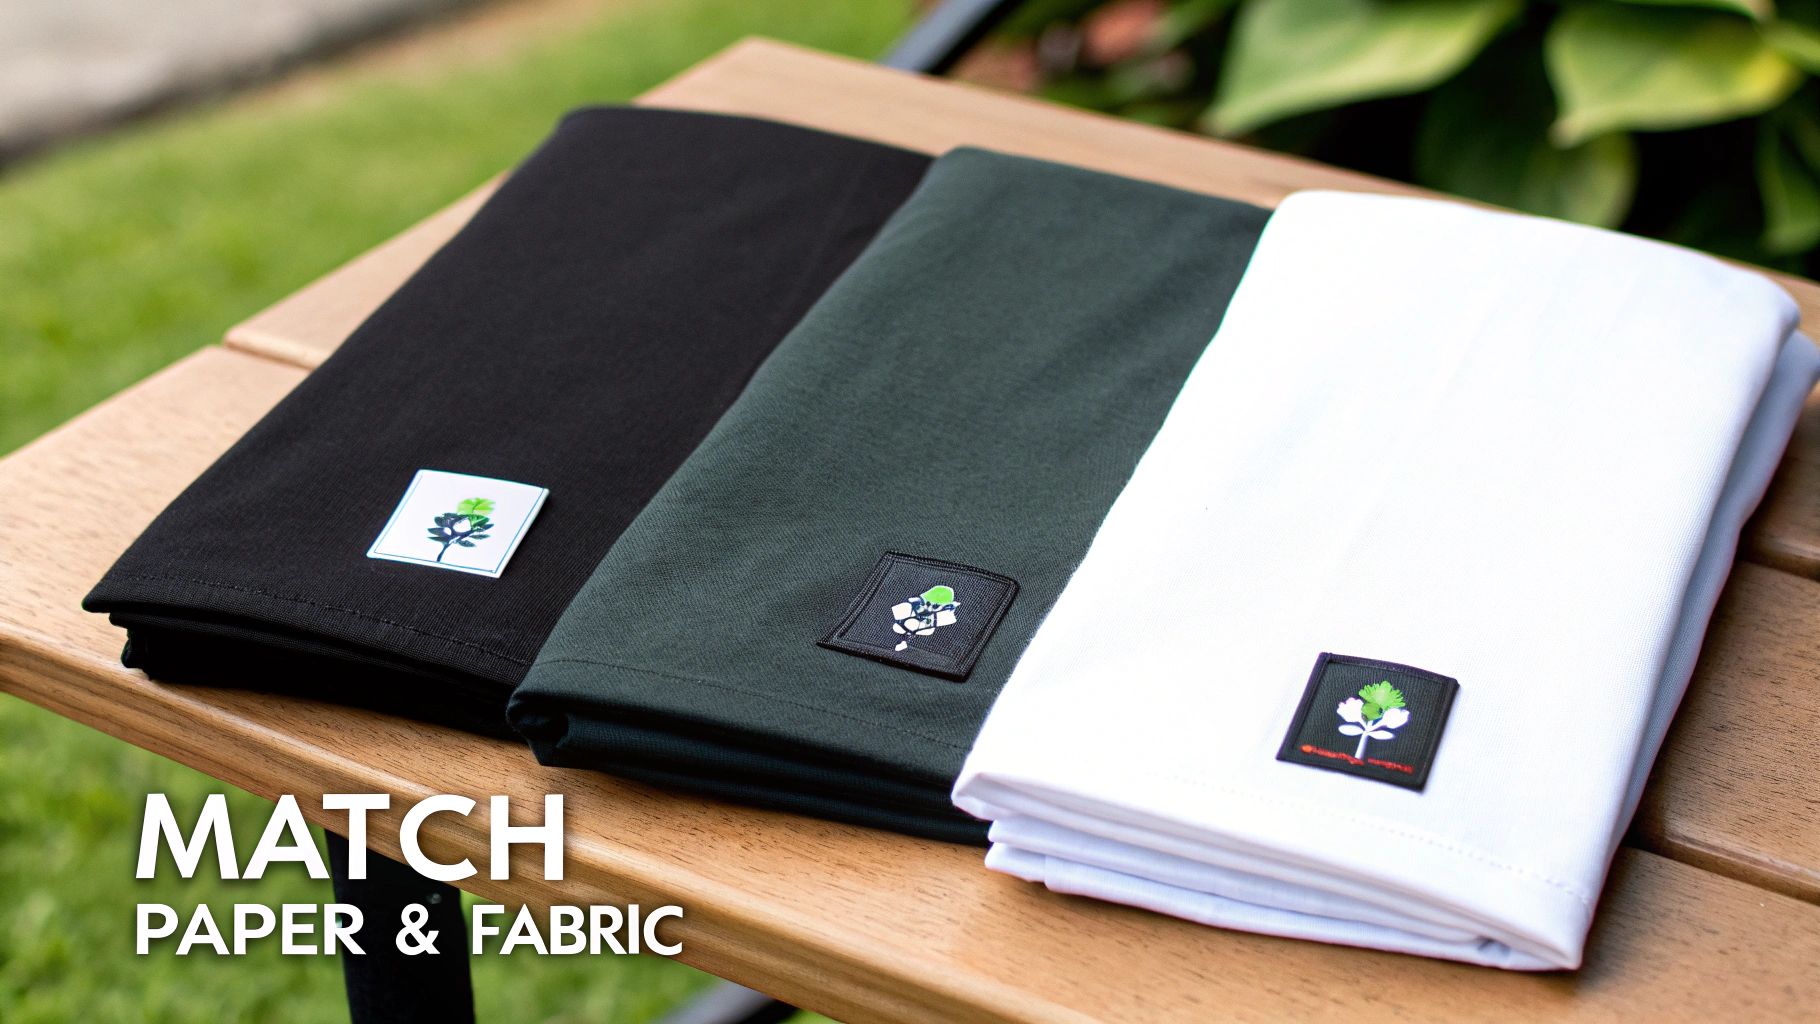
How to Match Transfer Paper with the Right Fabric
You’ve picked out the perfect print and transfer paper—great start. But the real secret to a custom garment that doesn't just look good but lasts is matching that paper to the right fabric. This isn't just a friendly tip; it's the golden rule. Get this pairing wrong, and you're setting yourself up for a faded, peeling design and a completely wasted afternoon.
Think of it like cooking. You wouldn't use delicate pastry flour to bake a hearty sourdough loaf, would you? It's the same principle here. Different transfer methods are engineered with specific chemical properties that only play nice with certain textile fibres. Grasping this simple concept is the key to creating designs that look brilliant on day one and stay that way wash after wash.
Let's break down the most common fabrics and find their perfect transfer partners.
The World of Natural Fibres: Cotton and Blends
Cotton is the undisputed king of the t-shirt world, and for good reason. It's soft, breathable, and just feels great to wear. As a natural fibre, it behaves very differently from synthetics when you apply heat, making it the ideal canvas for certain transfer types.
-
DTF (Direct-to-Film): This method is the undisputed champion for cotton. The DTF process uses a special adhesive powder that bonds securely into the cotton fibres, creating a design that’s both stunningly vibrant and incredibly flexible. It feels soft to the touch and moves with the fabric, which means no cracking.
-
Inkjet/Laser Heat Transfer Paper (HTP): Your standard HTP is also designed with cotton in mind. The polymer film on the paper is made to stick well to the surface of natural fibres. The quality can be a bit hit-or-miss, though, and it often leaves the design feeling a bit stiffer and heavier compared to a DTF print.
And what about sublimation? Forget it. Sublimation is completely incompatible with 100% cotton. The ink needs polyester fibres to bond with; press it onto cotton, and your design will just wash straight down the drain.
The Power of Synthetics: Polyester
Polyester and other synthetic fabrics have a totally different molecular structure. Their fibres are essentially a type of plastic, which unlocks a unique and seriously impressive transfer method.
Sublimation: This is where sublimation truly shines. When you heat it, the pores of the polyester fibres literally open up, allowing the vaporised sublimation ink to sink in. As it cools, the pores close, trapping the ink inside the fabric permanently. The design becomes part of the material itself, with zero feel and unbeatable durability.
While DTF also works exceptionally well on polyester—giving you great vibrancy and a solid feel—sublimation is the native language of synthetic fabrics. It's the only way to get a result that's truly dyed into the garment. If you're working with a light-coloured, 100% polyester item, sublimation is the ultimate choice.
Tackling Dark and Coloured Garments
Printing on dark fabrics throws a new spanner in the works: colour vibrancy. Most home printers don't use white ink. That means any white in your design is just the absence of ink. On a dark shirt, the fabric colour shows right through, making your design look muddy and dull.
This is where you need specific tech to solve the problem.
-
DTF Dominance: DTF was practically invented to fix the dark-fabric issue. The process cleverly prints a layer of brilliant white ink behind your colour design. This white layer acts as an opaque base, making your colours pop with full intensity against any background, from jet black to bright red.
-
Opaque HTP for Dark Fabrics: If you're using an inkjet or laser printer, you have to buy a specific "opaque" or "for darks" transfer paper. This paper has a thick, white background layer built-in. You print your design on it (without mirroring it!), and the entire sheet—white background and all—gets pressed onto the shirt. The downside? It creates a much heavier, less breathable print that can feel a bit like a sticker.
For a deeper dive into how different materials perform, our guide on t-shirt printing papers offers more detailed comparisons to help you choose. Matching the right paper to the right fabric isn't just a technical step; it's the foundation of a professional, long-lasting custom product you can be proud of.
Getting Your Tools and Settings Right for Perfect Transfers
Getting a professional-looking transfer isn't just art; it's a careful science. You can have the best print and transfer paper on the market, but the final result really hinges on your tools and how precisely you use them. A flawless, durable design boils down to mastering three pillars: your printer and ink, your heat press, and the exact settings you dial in for time, temperature, and pressure.
Think of it like baking a perfect cake. You can have the finest ingredients (your transfer paper and garment), but if the oven is too hot or you pull it out a minute too soon, you’re left with a disaster. The same principle applies here—precision is everything.
Choosing Your Printer and Ink System
The first piece of the puzzle is getting your design onto the paper in the first place. Not all printers and inks are created equal, and your choice is completely dictated by the transfer method you've picked. It’s absolutely critical to understand that these systems are not interchangeable.
-
For Sublimation: You need a dedicated sublimation printer. This isn't optional. Sublimation inks are unique—they turn from a solid straight to a gas under heat—and they simply won't work in a standard printer. Trying it will only lead to clogs and a wrecked machine.
-
For DTF Transfers: This method demands specialised textile inks and a purpose-built (or modified) DTF printer. These inks are formulated to be stretchy and tough on fabric, and the printer is set up to handle the white ink underbase that makes DTF so versatile.
-
For Inkjet/Laser HTP: This is your most accessible route. You can use your standard home or office inkjet or laser printer with its everyday ink or toner. Just make sure you buy the right type of heat transfer paper—inkjet paper for inkjet printers, and laser paper for laser printers. It's that simple.
When getting your files ready, brushing up on some general printing guidelines, even if they're for something else, can help you get a crisp print. A clean, high-resolution source file is always the best starting point for a quality transfer.
Why a Heat Press Beats a Household Iron, Every Time
Once your design is printed, it's time to apply it. While it’s tempting to grab the household iron for your first few projects, a dedicated heat press is the single best investment you can make for professional, long-lasting results.
An iron just can’t compete. They suffer from wildly inconsistent heat distribution, with scorching hot spots and cool patches that stop the transfer from sticking properly. They also rely on you leaning on it for pressure, which is impossible to apply evenly. This combo of uneven heat and pressure is the number one cause of transfers peeling, cracking, and fading after the first wash.
A heat press delivers what an iron cannot: consistent temperature and even pressure. These two elements are non-negotiable for correctly curing the adhesive and locking the design into the fabric’s fibres for good.
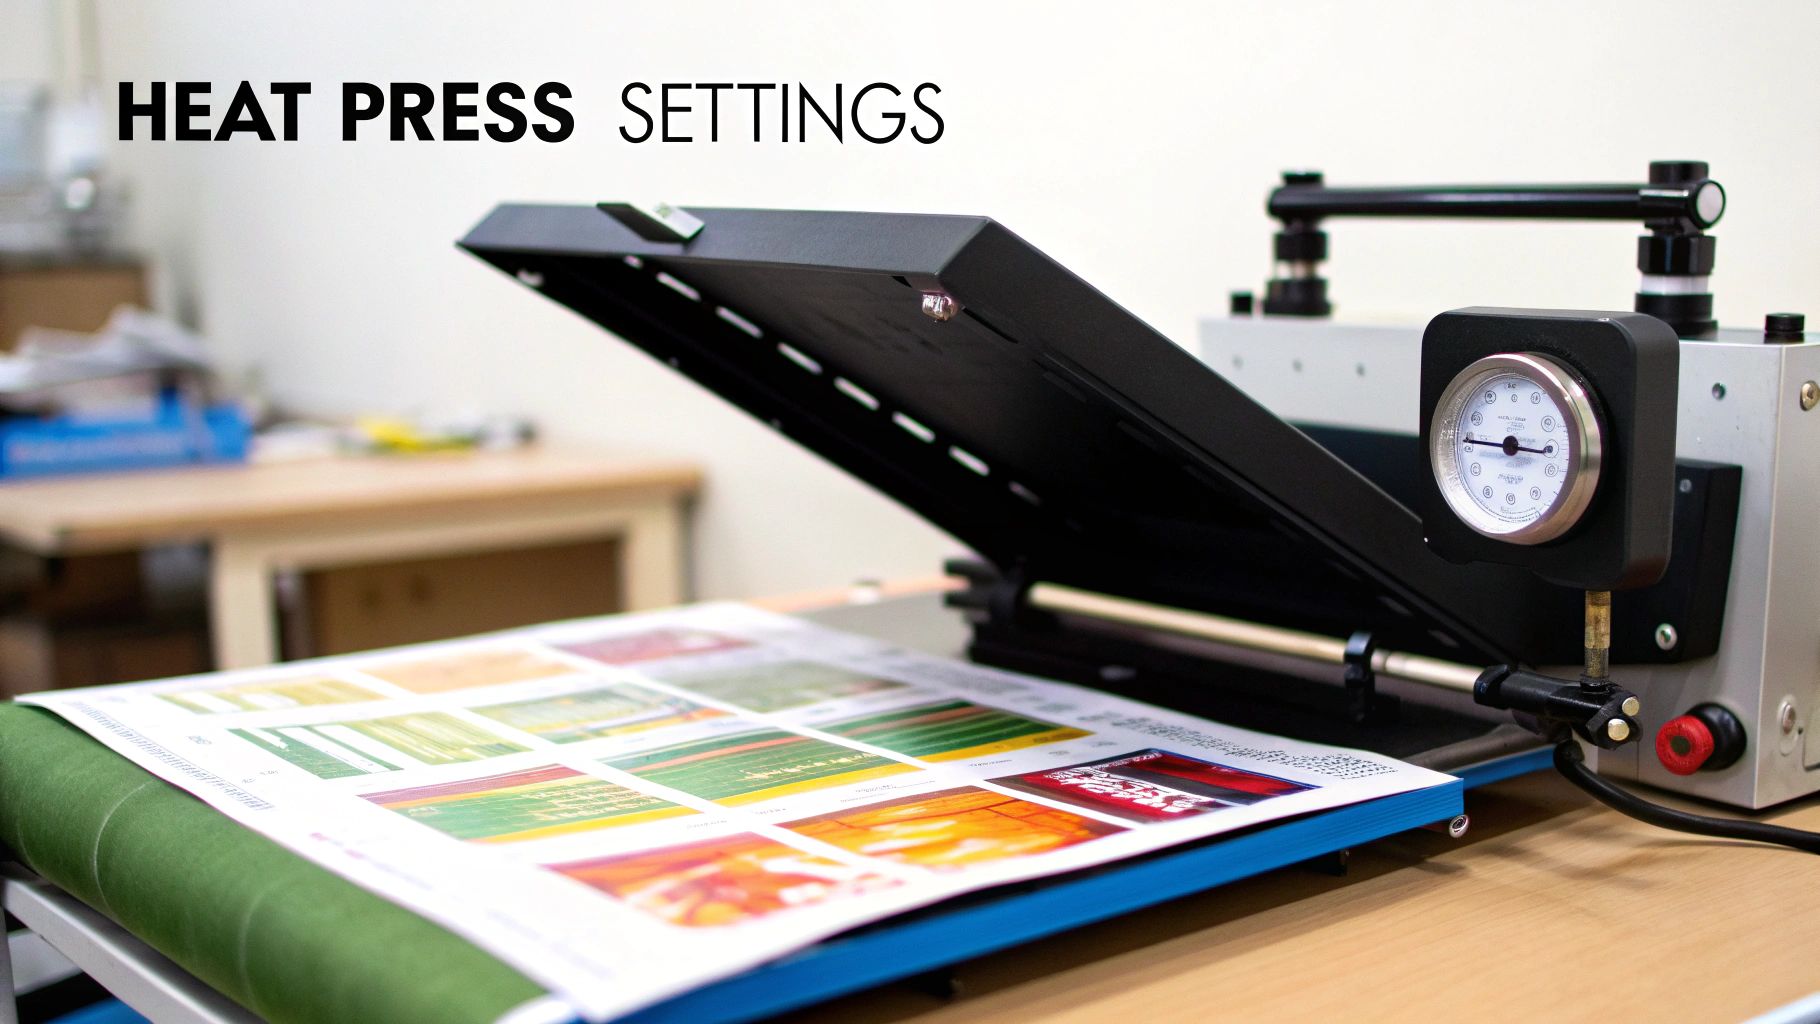
Calibrating Your Heat Press Settings
Dialling in the right settings on your heat press is the final, crucial step. The "perfect" recipe of time, temperature, and pressure changes a lot depending on the transfer paper you're using and the fabric you're pressing onto. Always, always start with the manufacturer's recommendations for your specific paper, but be prepared to do a little testing and tweaking.
Here are some general starting points for the most popular methods:
-
DTF Transfers: Typically need a temperature of 140-160°C for about 10-15 seconds with medium pressure. The key here is consistent heat to melt that adhesive powder perfectly.
-
Sublimation: This process needs some serious heat, usually around 190-200°C, for a longer press time of 45-60 seconds with light to medium pressure. That high temperature is what's needed to vaporise the ink.
-
Inkjet/Laser HTP: These papers have a pretty broad range, often sitting between 165-190°C for 15-25 seconds. Opaque papers for dark fabrics might need different settings than the transparent ones for light fabrics.
For anyone looking to really master their equipment, our comprehensive heat press temperature guide dives much deeper into calibrating your press for all sorts of materials. And remember, a small test print on a scrap piece of fabric can save you from the heartache of ruining an entire garment.
Common Transfer Paper Problems and How to Fix Them
Even when you've got all the right gear and a killer design, things can still go sideways with transfer paper. It's frustrating when a small hiccup in the process ruins your work, but don't panic—most of these common problems have surprisingly simple fixes. Think of it as part of the learning curve.
This is where knowing your materials really counts. The UK graphic paper market, which covers all the stuff we use for these jobs, is always shifting. As digital takes over, the demand for top-notch, reliable transfer paper only gets more important for creators like us. You can read up on the UK graphic paper market on mordorintelligence.com to see the bigger picture.
Learning to troubleshoot builds confidence, saves you time and money, and makes sure your final products look as good as you imagined.
My Design Is Cracking or Peeling After Washing
This is hands down the most common complaint we hear. When a design starts cracking or peeling away after just one or two washes, it’s almost always a problem with how it was heat-pressed. If the transfer isn't fully cured, its adhesive never really grabs onto the fabric fibres for a permanent hold.
- The Cause: The usual suspects are not enough heat, not enough pressure, or both being applied unevenly. A standard household iron is a classic culprit here because it just can't maintain a consistent temperature or deliver the firm, even pressure needed across the whole design.
- The Fix: Ditch the iron and use a proper heat press. It’s a game-changer. Make sure you're following the temperature and time settings recommended by the paper manufacturer. You need medium to firm pressure to properly embed the ink and adhesive deep into the weave of the fabric.
The Colours Look Dull or Faded After Pressing
You’ve printed a vibrant, punchy design, but on the finished shirt, it just looks… flat. If your colours are coming out washed out, there are a few things that could be at play, often starting right at your printer or with the paper you've chosen.
Key Insight: Getting vibrant colours isn't magic. It's the direct result of getting three things right: ink saturation, paper choice, and heat settings. If one of those is off, the final colour intensity will suffer.
- Check Your Printer Settings: Dive into your printer's settings and make sure you’re printing on the highest quality or photo setting available. This forces the printer to lay down more ink, giving you much richer and more saturated colours from the get-go.
- Make Sure Your Paper and Fabric Match: This is a big one. Trying to use sublimation paper on a cotton-heavy blend will always look faded because the ink only bonds with polyester. Likewise, using standard heat transfer paper for light fabrics on a dark shirt will give you a dull, see-through result. We break this down further in our detailed guide to choosing the right transfer print paper.
- Adjust Your Heat Settings: Too much heat can literally cook the inks, causing them to lose their vibrancy. Go back and double-check the recommended temperature for your specific paper—don't just guess
Got Questions About Print and Transfer Paper? We've Got Answers
Right, we’ve talked through the methods, materials, and machines. But I know from experience that once you're ready to actually start a project, a whole new set of practical questions pops up. Let's tackle some of the most common ones I hear from creators just like you.
Can I Just Use a Regular Iron Instead of a Heat Press?
Look, I get the temptation. For some beginner-friendly inkjet papers, a home iron might get the job done for a one-off project. But if you want professional results that actually last, it’s really not the way to go.
The problem with an iron is that it has uneven hot spots and can't deliver the consistent, firm pressure you need to properly cure the transfer. A heat press, on the other hand, gives you consistent temperature and even pressure across the entire design. That’s the real secret to bonding the ink to the fabric, and it's what makes the difference between a print that looks great for years and one that peels after its first trip through the washing machine.
Why Didn't the White Parts of My Design Print?
This is a classic stumbling block and a very common question. The simple answer is that most standard desktop printers you have at home don't actually contain white ink. They work by assuming the paper you're printing on is white, so they just leave those areas of your design blank.
This isn't a problem on white paper, but it becomes glaringly obvious when you transfer that design onto a dark or coloured T-shirt. Any part of your design that was supposed to be white will just show the colour of the fabric instead.
This is where professional methods like DTF (Direct-to-Film) really shine. Specialised DTF printers have a dedicated white ink channel. They print a solid white base layer first and then lay the colours on top, guaranteeing your design looks bright and vibrant on any colour garment you can think of.
How Long Will My Custom T-Shirt Actually Last?
The lifespan of your custom tee really boils down to the transfer method you've used.
High-quality DTF and sublimation transfers, when they’re applied correctly, are incredibly tough. We’re talking about lasting for 50+ washes without any major fading or cracking. Honestly, they often outlive the T-shirt itself!
On the other hand, standard inkjet and laser transfer papers have a shorter shelf life. You can typically expect them to last for around 10-25 washes before they start to show their age. A little tip: you can always get more life out of any custom print by following the proper care instructions, like turning it inside out and washing on a cool cycle.
Ready to skip the learning curve and get straight to professional, vibrant transfers? Psyque offers a premium DTF Print & Press service that takes all the technical headaches off your plate. Get your custom designs printed with brilliant quality and durability, delivered right to your door. Check us out at https://psyque.co.uk.