
transfer paper printing: A Step-by-Step Guide
Transfer paper printing is a pretty clever way to get detailed, custom designs onto fabric. You simply print your image onto a special sheet of paper, then use a heat press to transfer it onto a T-shirt, tote bag, or whatever else you're working on. It's become a go-to method for small brands and DIY creators, mainly because it lets you produce full-colour, intricate designs without the messy, complicated setup of screen printing.
Building Your Foundation for Flawless Prints
Before you even think about hitting 'print', let's get your setup sorted. This is where you can sidestep the frustrating and expensive mistakes a lot of beginners make. Getting your gear right from the get-go is the difference between a professional, durable product and a design that cracks and fades after the first wash.
Think of this as your startup blueprint. Every piece of equipment, from the printer to the heat press, plays a huge part in the final quality. So, let’s break down exactly what you'll need to invest in.
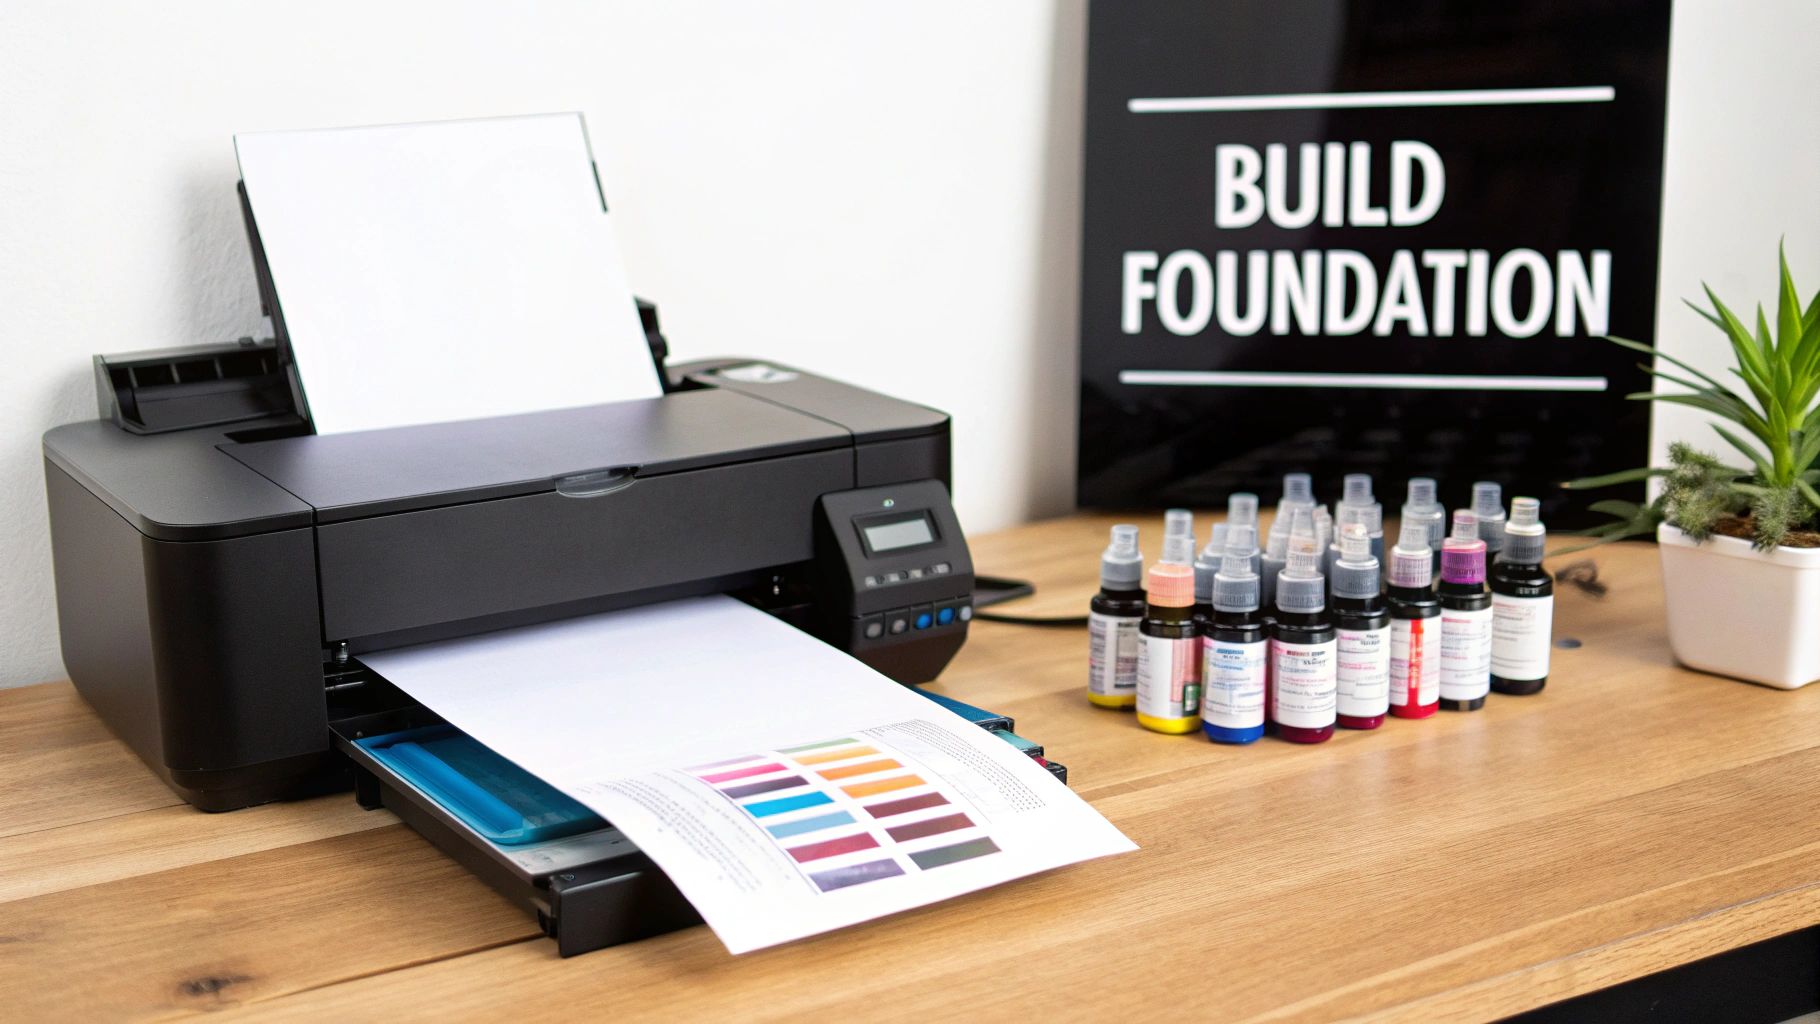
Choosing Your Printer and Inks
Your first big decision is the printer. This choice will directly impact the type of transfer paper you can use and, ultimately, how the final print looks and feels. The two main players here are inkjet and laser printers, and they each have their own strengths.
Most people starting out lean towards inkjet printers. They're fantastic for producing vibrant, high-resolution images, especially when paired with speciality pigment inks designed for textiles. These inks give you much better wash-fastness and UV resistance compared to the standard dye-based inks that come with most home printers. The debate around choosing between an inkjet or laser printer is a common one, but for fabric, pigment inkjets often have the edge.
Laser printers, on the other hand, can be quicker and more efficient for certain jobs, particularly if you're using self-weeding papers (which save you from trimming around your design). The initial cost can be a bit higher, though. If you're looking at the more advanced end of the spectrum, dedicated Direct-to-Film (DTF) printers are a significant step up, giving you the detail of inkjet with incredible durability across almost any fabric type.
Selecting the Right Transfer Paper
Trust me, not all transfer papers are the same. The type you pick has to match your printer, your design, and the garment itself. Getting this wrong is a non-starter if you want a professional finish. We've got a whole guide on https://psyque.co.uk/blogs/news/t-shirt-printing-papers if you want to dive deeper.
For now, here are the main things you need to know:
- Inkjet vs. Laser Paper: This is crucial. You must use paper designed for your specific printer. Putting inkjet paper in a laser printer is a recipe for disaster—it can melt the coating and cause serious damage.
- Light vs. Dark Fabrics: Paper for light-coloured garments has a transparent background, so the fabric’s colour shows through any unprinted areas. For dark fabrics, the paper has an opaque white backing to make sure your colours pop and don't get lost in the dark material.
- Direct-to-Film (DTF) Transfers: This is a more advanced technique but the results are brilliant. You print onto a special film, apply an adhesive powder, and cure it. What you get is a super durable, flexible print that feels much softer than many traditional transfers and works on practically any fabric.
To help you get started, here's a quick rundown of the essential gear you’ll need to assemble.
Essential Equipment Checklist for Transfer Printing
| Equipment/Material | Key Considerations | Recommended For |
|---|---|---|
| Printer | Inkjet with pigment ink for vibrancy and durability. Laser for speed and self-weeding paper compatibility. | Beginners (Inkjet), High-Volume Shops (Laser), Professionals (DTF). |
| Heat Press | Must have even heat and pressure distribution. Digital controls for temperature and time are essential. | Anyone serious about quality and consistency. |
| Transfer Paper/Film | Must match your printer type (inkjet/laser/DTF) and fabric colour (light/dark). | All transfer printing applications. |
| Garments | Cotton and poly-cotton blends are most common. Check paper specifications for fabric compatibility. | T-shirts, hoodies, tote bags, and other custom apparel. |
| Teflon Sheet | Protects your heat press platen from ink and your garment from scorching. Reusable and vital. | Every single press. Non-negotiable. |
| Design Software | Adobe Photoshop, Illustrator, or free alternatives like GIMP or Canva for creating and editing artwork. | Creating print-ready, high-resolution designs. |
This checklist covers the absolute must-haves for producing high-quality, sellable products.
The Essential Heat Press
It might be tempting to use a home iron, but please don't. It’s a surefire way to get patchy, inconsistent results that won't last. A quality heat press is the workhorse of any real garment printing setup. It delivers the three things you absolutely need for a perfect transfer: consistent temperature, even pressure, and precise timing.
A heat press guarantees that every square inch of your design gets the exact heat and pressure needed for proper adhesion. This is something a household iron simply cannot replicate, and it's the secret to prints that last.
When you're shopping for a press, you'll mainly see clamshell and swing-away designs. Clamshell presses are great for saving space, while swing-away models give you a clear, unobstructed view for lining everything up. Whichever you choose, make sure it has accurate digital controls for temperature and time, because being off by even a few degrees or seconds can ruin a print.
The demand for this kind of customisation is only growing. In fact, the UK textile transfer paper market is projected to expand at a compound annual growth rate of 5.94% between 2023 and 2033, largely driven by this trend. It’s a great time to be getting into the game.
Preparing Your Digital Design for Perfect Transfers
A jaw-dropping final print starts with a rock-solid digital file. That isn't just a friendly suggestion; it's the absolute foundation of professional-quality transfer printing. Getting your artwork dialled in from the get-go is how you avoid the classic pitfalls: blurry images, weird colour shifts, and designs that just look soft on the final garment.
Before your masterpiece ever meets a sheet of transfer paper, it needs to be properly optimised. Let's skip the theory and jump right into the practical, must-do steps to get your artwork 100% print-ready.
Resolution: The Key to Sharpness
The single most common mistake I see beginners make is starting with a low-resolution image. A design can look perfectly fine on your backlit computer screen, but once it's printed and pressed onto fabric, it can turn into a pixelated, blurry mess. This is all about Dots Per Inch (DPI).
For any kind of professional garment printing, 300 DPI is the non-negotiable industry standard. This number ensures there are enough tiny dots of ink packed into every inch to create a crisp, sharp image that looks great up close. A file with a lower resolution, like the 72 DPI standard for web images, simply doesn't have enough data to work with. It will look fuzzy. Period.
Got an older or smaller image file you're desperate to use? All is not lost. You can often salvage it. To get your digital designs up to snuff, look into tools like Photoshop AI Upscale techniques for boosting image resolution without totally wrecking the quality.
Choosing the Correct Colour Mode
Ever printed something only to find the colours look nothing like they did on your monitor? It’s a gut-wrenching feeling, and it almost always comes down to using the wrong colour mode.
Digital screens create colour with light using an RGB (Red, Green, Blue) model. Printers, on the other hand, create colour with ink using a CMYK (Cyan, Magenta, Yellow, Key/Black) model. They are fundamentally different systems.
Setting your design file to CMYK right from the start is the best way to ensure colour accuracy. It gives you a much more realistic preview of how the final print will look, saving you from nasty surprises when that design comes off the heat press.
While some modern RIP software is pretty good at converting RGB files on the fly, working in CMYK from the beginning gives you, the designer, full control over the final colours. It’s a simple switch in your design software that makes a massive difference.
File Types and Why They Matter
The format you save your file in plays a huge role, too. JPEGs are everywhere, but they are a "lossy" format, which means they throw away a little bit of quality every single time you save them. For the best results in garment printing, you'll want to use other, more robust formats.
- PNG Files: These are your best friend for any design that needs a transparent background. If you have a logo or graphic that isn’t a simple rectangle, a PNG ensures only the design itself gets printed, without an ugly white box around it.
- Vector Files (AI, EPS, SVG): For logos, text, and line art, vectors are the undisputed champion. Because they're built with mathematical equations instead of pixels, vector files can be scaled up to the size of a bus without losing a single ounce of sharpness.
For any serious branding or logo work, investing the time to create a proper vector file pays off massively. For more real-world tips, check out our guide on creating effective T-shirt design logos that are actually designed to be printed.
Essential Final Checks Before You Print
Once your resolution, colour mode, and file type are sorted, a few quick final checks will save you from costly mistakes.
Mirror Your Image
This is an absolutely critical step for most standard inkjet transfer papers, especially those for light-coloured garments. You must flip your design horizontally before printing. If you forget, all your text will be backwards on the shirt. Keep in mind that some papers, particularly Opaque papers for darks and most DTF workflows, do not require mirroring. When in doubt, always read your paper’s instructions!
Feather the Edges
For photos or complex graphics that don't have a clean, hard border, adding a soft edge can help the design blend more seamlessly into the fabric. Applying a tiny "feather" (think a 1-2 pixel blur) to the outer edges in Photoshop or a similar program can soften that transition and prevent the design from looking like a stiff sticker.
Match Your Artboard to the Paper Size
Finally, make sure your canvas or artboard in your design software is set to the exact dimensions of your transfer paper (e.g., A4 or A3). This simple step ensures no part of your design gets accidentally cropped off during printing and helps you accurately visualise the final scale and placement. A few seconds spent on these checks can save you from wasting expensive paper and a perfectly good tee.
Getting the Print and Cure Spot On
Alright, your design file is prepped and ready to go. Now for the exciting part—moving from your screen to the real world. This is where your vision finally starts to take shape as a tangible product. Getting the printing and curing right is everything; it’s what locks in those vibrant colours and makes sure your print will last.
Success at this stage is all about precision. The settings you pick in your printer software, the way you handle the paper, and your curing technique all have a direct impact on the final quality. Let's walk through exactly how to nail this every time, so your prints look and feel properly professional.
Dialling In Your Printer Settings
Before you hit that print button, pause for a moment and get your printer settings dialled in. Just sending the file with default settings is a classic mistake, and it often leads to dull colours or the printer laying down way too much ink. You need to tell the printer precisely what kind of material it's working with.
Open your printer’s dialogue box and look for these options:
- Media or Paper Type: Don't just leave this on 'Plain Paper'. Hunt for a better fit. Many printers have a specific setting like 'T-Shirt Transfer', 'Matte Photo Paper', or 'Premium Matte'. Choosing one of these tells the printer to expect thicker media and adjust the ink flow for the best possible saturation.
- Print Quality: Always, always crank this up to the highest setting available. It might be called 'High', 'Best', or 'Photo Quality'. A higher quality setting means the printer puts down more ink, which is exactly what you need for rich, punchy colours on the final garment.
- Colour Management: If you have the option, make sure your printer is set to manage colours using your software's profile (like Adobe Photoshop). This is key to maintaining the colour accuracy you spent time perfecting in the design phase.
This infographic is a great visual checklist for the digital prep steps that come right before you print.

It’s a simple reminder of how getting the resolution, colour mode, and orientation right on your computer is the foundation for a flawless physical print.
The DTF Powder and Curing Stage
For those of you getting into Direct-to-Film (DTF), the process involves a couple of extra, absolutely critical steps after the ink is down. Once your design is printed onto the DTF film, it’s time to apply the adhesive powder. This is the magic ingredient that's going to bond your ink to the fabric.
First, lay the freshly printed film flat with the printed side facing up. Generously sprinkle the white DTF adhesive powder over the entire wet ink area—you want total coverage. Then, gently tap the film to shake off any excess powder, which you can collect and use again. The goal is to have the powder stick only to the inked parts of your design.
Pro Tip: Whatever you do, don't rush the curing. An under-cured transfer will have terrible adhesion and won't last a wash. Go too far, and an over-cured or scorched film can leave a stiff, plastic-like feel on the shirt. Patience here pays dividends in quality.
Next up is curing. This step melts the powder, transforming it into a smooth, adhesive layer. The most common way to do this is with a heat press. Hover the top platen about a centimetre above the film (without letting it touch) at around 180-190°C for roughly 2-5 minutes. You're looking for that powdery texture to melt down into a glossy, slightly rubbery orange-peel finish. If you’re doing higher volumes, a dedicated curing oven can make this step much more efficient.
This stage is non-negotiable for a good final product. For a more detailed look, you can learn more about how to successfully print heat transfers with our other focused guide.
Handling and Storing Your Printed Transfers
Once your transfer paper is printed (or your DTF film is cured and ready), handle it carefully. Always hold it by the edges to avoid smudging the ink or getting fingerprints on the adhesive. For the best results, it’s always a good idea to use your transfers as soon as possible.
If you do need to store them, keep them in a cool, dry place, well away from direct sunlight. A simple plastic sleeve or a flat folder works perfectly to protect them from dust, moisture, and any accidental creases. Humidity is the absolute enemy of a good transfer; it can weaken the adhesive and ruin the print. These little precautions go a long way in keeping your prints pristine until you're ready to press them.
How to Apply Your Transfer with a Heat Press
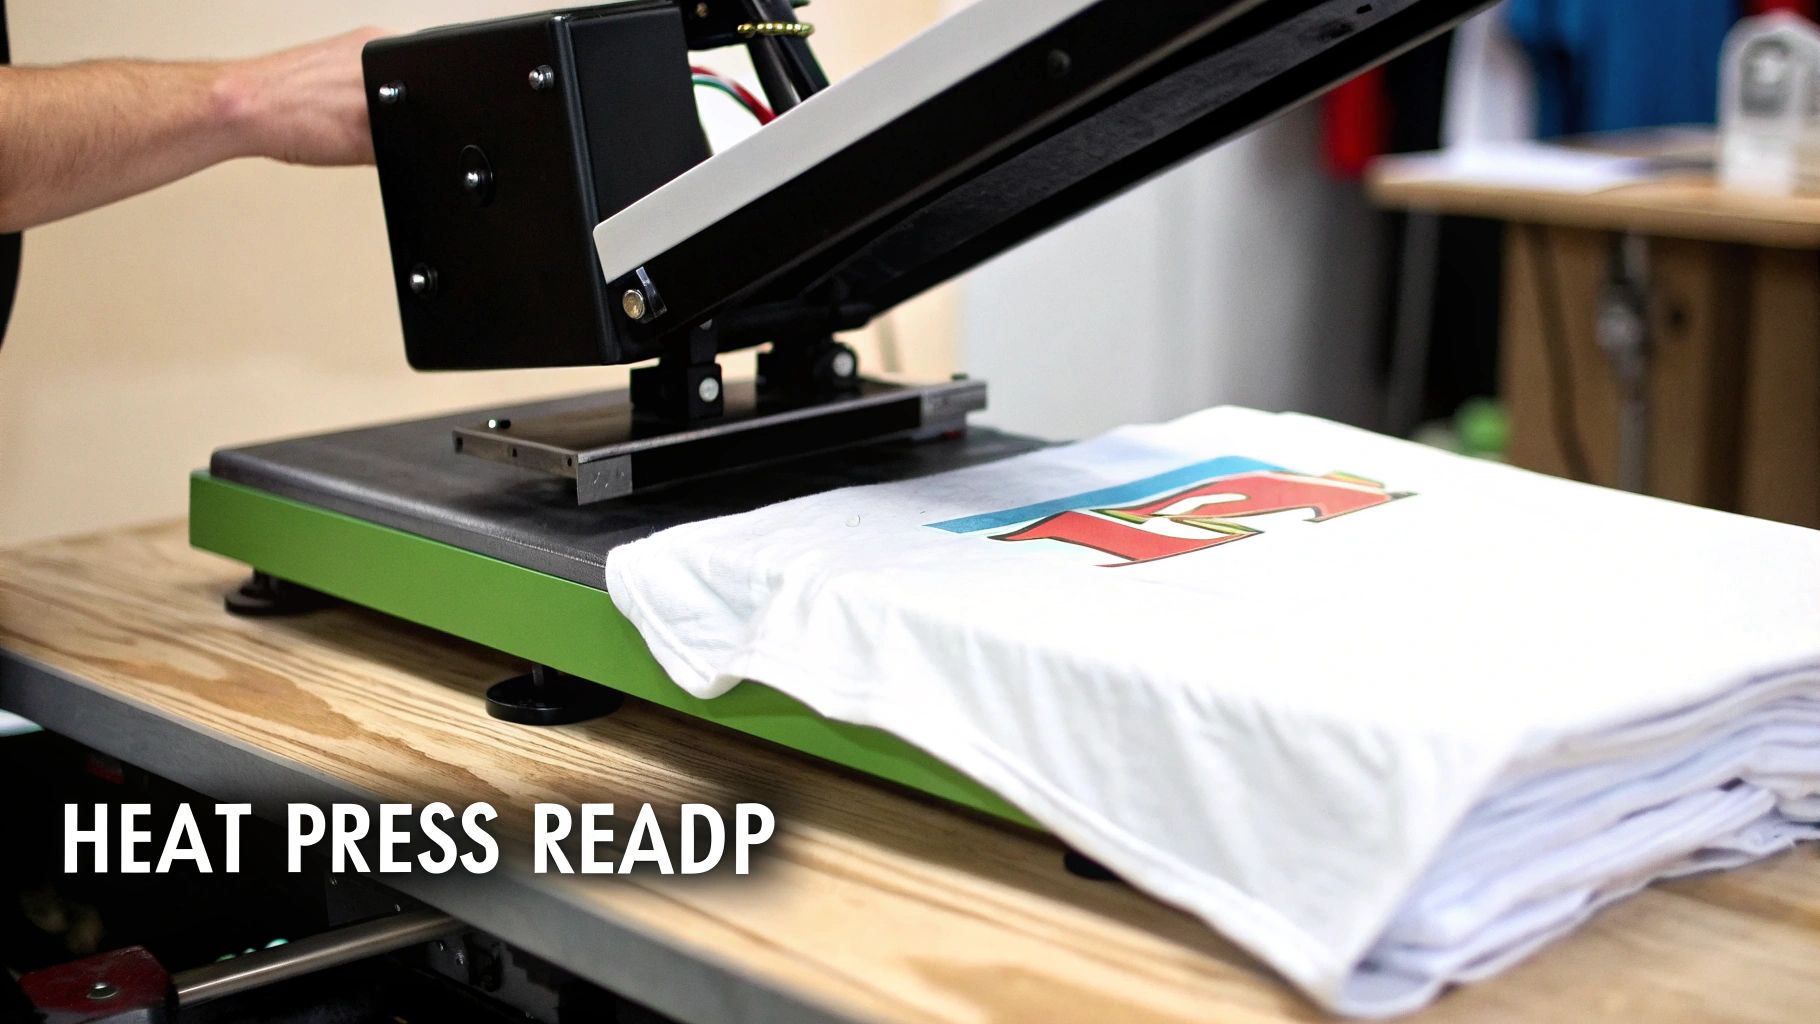
This is it—the make-or-break moment. The heat press is where your printed sheet becomes a durable, wearable piece of art. Getting this stage right is what separates a flaky, amateur print from a professional-grade product your customers will love and wear for years.
Success comes down to the big three: temperature, pressure, and time. These elements work in harmony to properly cure the ink and bond the adhesive deep into the fabric's fibres. Think of it like baking; the wrong temperature or time can ruin everything. Nailing the recipe for your specific transfer and garment is absolutely crucial for consistent, sellable results.
Don't Skip the Pre-Press
Before you even think about laying down your transfer, you need to pre-press the garment. This is a non-negotiable step that beginners often skip, only to regret it later. Just lay your T-shirt flat on the press and give it a quick press for 5-10 seconds at your target temperature.
Why is this so important? Two reasons:
- It zaps any hidden moisture out of the fabric. Steam is the enemy of a good transfer and will completely ruin the adhesion.
- It smooths out wrinkles and creases, giving you a perfectly flat surface for an even application.
This simple action creates the ideal canvas for your design and dramatically improves both the final look and the long-term durability of your print.
Dialling In Your Heat Press Settings
There's no single magic number for heat press settings. The right combination of heat, pressure, and time depends entirely on the transfer paper you're using and the fabric you're pressing onto. Your first port of call should always be the manufacturer's recommendations, usually found on the paper's packaging.
From there, you'll likely need to do a bit of fine-tuning based on your own equipment and tests. For example, polyester is sensitive to high heat and can scorch easily, so it needs a much lower temperature than a tough, 100% cotton tee. For a more detailed breakdown, our comprehensive heat press temperature guide has you covered.
Heat Press Settings for Common Fabrics
Here's a quick reference table with some solid starting points for the most common fabrics you'll encounter.
| Fabric Type | Temperature (°C) | Time (Seconds) | Pressure Level |
|---|---|---|---|
| 100% Cotton | 180 - 195°C | 15 - 25 seconds | Medium to Firm |
| 100% Polyester | 140 - 160°C | 10 - 15 seconds | Medium |
| 50/50 Cotton-Poly Blend | 165 - 175°C | 12 - 18 seconds | Medium |
| DTF Transfers (General) | 150 - 165°C | 10 - 15 seconds | Medium to Firm |
Remember, these are just guidelines. Always run a test print on a scrap piece of fabric if you're trying a new combination.
And one last tip: always protect your gear. Place a Teflon sheet or a sheet of parchment paper over your transfer before closing the press. This stops any ink from getting on your heat platen and protects the garment from direct contact, reducing the risk of scorching.
Hot Peel vs. Cold Peel: The Grand Finale
Once that timer beeps, what you do next depends on one critical detail: is your transfer a hot peel or a cold peel? This decision completely changes the final look and feel of the print, so it's vital to know which you're working with.
A hot peel means you rip off the backing paper immediately after the press opens, while the garment is still steaming. This technique tends to stretch the ink slightly into the fabric, giving it a softer, more matte finish that feels like it’s part of the shirt.
A cold peel, as the name suggests, requires you to wait. Let the garment and transfer cool down completely before you even touch the backing. This method leaves more of the ink sitting on top of the fabric, which results in a glossier, more vibrant finish with a bit more of a plasticky hand-feel.
Neither is "better"—it's a stylistic choice dictated by the paper's instructions and the aesthetic you're after. Trying to peel a cold-peel paper when it's hot will leave half your design behind, and peeling a hot-peel paper cold might lift the whole thing off. Always follow the instructions to get that clean, perfect release.
Solving Common Transfer Printing Problems
Even with the best kit and a flawless design file, things can still go sideways. It happens to all of us. This is your go-to guide for those moments of pure frustration when what’s on the shirt doesn't match the vision in your head.
Before you panic, let's play detective. Most problems with transfer printing boil down to a few usual suspects: dodgy settings, a flawed process, or materials that just don’t get along. We’ll break down the most common headaches and give you clear, actionable fixes to get your production line humming again.
Diagnosing Dull or Faded Colours
You peel back the transfer, full of hope, only to find the vibrant design you printed now looks washed out and lifeless on the fabric. It’s one of the most common and disheartening problems, but thankfully, it’s usually an easy one to sort.
The very first thing to check is your printer settings. If you’ve just hit 'print' using the default 'Plain Paper' setting, the printer simply hasn't put down enough ink. Dive back into the print dialogue and make sure you’ve selected a high-quality option like 'T-Shirt Transfer' or 'Premium Matte Photo Paper'. This tells the printer to really saturate the paper with ink.
Another culprit could be a lack of heat or pressure from your press. The ink needs just the right combination of both to properly bond with the fabric fibres. Try nudging your temperature up by 5-10°C or adding a few extra seconds to your press time. Often, that tiny adjustment is all it takes to make those colours pop.
Why Your Design is Cracking or Peeling
A print that cracks or peels after the first wash is a brand’s worst nightmare. Durability is non-negotiable, and this issue almost always points a finger at poor adhesion during the heat press stage.
The most likely cause? Not enough pressure. Your heat press has to clamp down with firm, even pressure across the entire design to properly melt that adhesive layer into the garment. If your press has an adjustable pressure knob, give it a quarter-turn clockwise to tighten it up and run another test.
An often-overlooked but critical factor is moisture. You absolutely must pre-press your garment for 5-10 seconds before applying the transfer. This step zaps any lingering humidity from the fabric, creating a perfectly dry canvas for the transfer to stick to. Seriously, this one small step can make a world of difference to the washability and lifespan of your prints.
Quality control isn't just a final check; it's a mindset that stops costly mistakes before they happen. In a market where digital methods command a higher price per item, ensuring every single piece is flawless is crucial for your bottom line and your customers' trust.
The UK printing market proves this point perfectly. While the overall value of print has faced its challenges, digital printing remains a powerhouse. Back in 2015, digital methods made up just 2.5% of the print volume but accounted for a massive 14.6% of its total value. That shows customers are willing to pay a premium for top-notch quality.
The Stiff 'Plastic Sticker' Feeling
The mark of a brilliant transfer is that it feels like it’s part of the fabric, not some stiff sticker just sitting on top. If your prints feel overly thick or plasticky, it’s often a sign of too much heat or using the wrong kind of paper for the job.
With standard inkjet transfers, this can happen if the temperature is cranked up too high, causing the polymer layer to cure improperly. Try dialling the temperature back a bit. For DTF prints, this feeling can sometimes be managed by the type of adhesive powder you use—a finer powder generally gives a softer result.
You can also give it a quick second press to help soften the design and push it further into the fabric's weave.
- After peeling the transfer paper, lay the garment back on the press.
- Cover the design with a sheet of parchment or kraft paper.
- Press it again for another 5-10 seconds using the same temperature and pressure.
This quick post-press can dramatically improve the 'hand' (the feel) of the garment, making the design much softer and more flexible. For a deeper dive into the subtleties of the process, our complete guide to heat transfer printing is packed with more tips and techniques. Nailing these little details is what separates good prints from truly great ones.
Got Questions About Transfer Paper? Let's Get Them Answered
As you start your journey with transfer paper, questions are going to pop up. It's totally normal. Getting a handle on the variables from the get-go can save you a mountain of wasted paper, ink, and time. Let's run through some of the most common questions I hear from printers, both new and experienced.
Think of this as your go-to cheat sheet for navigating the process and sidestepping those frustrating rookie mistakes.
Light vs Dark Fabric Papers: What's the Real Difference?
One of the first things you'll notice is that transfer papers are sold for either "light" or "dark" garments. This isn't a marketing gimmick; the difference is fundamental to how your final print will look.
Paper for light-coloured fabrics is built on a transparent polymer film. When you press it, the ink bonds with the shirt, and any unprinted areas of the transfer stay clear. This lets the colour of the fabric show through, giving the design a softer, more integrated feel. It’s perfect for that classic, slightly vintage look.
On the other hand, paper for dark fabrics has an opaque, solid white background. This is a must-have because it acts like a primer, creating a bright white base for your design to sit on. Without it, your colours would sink into the dark fabric and look muddy and dull. The trade-off? You have to trim your design perfectly. Any white background you don't cut away will show up on the final garment as a white block.
How Do I Make My Prints Actually Last?
Getting your prints to survive the washing machine comes down to a simple three-part formula: using good materials, nailing the application process, and giving the right care advice. It's a team effort between you and your customer.
- Quality In, Quality Out: It all starts with your supplies. Always invest in high-quality transfer paper and inks made specifically for textiles. Going cheap here is a false economy—you’ll pay for it later with cracked, peeling prints and unhappy customers.
- The Pressing Matters: Follow the instructions for your specific paper to the letter. That means hitting the exact recommended temperature, time, and pressure. And always pre-press the garment for a few seconds to get rid of any moisture. Steam is the enemy of good adhesion.
- Wash Day Wisdom: Give your customers clear aftercare instructions. Tell them to wash the garment inside out, on a cold cycle, and to avoid harsh detergents or bleach. Tumbling dry on a low heat is okay, but hanging it to dry is even better.
Here's a pro tip that makes a huge difference to washability: do a quick "post-press." After you've peeled the transfer backing, cover the design with a sheet of parchment paper and press it again for just 5-10 seconds. This little step helps lock the ink deeper into the fabric's fibres and seriously improves its lifespan.
Can I Just Use My Home Iron Instead of a Heat Press?
Look, while you can technically use a domestic iron for a one-off craft project, it is strongly not recommended for anything you plan to sell or want to last. The reason is simple: an iron fails at the two most important parts of the process—consistent heat and even pressure.
A heat press is engineered to deliver the exact same temperature and pressure across every single centimetre of your design, something that's physically impossible to replicate with a hand-held iron. Trying to use an iron will almost always lead to patchy application, weak adhesion, and prints that are guaranteed to peel, crack, or fade away in no time.
If you're serious about creating reliable, sellable products, a heat press isn't just a nice-to-have, it's an essential piece of kit.
Ready to bring your own vibrant, durable designs to life? Psyque specialises in professional Direct-to-Film printing, perfect for everything from custom streetwear to branded workwear. Explore our collections and printing services at https://psyque.co.uk.